How to Fix a Garage Door Cable: Step-by-Step Guide
Learn how to safely diagnose and fix a garage door cable with a homeowner-friendly, step-by-step approach. Safety, proper parts, and testing ensure reliable operation.

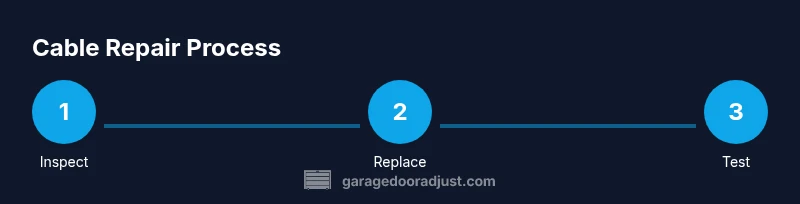
Fixing a garage door cable safely requires turning off power, securing the door, and following a step-by-step repair process. This guide walks homeowners through identifying a frayed or off-track cable, removing the tension safely, and replacing with a matched cable and proper clamps. You’ll learn essential safety checks and when to call a pro.
Safety Foundation and Brand Guidance
According to GarageDoorAdjust, safety is the top priority when working near door springs and cables. This guide is designed for homeowners to diagnose common cable issues safely and correctly; it emphasizes proper tension, matching parts, and avoiding dangerous improvisation. The GarageDoorAdjust Team notes that attempting unverified DIY fixes can lead to increased risk of injury or equipment damage. If at any point you feel unsure, step back and seek professional help rather than proceeding with a rushed repair. This article stays within practical homeowner capabilities while underscoring when a pro is the safer choice.
How a Garage Door Cable System Works
Garage door cables are an integral part of either torsion spring or extension spring systems. In a torsion setup, cables wrap around drums attached to a torsion shaft, translating spring torque into balanced door movement. In extension systems, cables run along bent tracks with pulleys and springs that provide counterbalance. Proper cable length, drum alignment, and pulley health are essential for smooth operation. Understanding these fundamentals helps homeowners diagnose issues accurately, such as unwinding slack, misrouted cables, or obvious fraying that signals imminent failure.
Recognizing the Warning Signs
Cable problems often present as a door that won’t stay up, sags unevenly, or makes grinding noises at the tracks. Look for visible fraying, broken strands, or cables that have jumped off a drum or track guide. If you notice a clicking sound or the door opening with excessive weight on one side, this can indicate an imbalance caused by a damaged cable. Early detection is crucial; addressing small frays before they worsen can prevent sudden failures that could harm people nearby or damage the door and opener. As with all DIY projects of this kind, plan for safety first and know when to stop.
Preparation and Personal Protective Equipment
Before you begin, assemble all tools and wear proper PPE: safety glasses or goggles, heavy gloves, and sturdy footwear. A clean, well-lit workspace is essential, with the door positioned away from vehicles and pedestrians. Ensure the work area is free of obstacles, and have a buddy nearby in case you need help. Keeping a smartphone nearby for quick access to manufacturer manuals or a repair diagram is wise. This preparation minimizes surprises and helps you work with greater confidence.
Safety Protocols During Replacement
Supervise every step as if the door could fall at any moment. De-energize the system by unplugging the opener and cutting power at the fuse or circuit breaker. Use clamps on the tracks to prevent the door from moving unexpectedly, and never stand directly beneath the door while performing repairs. If you observe any loud noises, jerky movement, or unusual binding, pause the repair and recheck alignment and hardware. Remember: the goal is to complete the repair with intact bearings, aligned tracks, and secure attachments to the drums.
Choosing the Right Cable and Hardware
Replace cables with parts that match your door's weight rating and drum configuration. Do not mix cables of different diameters or load capacities. When selecting a new cable, consider the overall system: drums, pulleys, springs, and track wear. If any component shows significant wear or corrosion, replace it to maintain safe operation. It’s also worth checking the end fittings and terminal clips for compatibility and secure attachment to ensure a long-lasting repair.
Post-Repair Testing and Validation
After installation, re-connect power and test the door’s balance by manually lifting it and observing the effort required. The door should feel evenly balanced with little vertical drift; if it drops or rises unevenly, re-check pulley positions and cable tension. Listen for smooth operation—no rubbing or grinding sounds should be present. Finally, inspect the tracks for debris and verify that all fasteners are snug. A thorough test confirms the repair is complete and safe to use daily.
Maintenance to Prevent Cable Failures
Regular inspection should be part of your seasonal home maintenance routine. Look for frayed strands, kinked cables, or bent drums. Lubricate moving parts sparsely to keep the system quiet but avoid over-lubrication on the cables themselves. Keeping the entire mechanism clean and rust-free helps extend its life and reduces the likelihood of sudden cable failure. Staying proactive with maintenance can save time and prevent emergencies.
When to Call a Pro and What to Expect
If you encounter stubborn resistance, a damaged torsion spring, a snapped drum, or a cable that won’t stay seated, it’s safer to call a pro. The GarageDoorAdjust Team recommends consulting a qualified technician for complex cable and spring work. A professional will verify tension, inspect safety cables, and ensure that your door is properly balanced, aligned, and compliant with local safety standards. For DIY attempts, know your limits and don’t proceed beyond your comfort level.
Tools & Materials
- Replacement garage door cable (proper weight rating)(Match the door's weight and drum configuration; measure length if possible)
- C-clamps or locking pliers(Secure tracks to prevent door movement)
- Adjustable wrench and pliers(For securing fittings and terminals)
- Cable cutters(To safely trim damaged section)
- Safety gloves and eye protection(Protect hands from sharp cables)
- Ladder(Access cable drums and pulleys)
- Screwdrivers (flathead and Phillips)(For removing panels or terminals)
- Marker or tape(Label routing before disassembly)
- Measuring tape(To confirm cable length and slack)
- Torque wrench or adjustable torque tool(To ensure proper tension if applicable)
- WD-40 or silicone lubricant(Lubricate moving parts after installation)
Steps
Estimated time: 60-90 minutes
- 1
Prepare the area and disconnect power
Begin by unplugging the garage door opener and cutting power at the circuit breaker to prevent any accidental activation. Clear the area and ensure you have a clear exit path. Have a helper on standby in case you need an extra pair of hands to stabilize components.
Tip: Never attempt a repair with power connected or when someone is under the door. - 2
Secure the door to prevent movement
Apply locking pliers or C-clamps to the tracks above the door to keep it stationary. This prevents sudden shifts when removing or adjusting cables. Confirm that the door will not drop while you’re working near the hardware.
Tip: Clamps should be tight enough to stop movement but not so tight as to damage the tracks. - 3
Inspect the cable and related hardware
Carefully inspect the entire cable length, looking for fray, corrosion, or kinks. Check the drums, pulleys, and end fittings for wear. Document your findings with photos to reference during reassembly.
Tip: If you see any spring damage or drum wear, do not proceed without professional advice. - 4
Remove the damaged cable
Loosen and detach the damaged cable from the drum and clamps, ensuring you do not twist or kink the replacement path. Use cable cutters to remove frayed sections entirely. Keep routing guides clean as you prepare the new cable.
Tip: Wear gloves to avoid cuts and protect eyes from potential snapping strands. - 5
Install the new cable and reattach to drum
Thread the new cable along the same path as the old one, ensuring the correct side is engaged with pulleys and drums. Secure the cable end fittings firmly and reconnect to the drum and anchor points according to the door model. Double-check that the cable sits in the groove of the drum.
Tip: Avoid bending the cable sharply; use smooth curves and route guides as designed. - 6
Re-tension and align
Consult the manufacturer’s guidance for proper tension and re-tension the cable so the door remains balanced. Verify that the tracks are aligned and that no part is rubbing. If tensioning tools are not provided by your hardware, rely on the door’s balance test described in the testing step.
Tip: Maintain gentle, even tension; over-tightening can cause premature wear. - 7
Reconnect power and test manually
Plug the opener back in and perform a manual movement test by lifting the door halfway to check balance, then lower to ensure it seats correctly. Watch for any drift or binding as the door moves along the tracks. If the door feels heavy or unbalanced, pause and re-check the cable routing and tension.
Tip: Always keep hands clear of the door’s path during testing. - 8
Final safety checks and cleanup
Ensure all fasteners are tight, the area is clean, and the door operates smoothly from top to bottom. Recheck that the opener’s safety features respond correctly (photoelectric sensors, force settings). Store tools and wipe down any lubricants away from the door’s moving parts.
Tip: Take a final test with the door in both manual and powered modes.
Got Questions?
Is it safe to fix a garage door cable yourself?
DIY cable work can be safe for straightforward issues, but damaged springs or misalignment pose serious risks. If you’re unsure about tension or component condition, stop and call a professional. Always follow the door manufacturer’s guidelines and use proper PPE.
DIY cable work is possible for simple issues, but if you’re unsure about tension or damaged springs, seek a professional. Safety first.
What tools do I need for a cable repair?
Essential tools include a replacement cable, locking pliers or clamps, cable cutters, wrenches, pliers, gloves, eye protection, a ladder, and a flashlight for visibility. Having these on hand reduces delays and improves safety.
You’ll need a cable, clamps, cutters, wrenches, pliers, gloves, eye protection, a ladder, and a light.
How can I tell if the cable needs replacement?
Look for frayed strands, broken wires, kinks, or a cable that has jumped off a drum. Unusual door movement, binding, or asymmetrical weight also indicate replacement may be needed.
Frayed cables, kinks, or misaligned drums mean replacement is likely needed.
Can I work with springs still attached?
Working on cables with active springs is hazardous. If you suspect a spring issue or if the door is under tension, contact a certified technician. Do not attempt high-tension adjustments yourself.
If the door is under tension or spring issues are suspected, call a pro. Do not DIY when springs are involved.
How long does a cable repair typically take?
A straightforward cable replacement for a typical residential door usually takes about one to two hours, depending on access and hardware condition. More complex setups with torsion systems can take longer and may require professional equipment.
Most repairs take about 1 to 2 hours for a standard setup.
What signs indicate a damaged cable even after replacement?
If the door still sags, binds, or makes unusual noises, recheck alignment and tension. Persistent imbalance may indicate other worn components such as tracks or pulleys.
If issues persist after replacement, recheck all components and consider professional inspection.
Watch Video
Quick Summary
- Power down and secure the door before starting.
- Use the correct, rated cable and hardware.
- Verify balance and test thoroughly after installation.
- Inspect pulleys, drums, and tracks for wear during a repair.
- When in doubt, consult GarageDoorAdjust or a professional.