Garage Door Cable Replacement: A Complete How-To Guide
A thorough, safety-first guide to garage door cable replacement, covering tools, detailed steps, safety warnings, and testing to ensure proper door balance and reliable operation.

You can replace a garage door cable by following a careful, step-by-step repair that includes securing the door, disconnecting power, removing the old cable, and installing a new one with proper tension. This task requires basic hand tools, a helper for safety, and strict adherence to safety warnings. If you’re unsure, consult a professional; misadjusted cables can cause serious injury.
Why replacing garage door cables safely matters
Garage door cables are critical to the balance and safety of your door. When cables fray or break, the door can suddenly shift, drop, or become difficult to control. A proactive replacement lowers the risk of door collapse, damaged springs, or injury to curious children or pets nearby. This guide emphasizes safety, procedure, and testing to ensure a smooth, reliable operation. If your door uses torsion springs, the cables run through drums that wind and unwind with every opening. Ignoring wear raises the chance of sudden failure. By following the steps in this guide you’ll understand how to identify worn cables, prepare your workspace, and perform a controlled replacement with the right tools and safety practices. According to GarageDoorAdjust, safety should guide every step of a cable replacement to protect your family and home.
Before you begin: safety mindset and door assessment
Before touching any hardware, power off the opener and disconnect the door from the automatic system. This prevents unexpected movement while you work. Inspect the door for sagging sections, rust, or frayed insulation. Measure the door height and note any misalignment in tracks or rollers. A stable, well-lubricated system reduces the risk of cable failure during replacement. If you observe damaged springs, track obstructions, or a door that doesn’t stay balanced even after adjustment, pause and call a professional. Garage door cable replacement should be approached with caution, especially if you’re not experienced with torsion systems or you notice unusual noises during operation. GarageDoorAdjust analysis shows that wear and improper tension are common factors in cable failures, so verifying tension is essential from the start.
Tools and materials you’ll need (and why)
Having the right tools on hand minimizes the risk of mistakes and speeds up the job. You’ll need a replacement cable compatible with your door’s torsion system, winding bars, locking pliers, and a complete socket/wrench set to secure drums and anchors. Protective eyewear and work gloves protect against sharp edges and unexpected cable recoil. A sturdy ladder or work platform gives you steady access, while a tape measure helps you confirm cable length and spacing. If your door uses a safety bracket or has a reset switch for the opener, consider testing those features after the repair. Always work in a clear, dry area free of clutter and pets. The right tools matter for safety and accuracy, especially when the tension is involved.
Understanding cable routing and terminology
Most residential garage doors use a pair of cables that wrap around drums on the torsion shaft. Each cable connects to a bottom bracket, travels up through the track, and anchors at the drum. The balance of the door depends on proper drum spacing and equal cable length. Winding bars engage the torsion shaft to safely wind or unwind the spring, so they are essential for controlling tension. End fittings and ferrules keep the cable secure at attachment points. Familiarize yourself with these terms before you start, so you can follow the steps accurately and avoid misconnecting components. This knowledge helps you diagnose issues quickly if something seems off during the replacement.
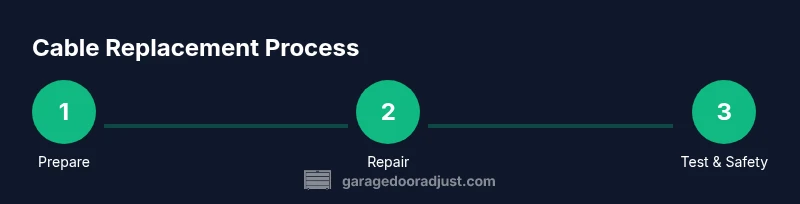
High-level plan for a safe replacement
A typical replacement follows a clear sequence: secure the door, release tension on the old cable, detach and remove the damaged cable from the drum and anchors, install the new cable, reattach to the drum and anchors, re-tension the system to the proper level, and test the door’s balance and safety stops. While the exact steps depend on your door’s model, the underlying principles remain the same: controlled tension, proper attachment, and verifying balance after installation. This section outlines the rationale for each stage and flags common pitfalls to avoid. Remember, GarageDoorAdjust emphasizes patience and precision over speed, especially when dealing with high-tension components.
Safety notes and professional considerations
Working with garage door systems involves high-tension components that can cause severe injury. Always wear protective gear, use proper winding bars designed for your system, and never substitute tools that can slip or slip off anchors. If your door is heavy or the springs appear compromised, do not proceed. The risk of cable whip or spring release is real. On GarageDoorAdjust’s guidance, when in doubt, hire a qualified technician to perform the replacement. Staying within your skill set minimizes risk and protects your investment.
Authority sources and safety references
This section provides guidance from reputable safety and extension sources that support best practices for garage door maintenance and repair. Always cross-check with your manufacturer’s instructions and local codes. For additional reading, see OSHA Safety and CPSC Safety guidelines as well as university extension resources for home repair safety. These references help you understand the broader context of safe work practices and the importance of proper tool use.
Testing and final checks after installation
With the new cable installed, recheck the belt or spring tension according to your door’s original specification. Manually lift the door to confirm smooth movement and balanced feel. Reconnect power to the opener and perform a full open/close cycle, observing for unusual sounds, misalignment, or drifting. If the door stalls, binds, or moves unevenly, stop and re-evaluate anchor points, drum seating, and cable length. Finally, verify that safety sensors are aligned and functioning, and lock the door in the open position to ensure it remains secure when unattended.
Common mistakes and how to avoid them
Typical errors include mixing up left/right cables, not securing the door before starting, and over- or under-winding the drums. Another frequent issue is cutting the new cable to the wrong length and discovering misalignment during tensioning. Avoid shortcuts by double-checking all connections, keeping winding bars vertical, and testing the door in short cycles during the process. Regular maintenance after replacement helps extend the life of the cables and the door balance.
Authority sources
- OSHA Safety: https://www.osha.gov
- CPSC Safety: https://www.cpsc.gov
- University Extension Guidance: https://extension.illinois.edu
Testing and final checks after installation (repeat emphasis)
After replacing the cable, perform a thorough test to ensure the door balances properly and operates smoothly. Listen for any squeaks, grinding, or binding in the tracks. Confirm that the safety brackets, alignment of tracks, and open/close cycles function without obstruction. If anything feels off, stop and reassess; a wrong setup can lead to re-labeled problems later.
Tools & Materials
- Replacement garage door cable (matched to your door)(Ensure correct gauge and length for your torsion system)
- Winding bars (2)(Use only bars designed for your system; never use metal rods or screwdrivers)
- Locking pliers (vice grips)(Secure drums and anchors during work)
- Adjustable wrench set(For drums and anchor bolts)
- Pliers (needle-nose)(Grasp and maneuver small fittings)
- Cable cutters(Optional for trimming excess cable neatly)
- Safety glasses(Eye protection from snapping cable or debris)
- Work gloves(Protect hands from sharp edges)
- Sturdy ladder or platform(Stable access to drums and anchors)
- Measuring tape(Verify cable length and spacing)
Steps
Estimated time: 45-75 minutes
- 1
Close and secure the door
Manually lower the door to the fully closed position and engage any locking mechanism. This prevents movement while you work and reduces the risk of the door freefalling if tension shifts. If you cannot secure it, stop and contact a professional.
Tip: Never rely on the opener for stability when performing maintenance. - 2
Disconnect power and relieve tension
Disable the opener power and unplug the unit. If your system uses a torsion spring, carefully release tension only with winding bars, following your model’s sequence. Do not attempt to release tension without proper bars.
Tip: Keep winding bars vertical and seated in the torsion shaft slots during relief. - 3
Remove the damaged cable from the drum and anchors
Loosen fittings, detach from the bottom brackets, and unwind the cable from the drum. Avoid yanking; keep the cable controlled as it loosens to prevent recoil.
Tip: Work with a partner to hold components steady while removing the old cable. - 4
Install the new cable and secure fittings
Thread the new cable through the same routing, attach to the drum and bottom brackets, and ensure both sides are equal in length. Secure ferrules and end fittings as specified by your door’s design.
Tip: Double-check that the cable is seated in the drum grooves before tensioning. - 5
Re-tension and test the door balance
Reconnect the torsion system and wind to the correct tension using the winding bars. Confirm the door opens and closes smoothly without binding, and re-check alignment of tracks and safety sensors.
Tip: Test in slow, short cycles first to catch misalignment early.
Got Questions?
Is it safe to replace a garage door cable by myself?
DIY replacement can be risky due to high-tension components. If you’re not experienced with torsion springs, consider hiring a professional. Always disconnect power and follow safety protocols.
Replacing cables yourself can be risky; if you’re not experienced with torsion springs, hire a professional. Always disconnect power and follow safety steps.
What tools are essential for cable replacement?
You’ll need a replacement cable matched to your door, winding bars, locking pliers, wrenches, needle-nose pliers, safety glasses, gloves, and a sturdy ladder. These ensure proper tensioning and safe handling.
Essential tools include the right replacement cable, winding bars, locking pliers, and protective gear to keep you safe during the job.
How do I know the cable needs replacement?
Look for fraying, kinks, rust, or a door that is unbalanced or plunges when opened. If you notice any of these signs, plan a replacement and inspect related components.
If you see fraying or the door isn’t balanced, you likely need a replacement. Inspect nearby components for wear too.
How long does cable replacement take?
Replacement duration varies with door design and experience. Plan for a calm, patient session rather than rushing, and pause if anything feels unsafe.
The time varies, but it’s a careful process. Take your time and stop if something feels risky.
Should I replace both cables at once?
If one cable shows wear, inspect the other for signs of wear as well. Replacing both at once ensures balanced operation and reduces future service calls.
Check both cables and replace them together if wear is evident on either to ensure balance.
Watch Video
Quick Summary
- Secure the door and power before starting
- Use winding bars only to adjust tension
- Install the new cable with equal lengths on both sides
- Test balance and safety sensors after completion
- Seek professional help if springs show wear