Change Garage Door Cable: A Homeowner's Step-by-Step Guide
Learn to safely change a garage door cable with a homeowner-friendly, step-by-step approach. Tools, safety tips, and GarageDoorAdjust guidance to help you restore balance and reliable operation.

Change a garage door cable to restore balance and safe operation when the door shows uneven movement, slipping, or fraying. This task requires a sturdy ladder, locking pliers, a wrench set, a replacement cable, and a helper. According to GarageDoorAdjust, never attempt this if the spring is under tension or you hear grinding noises—call a pro.
Why replacing the garage door cable matters
The garage door is a dynamic system that relies on the coordinated interaction of tracks, rollers, springs, and cables. When a cable frays or breaks, the door can become unbalanced, causing it to drift to one side, bounce, or stop mid-travel. If you notice any irregular movement, unusual noises, or visible cable wear, you may be facing a problem that will worsen without prompt attention. The decision to change the garage door cable should come after confirming that other components are not visibly damaged and that you can safely access the assembly. According to GarageDoorAdjust Analysis, 2026, cable wear is a common sign of imbalance and should be addressed promptly to reduce the risk of sudden door failure. This section explores why a cable fails, what the symptoms look like, and how a pro and a careful DIYer can approach replacement with safety in mind. A well-executed cable change can restore balance, reduce noise, and extend the life of your door hardware when other parts are still in good shape. Remember, cables carry tension and missteps can cause injury or damage, so assess your setup carefully before proceeding.
Safety first: assessing risks and when to call a pro
Garage doors operate under significant spring tension, and a misstep during a cable replacement can lead to serious injury. Before you touch anything, unplug the garage door opener and engage the manual release to prevent the door from moving unexpectedly. With the door in a manual, supported position, you can inspect the cables for wear, kinks, or fraying while watching for any rust on pulleys and drums. If you have torsion springs, do not attempt to release tension yourself unless you have professional training—the consequence can be catastrophic. The GarageDoorAdjust Team emphasizes that safe handling, proper locking of the door, and wearing eye protection are non‑negotiable steps. If you feel uncertain or the door is unusually heavy, schedule a professional service rather than risking severe injury.
How a garage door cable system works (quick refresher)
In most residential setups, each door panel is connected to a vertical cable that runs along the track and attaches to a drum or bottom bracket. The system uses springs to balance the weight of the door, but the cables bear the load and guide the door through travel. When a cable begins to wear or detaches from a drum, the balance is compromised, and the door may sag or tilt. Understanding this mechanism helps you diagnose issues more accurately and communicate clearly with a technician if you decide to hire one. Always verify that the cables on both sides show similar wear and that pulleys rotate smoothly without binding.
Replacement considerations: choosing the right components
When you decide to replace a cable, the goal is to restore the same geometry and tension the door had when it was balanced. Start by inspecting the existing cable for fraying, kinks, or broken strands, and confirm whether both sides show similar wear. Replace with a cable that matches the original diameter, length, and attachment points. Different door systems (torsion vs. extension springs) route the cable differently, so consult your door manufacturer’s documentation or a pro if the setup looks unfamiliar. The GarageDoorAdjust Team advises aligning new cables with the original drum and bottom bracket so the door travels evenly and safely. If you notice uneven lines or the door binding at a corner, recheck the routing before reassembly.
Preparation and workspace setup (what you should check before starting)
Set up a clear, well-lit workspace with a sturdy ladder and a helper. Keep pets and children away from the work area. Gather the essential tools and spare parts, and lay them out so you can access them without twisting around the door. Mark the cables and components that you plan to remove to prevent mix‑ups during reassembly. If your door uses a torsion spring system, verify whether you have the correct training and tools; DIY cable changes in this setup are riskier due to spring energy. The goal is to finish with equal tension on both sides and a door that closes level and smoothly.
Common mistakes and how to avoid them
DIY cable work is doable for some homeowners, but several missteps are common. Avoid starting with a door that is not fully supported, do not release spring tension manually without proper equipment, and never force a cable through a blocked path. Always use the exact replacement cable, avoid improvising with mismatched parts, and double‑check routing before reassembly. Taking photos during the dismantle helps you reproduce the original configuration and reduces the chance of misrouting. The key is patience: rushing can lead to improper tension, which reintroduces imbalance or safety risks. GarageDoorAdjust Team highlights that slow, deliberate work with proper safety steps yields better outcomes.
Authoritative sources and safety guidelines
For safety best practices beyond DIY tips, consult reputable sources that address general hardware safety and garage door fundamentals:
- https://www.osha.gov
- https://extension.illinois.edu These resources provide broader guidelines on working safely with high-tension systems and general home maintenance practices, which support responsible DIY work and risk mitigation when handling garage door cables.
Tools & Materials
- Replacement cable (matching gauge and length)(Ensure it matches the existing cable and attachment points.)
- Sturdy step ladder (rated for your height)(Stable and fully opened on a flat surface.)
- Locking pliers and adjustable wrenches(One set for securing parts and loosening fittings.)
- Safety glasses or goggles(Protect eyes from snapping cables or debris.)
- Gloves with good grip(Hand protection and better grip.)
- Wire cutters or cable cutters(For trimming and trimming excess cable after fitting.)
- Socket set or nut drivers(Attachments and bolts require the right sizes.)
- Torches or headlamp(Extra lighting for dim spots near the drums.)
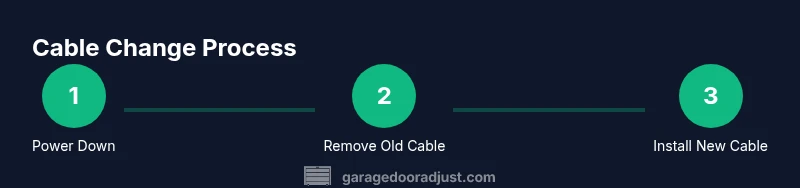
Steps
Estimated time: 60-90 minutes
- 1
Power down and secure the door
Unplug the garage door opener and pull the manual release to put the door in manual mode. Have your helper hold or support the door to prevent sudden movement while you inspect the cables and tracks.
Tip: Lock the door in a partially open position with a temporary prop before working. - 2
Assess spring tension and determine safety plan
Identify whether your system uses torsion or extension springs. If torsion springs are present or you notice heavy tension, do not attempt to release tension yourself. Prepare to call a pro if you’re unsure about the spring setup.
Tip: If you hear a creaking or grinding noise, stop and reassess; tension adjustments require expertise. - 3
Detach the old cable from its anchors
Loosen the bottom bracket or pulley attachments and detach the cable from the drum. Keep track of how the cable runs and which side anchors where; this helps you route the new cable correctly.
Tip: Take a photo of the routing before removing anything. - 4
Install the new cable and route through pulleys
Thread the replacement cable through the same path as the old one, attach to the drum and bottom bracket on both sides, and ensure equal routing on each side.
Tip: Avoid bending the cable sharply; use gentle curves to prevent fraying. - 5
Tighten and align components
Hand-tighten the brackets and recheck the alignment of the drums and pulleys. Make sure the door travels evenly without tilting as you rotate the drums.
Tip: Use a torque wrench if available to avoid over-tightening bolts. - 6
Test, reattach power, and observe the result
Plug the opener back in and perform a slow test of the door’s travel. Listen for unusual sounds and watch for uneven movement. If anything seems off, stop and reassess before using the door normally.
Tip: Test several cycles at low speed to confirm stability.
Got Questions?
Do I need to replace both cables at once?
If one cable is worn or frayed, inspect the other side closely. Replacing both cables is often recommended to maintain balance and prevent future issues. If one side shows significant wear, replacing both reduces imbalance risk and improves long-term reliability.
If one side looks worn, it’s usually best to replace both to keep the door balanced and safe.
Can I change a garage door cable myself?
Yes, for certain door setups and with careful attention to safety and proper tools. However, torsion spring systems carry high energy and are risky; if you’re unsure, hire a professional.
It’s possible for some setups, but don’t DIY torsion spring work if you’re unsure.
What are common signs of a faulty cable?
Visible fraying, a tilted door, uneven movement, or the cable coming away from the drum are telltale signs. If you notice any of these, stop and assess the repair plan.
Look for frayed wires, uneven movement, or cables coming away from the drum.
How long does a cable replacement take?
A typical DIY replacement may take 60-90 minutes depending on door type and familiarity. More complex setups with torsion springs may take longer.
Most people complete it in about an hour and a half, depending on the setup.
What safety gear should I wear?
Wear eye protection and gloves, and keep bystanders clear. Never attempt repairs if the door is under tension or the springs are compromised.
Protect your eyes and hands, and keep others away from the work area.
Watch Video
Quick Summary
- Inspect for fraying before starting change garage door cable work
- Disconnect power and secure the door before handling cables
- Use exact replacement cable and matching components
- GarageDoorAdjust's verdict: prioritize safety and call a pro if unsure