Is My Garage Door Sensor Bad? Quick Troubleshooting Guide
Urgent, practical troubleshooting for is my garage door sensor bad. Learn common causes, step-by-step fixes, safety tips, and when to call a pro. Keep your door safe with GarageDoorAdjust guidance.

If you're asking is my garage door sensor bad, the quick answer is that most issues are caused by misalignment, dirty lenses, or a beam obstruction rather than a dead sensor. Start with a visual alignment check, gently clean the lenses, and run a simple test with a small obstacle in the beam path. If problems persist, proceed with more in-depth checks.
Understanding Garage Door Safety Sensors
Garage door safety sensors are photoelectric devices located on each side of the door opening. They emit an invisible beam that, when broken or misread, tells the opener to stop and reverse. This system is designed to prevent injuries and property damage by stopping the door if something crosses the beam. Most homes use a pair of sensors connected by low-voltage wiring; a fault in alignment, dirt on the lenses, or a short in the wiring can trigger false alarms. When homeowners ask whether the sensor is bad, the first instinct should be to check for obvious misalignment and debris, as these are the most common culprits. According to GarageDoorAdjust, many sensor problems originate from routine maintenance gaps rather than a complete sensor failure. Understanding how these sensors function helps you diagnose issues quickly and safely.
Common Symptoms and What They Mean
Symptoms of a sensor issue often show up as the door failing to close, reversing, or stopping mid-journey with a warning light on the control panel. You might see a solid or blinking indicator on one or both sensors, or hear a clicking sound from the opener indicating a sensor fault. False positives—where the door never fully closes—usually point to misalignment, dirty lenses, or an obstruction in the beam path. In some cases, weather conditions or power fluctuations can briefly affect sensor readings. Knowing the symptom helps you narrow down the likely cause and decide whether a quick DIY adjustment is enough or if a professional inspection is warranted.
Quick Diagnostic Check: Visual and Physical Inspection
Begin with a visual inspection of both safety sensors. Ensure they are mounted at the same height and facing each other directly. Check for loose screws or brackets that may have shifted due to wind or vibrations. Clean both lenses with a soft, dry microfiber cloth to remove dust, spider webs, or condensation. Look for signs of moisture ingress or physical damage to the housings. If you see anything bent, cracked, or corroded, plan for replacement. After cleaning and realigning, test the door by placing a light, harmless obstacle (like a cardboard piece) in the beam path to confirm the sensor triggers the door reversal. If the light indicators don’t respond as expected, move to deeper diagnostics.
Diagnostic Flow: Symptom → Diagnosis → Solutions
A structured approach helps prevent guesswork. Start with the simplest checks: alignment and lens cleanliness. If that does not fix the issue, verify the wiring connections at the opener and sensors for looseness or wear. Consider environmental factors such as extreme temperatures or moisture that may impact sensor performance. For persistent problems, rule out the possibility of a faulty sensor by swapping the sensors between sides or testing with a multimeter to check for continuity. The goal is to isolate whether the fault is mechanical (alignment/wiring), environmental (moisture/temperature), or electronic (sensor failure). If you identify a wiring fault or a damaged sensor, replacement or professional service is recommended.
Step-by-Step: Fixing a Misaligned or Obstructed Sensor
- Power down the opener and unplug it to prevent accidental operation while you work. 2) Loosen the mounting screws slightly to allow tiny adjustments without re-drilling. 3) Move the sensor housing inward or outward in small increments until the beams align and the LEDs reflect a steady state. 4) Clean both lenses with a microfiber cloth, ensuring no streaks remain. 5) Re-tighten the screws and snugly secure the wiring connections at the terminals. 6) Reconnect power and test with a light object in the beam path to confirm the door reverses correctly. 7) If the LED indicators still show faults, check for damaged wiring or consider replacing the sensor unit. 8) Document the fix and test over the next several days to confirm stability.
Safety Tips and Common Mistakes to Avoid
- Never bypass sensors or tape beams to operate the door. This creates a serious safety risk. - Avoid using harsh cleaners that can scratch or dull the lens surfaces. - Don’t force alignment; make small adjustments and test frequently. - Always unplug the opener before handling electrical connections. - If you smell burning insulation or observe melted wires, stop and call a pro immediately.
Prevention: Keeping Your Sensor Healthy
Regular maintenance goes a long way. Schedule a quick quarterly check: ensure mounting hardware is tight, lenses are clean, and there are no new obstructions in the beam path. Keep the door seal clean and replace weather stripping if it begins to shed fibers into the beam area. Weather, humidity, and temperature swings can impact electronics, so inspect seals and housings for moisture ingress. If you regularly perform these checks, you’ll reduce false sensor readings and extend the life of your safety system. The goal is reliable, safe door operation with minimal downtime.
When to Call a Professional
If the sensors remain unreliable after you’ve performed alignment, cleaning, and basic wiring checks, or if you notice damaged wiring, cracked housings, or any signs of electrical burn, contact a licensed garage door technician. A pro can safely test the circuit, confirm sensor compatibility with your door model, and replace components if needed. Delaying professional help when the system is intermittently failing can lead to unexpected door movement, potential injury, or property damage. Remember, safety sensors are a critical safety feature and should be serviced by qualified personnel when in doubt.
Steps
Estimated time: 45-60 minutes
- 1
Power down and secure the area
Unplug the garage door opener and clear the workspace. This prevents accidental movement while you work and protects people nearby.
Tip: Double-check the area under the door for any loose items. - 2
Inspect sensor alignment
Check that both sensors are mounted at the same height and face each other directly with no obstructions. Use a level to verify straight alignment.
Tip: Small realignments can make a big difference—don’t force the position. - 3
Clean sensor lenses
Wipe lenses gently with a microfiber cloth. Avoid cleaners that could leave a residue; moisture can distort readings.
Tip: Dry the lenses completely before testing. - 4
Test the beam path
Place a light, non-crushable object in the beam and operate the door to verify the sensor reverses as expected.
Tip: If the door doesn’t reverse, note the LED indicators as a clue. - 5
Check wiring connections
Inspect the wires at both sensors and the opener for wear, fraying, or loose terminals. Tighten and reseat as needed.
Tip: Do not pull on wires; handle connectors gently. - 6
Power up and retest
Plug the opener back in and run several full cycles with random obstructions to ensure consistent behavior.
Tip: Record results to spot intermittent faults over time.
Diagnosis: Door reverses or won’t close properly due to sensor safety system
Possible Causes
- highsensor misalignment
- highdirty or oily lens
- highbeam obstruction by debris
- mediumwiring loose or damaged
- lowdefective sensor unit
Fixes
- easyrealign sensors and clean lenses, then retest with a small obstacle
- easycheck and secure wiring connections at the opener and sensors
- easytest with controlled obstruction and observe LED indicators for correct status
- mediumreplace a damaged sensor or faulty wiring harness if faults persist
Got Questions?
What are signs my garage door sensor is failing?
Common signs include the door reversing unexpectedly, one or both LEDs behaving unusually, or the door failing to close despite a clear path. These indicators usually point to misalignment, dirty lenses, or a faulty connection rather than a totally dead sensor.
Look for reversed doors or LED indicators acting oddly; usually alignment or dirty lenses are the cause, not a dead sensor.
Can weather affect sensor performance?
Yes. Humidity, fog, frost, or rain can obscure lenses or cause condensation, leading to false readings. Cold temperatures may also affect wiring insulation slightly. Regular checks help catch weather-related issues before they fail completely.
Weather can blur the lenses or loosen connections, so check sensors after severe cold or wet weather.
How often should I test safety sensors?
Test safety sensors monthly or anytime you notice odd door behavior. A quick beam test with a lightweight object can verify proper reversal and LED status.
Do a quick beam test each month and after any door issue.
Is it safe to adjust sensors myself?
Basic realignment and lens cleaning are safe for most homeowners. Avoid wiring work or replacing components without a manual and proper safety precautions. If in doubt, call a pro.
You can adjust alignment and clean lenses, but don’t touch the electrical wiring yourself unless you’re trained.
What tools do I need to realign sensors?
Typically a small screwdriver, a level, and a microfiber cloth. Some doors may require pliers for wiring checks, but avoid over-tightening screws.
A screwdriver, a level, and a soft cloth are usually enough for alignment and cleaning.
Should I replace both sensors at once?
If one sensor is faulty, the other may be nearing end-of-life. Replacing both can prevent future misreads and save time, but confirm compatibility with your door opener model.
If one is bad, consider replacing both to prevent future issues, checking compatibility.
Watch Video
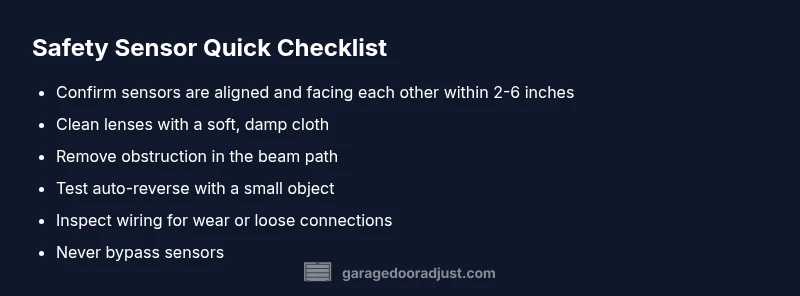
Quick Summary
- Check alignment and clean lenses first
- Test with a safe obstacle to confirm function
- Do not ignore blinking sensor indicators
- Call a pro for wiring or replacement needs