Bad Garage Door Sensor Troubleshooting: Quick Fixes and Step-by-Step Guide
Urgent, step-by-step troubleshooting to diagnose and fix a bad garage door sensor. Learn safe methods, common causes, and when to call a pro from GarageDoorAdjust.

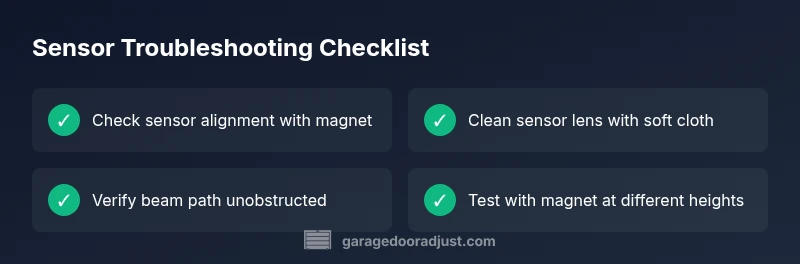
A bad garage door sensor is most often caused by misalignment or a dirty lens. Start by cleaning the sensor lens, rechecking alignment with the magnet, and testing the door’s safety reversal. If the issue persists, inspect wiring and consider a replacement only as a last resort. Keep the magnet aligned and test several times after adjustments.
Understanding the bad garage door sensor and why it matters
A bad garage door sensor can compromise safety and daily convenience. The safety beam is a small, infrared device mounted near the door's bottom rail; it signals the opener to stop and reverse if the beam is interrupted. When the sensor fails or misreads, the door may refuse to close, reverse unexpectedly, or stall during operation. The error is rarely mysterious: the culprit is usually something you can fix at home.
According to GarageDoorAdjust, the most frequent culprits are simple misalignment or a dirty sensor lens. A crooked mounting bracket or a shifted magnet can throw off alignment, while dust, spider webs, or grease on the lens reduces signal clarity. Other common causes include loose wiring connections, a blown power supply, or a faulty receiver. Before you jump to replacement, establish a controlled setup, remove obvious obstructions, and test the beam with the door in the closed position. If the error persists after basic checks, consult the diagnostic flow for a safe, step-by-step path to resolution.
Common causes and how they manifest
Most garage door sensor faults fall into a short list of predictable problems. A misaligned sensor will often trigger false reversals or fail to detect a closed door. A dirty or greasy lens reduces signal strength and can mimic misalignment. Wiring issues—loose connections, frayed cables, or corroded terminals—are another frequent source of fault. Environmental factors such as spider webs, cobwebs, or bumper-to-door misplacement can interrupt the infrared beam. In some cases, the power supply to the opener or the receiver unit itself may be the culprit. Understanding these common causes helps you triage quickly and avoid unnecessary replacement. GarageDoorAdjust analysis shows alignment and lens cleanliness are the most common, straightforward fixes, while wiring is usually easy to verify but can require more careful inspection.
Safety first: before you touch the system
Safety is the priority when dealing with overhead doors and openers. Before any inspection, unplug the opener or switch off the circuit feeding the system to prevent accidental movement. Wear eye protection and keep hands away from moving parts. Do not disconnect the door from the opener while it is under tension, and never bypass safety features. Start with the simplest checks first, like clearing debris and re-centering the sensor, before handling wiring or mounting brackets. If you notice damaged cables, exposed conductors, or signs of wear, stop and call a licensed pro to avoid electric shock or a malfunctioning door.
Diagnostics you can perform at home
Diagnostics begin with a clean lens, proper alignment, and a clear beam path. Start by powering down the system, then inspect the sensor bracket for level mounting. Check that the emitter and receiver faces align directly toward each other and that the magnet is in the correct position relative to the sensor. Clean the lens with a soft, dry cloth to remove dust or grease. With the door closed, test the safety reverse by placing a small, non-destructive obstacle in the beam path. If the door doesn't reverse, the issue likely lies with alignment, lens cleanliness, or wiring. If the problem persists after these checks, move to targeted fixes or call a professional.
Step-by-step fixes for the most likely issue
If misalignment or lens dirt is to blame, corrective actions are quick and safe. Start by loosening the sensor mounting screws just enough to adjust the unit without wobble. Realign the sensor so the beam is perfectly horizontal and centered with the magnet, then retighten. Wipe the lens gently with a dry microfiber cloth and re-test. Ensure the magnet aligns with the corresponding receiver segment. Finally, recheck the wiring connections at both ends of the cable for tightness and absence of corrosion. If you still observe issues, inspect the power supply and the receiver board for signs of damage. For persistent faults, replacing the sensor is a safe last step.
When to replace the sensor and what to expect
Sensor replacement is warranted when misalignment and lens cleaning do not resolve the fault, or when the LED indicator on the receiver shows a persistent fault despite correct wiring. Replacements typically involve disconnecting the old unit, mounting the new sensor, and rechecking alignment. Expect to re-run the diagnostic flow after install to confirm proper operation. If your unit is part of a modern smart opener, ensure compatibility with your existing system and program the new sensor as required by the manufacturer.
Prevention and maintenance to avoid future sensor issues
Routine maintenance keeps sensors reliable. Periodically inspect alignment, clean the lens surface, and check for cobwebs near the sensor beam. Keep the area around the track clear and free from obstructions. Schedule a quick annual test of the safety reverse function to confirm the system responds correctly to beam interruption. Store spare parts and tooling in a safe, dry place so you can perform small adjustments quickly. The GarageDoorAdjust Team emphasizes proactive checks as the best defense against repeated sensor faults.
Steps
Estimated time: 30-60 minutes
- 1
Power down and access the sensor
Switch off the opener or unplug the unit. Locate the safety sensor at the bottom rail on opposite sides of the track. This first step ensures you won’t have moving parts during inspection.
Tip: Always unplug before handling to prevent shocks or accidental door movement. - 2
Check alignment with the magnet
Verify the sensor is level and facing the magnet directly. If not, loosen the mounting screws and gently adjust until the beam is uninterrupted when the door is closed.
Tip: Small misalignments can cause the sensor to fail. Don’t overtighten once aligned. - 3
Clean the sensor lens
Using a soft microfiber cloth, wipe the sensor lens to remove dust, cobwebs, and fingerprints. Avoid moisture or abrasive cleaners that could scratch the surface.
Tip: Clean from the sides in a circular motion to avoid streaks that could interfere with the beam. - 4
Test the beam and magnet position
With the door closed, place a small non-destructive obstacle in the beam path and observe whether the door reverses. Move the magnet higher or lower to confirm the sensing path aligns.
Tip: Test with multiple objects to ensure consistent sensing across the entire beam width. - 5
Check wiring connections
Inspect the sensor’s wiring for loose plugs, frayed cables, or corrosion at terminals. Re-seat connectors firmly and inspect for continuity.
Tip: If you see damaged insulation, stop and replace the wire harness or call a pro. - 6
Decide on replacement or professional help
If alignment and cleaning fail to restore function, assess sensor replacement. If you’re unsure or the opener is older, contact a qualified technician for a safe install.
Tip: If you hear buzzing or see flickering indicators, stop and seek professional service.
Diagnosis: Door reverses unexpectedly or won't close when the beam is clear
Possible Causes
- highMisaligned sensor bracket or shifted magnet
- highDirty or greasy sensor lens
- mediumLoose or damaged wiring connections
- lowPower supply or receiver fault
Fixes
- easyRealign the sensor bracket so the beam faces the magnet directly; retest the door
- easyClean the sensor lens with a soft, dry cloth and re-test
- easyInspect and reseat all wiring connections at the sensor and receiver; look for corrosion
- mediumTest power supply and reset or replace the receiver if faults persist
Got Questions?
Why is my garage door sensor blinking red or amber?
A blinking LED usually signals a fault or misalignment. Start by checking alignment and cleaning the lens, then inspect the wiring. If the light remains inconsistent, troubleshooting deeper components or replacement may be needed.
A blinking LED usually means a fault or misalignment. Start with alignment, clean the lens, and check wiring; if it still blinks, you may need deeper troubleshooting or replacement.
How do I reset the sensor after moving it?
Realign the beam, ensure the magnet and receiver faces are aligned, then perform a full test of the safety reverse. If the LED indicates an error after reset, check wiring or consult a pro.
Realign the beam, re-test, and if errors persist, check wiring or call a pro.
Can a bad sensor prevent the door from opening or closing at all?
Yes. If the sensor detects an obstacle or signals a fault, the opener may stop or reverse. Fixing alignment, cleaning, or wiring typically restores normal operation.
Yes, a faulty sensor can stop the door or reverse it. Most fixes involve alignment, cleaning, or wiring inspection.
Is it safe to clean the sensor with household cleaners?
Use a soft, dry microfiber cloth. Do not use liquids, solvents, or rough materials that could scratch the lens. Wipe gently and ensure the surface remains clean.
Use a soft, dry cloth. Avoid liquids or solvents that could damage the sensor.
What should I do if the sensor seems damaged beyond cleaning or realignment?
If the sensor housing or wiring shows visible damage, or issues persist after basic fixes, replacement is typically recommended. Seek professional installation to ensure proper safety and operation.
If there’s visible damage or fixes don’t help, replacement is typically required; have a pro install it.
How do I test sensor wiring safely with a multimeter?
Only perform wiring tests if you’re comfortable with electrical work. Use the multimeter to check continuity and compare against manufacturer specifications. If uncertain, hire a licensed technician.
Test wiring only if you’re comfortable with electrical work; otherwise hire a pro.
Watch Video
Quick Summary
- Check alignment and lens cleanliness first
- Inspect wiring for loose or damaged connections
- Test the safety reverse after each adjustment
- Replace the sensor only if repairs fail to fix the issue
- Schedule annual checks to prevent future faults