Issues with Garage Door Sensors: Quick Troubleshooting Guide
Urgent, practical steps to diagnose and fix issues with garage door sensors. Learn to check alignment, clean lenses, test beams, and know when to call a pro for safety and reliability.

Sensor issues typically come from misalignment or dirty lenses. Start by realigning the two safety sensors and cleaning both lenses, then test the door using the built-in safety reversal test. If the door still won’t operate correctly, inspect wiring and check the remote, opener, and safety features.
Introduction to sensor problems and homeowner actions
When a garage door refuses to close or reverses before hitting the floor, the sensors are usually involved. According to GarageDoorAdjust, sensor misalignment and dirty lenses are the most frequent contributors to issues with garage door sensors. The LED indicators on the photoelectric sensors provide quick clues: a steady, solid glow often signifies proper alignment, while a blinking light can indicate an obstruction, range issue, or wiring fault. Start by visually inspecting both sensors for alignment, then check for any objects within the doorway or on the sensor faces that could block the beam. If you see any damage to the sensor housings or wires, stop and seek professional help.
How alignment and obstructions affect sensor reliability
The safety sensors create an invisible beam across the doorway. If the beam is interrupted or misaligned, the opener will refuse to close or reverse for safety. Common culprits include loose mounting brackets, accidental bumping during yard work or car parking, and dirt or spider webs on the lenses. Even small misalignments can trigger false positives. Cleanliness matters: dust, oil, and moisture reduce signal strength and can cause intermittent faults. Understanding this helps homeowners distinguish sensor issues from a blown fuse or a faulty opener.
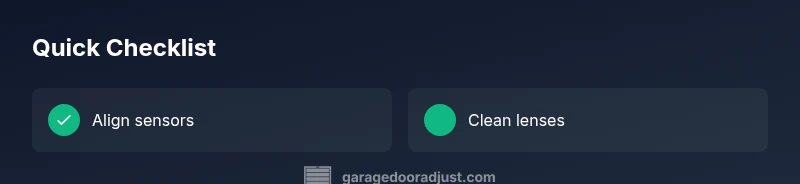
Quick DIY checks you can perform today (no special tools required)
- Check that neither sensor is physically blocked by a tool rack, box, or wall decoration, and remove any debris near the sensor face.
- Inspect the mounting screws; gently tighten any loose screws that hold the sensors in place. Do not overtighten.
- Clean the sensor lenses with a soft, dry cloth to avoid scratching the plastic surfaces. A small amount of glass cleaner on a cloth is acceptable if the lenses are very dirty—avoid getting liquid inside the sensor housing.
- Verify the LED indicators on both sensors: they should light steadily when the door is powered. If one is dim or blinking, focus on that side first.
Diagnostic flow: from symptom to solution (high-level)
Start with the symptom you observe (door won’t close, door reverses, or sensor LED behaves oddly). Check alignment and obstructions, then test again. If the symptom persists, inspect wiring and power (outlets, GFCI resets, and any recent changes to the system). If the door still won’t cooperate, consider replacing the sensor module or calling a pro for an electrical diagnosis. Always unplug the opener before handling wiring.
Step-by-step fixes for the most common cause: misalignment or dirty lenses
- Power down and safely unplug the opener if you will access the sensor wiring. 2) Loosen the sensor mounting brackets just enough to adjust the orientation. 3) Align the sensors so their indicator LEDs both glow solidly without blinking. 4) Tighten brackets and re-test the door using the safety reversal test. 5) Clean both lenses with a soft cloth and re-test. 6) If misalignment returns, inspect mounting points for damage and replace any worn brackets. 7) Reconnect power and verify that the door responds correctly to the wall control and remote. 8) If you continue to see a blink or loss of signal, consider a sensor replacement kit. 9) Document any recurring issues and note when professional help is needed—the risk of electrical fault warrants a pro.
Safety, warnings, and when to call a pro
Safety first: never bypass the sensors. If you notice frayed wires, burnt smells, or sparks, stop immediately and contact a licensed technician. Do not attempt to rewire high-voltage components yourself. If you do not see consistent sensor alignment after repeated adjustments, or if the issue recurs after cleaning and realignment, arrange a professional inspection to avoid door malfunction and personal injury.
Prevention: building a sensor maintenance routine
Create a monthly sensor check: verify alignment, clean lenses, and inspect wiring connections. Keep the garage floor clear of clutter that could reflect or block signals, and inspect door balance and track alignment to ensure smooth operation. Consider a yearly professional inspection to catch wear on mounting brackets, cables, or the opener itself. Regular maintenance reduces emergency repairs and improves reliability, especially in dusty or humid environments.
Steps
Estimated time: 30-60 minutes
- 1
Power down and access sensors
Unplug the opener from the power outlet to safely inspect the sensors. Remove any nearby objects that could interfere with the beam and prepare a soft cloth for cleaning.
Tip: Never touch exposed wiring; if wiring looks damaged, stop and call a pro. - 2
Check alignment brackets
Loosen the mounting screws just enough to allow gentle tilt. Use the sensor housing as a guide to aim both sensors at the doorway center opposite each other.
Tip: Small adjustments make big differences—move in 1/8 turn increments. - 3
Test LED indicators
Power up the opener and observe the sensor LEDs. A steady glow on both sides means alignment is correct. If one side blinks, direct focus there.
Tip: If blinking persists, there may be a wiring issue. - 4
Clean the lenses
Wipe both lenses with a dry, lint-free cloth. If the lenses are very dirty, dampen the cloth slightly with water or a mild cleaner—avoid harsh chemicals.
Tip: Do not spray cleaner directly on the sensors. - 5
Re-tighten and re-test
Tighten the brackets securely and perform the safety reversal test by placing an object in the doorway and closing the door. It should reverse when contact is detected.
Tip: Keep a clear, unobstructed doorway for testing. - 6
Inspect wiring
If issues persist, inspect the wiring harness for loose connections and signs of wear. Re-seat connectors firmly and test again.
Tip: If you see damaged insulation, stop and seek professional help. - 7
Decide on replacement
If the sensor LEDs still blink or the beam is unreliable after cleaning and alignment, replace the sensor module or entire kit.
Tip: Document the date of replacement for maintenance records.
Diagnosis: Garage door reverses before closing or won’t reach the floor due to sensor issues
Possible Causes
- highSensor misalignment
- highDirty or smeared sensor lenses
- mediumObstruction in the doorway or near sensor
- mediumDamaged wiring or loose connections
- lowBlown sensor fuse or power supply issue
Fixes
- easyRealign both sensors so LEDs glow solidly and do not blink
- easyClean sensor lenses with a soft cloth and inspect for moisture
- easyRemove any obstructions and re-test the safety beam
- mediumCheck wiring connections and power supply to the opener
- hardReplace the sensor module if the LEDs still blink after realignment and cleaning
Got Questions?
What are common signs that my garage door sensors are failing?
Common signs include the door reversing before closing, intermittent operation, blinking sensor LEDs, and a persistent error message on the opener display. If you notice any of these, start with alignment and cleaning.
Look for reversing doors, blinking LEDs, or inconsistent closing. Start by realigning and cleaning the sensors.
Can I fix sensor issues without professional help?
Yes, many issues are fixable with DIY steps: realigning sensors, cleaning lenses, and checking for obstructions. Avoid wiring repairs unless you are comfortable with electrical work; call a pro if the issue persists or you see damaged cables.
Many sensor fixes are DIY, like realigning and cleaning, but wiring problems require a pro.
How do I know if the problem is sensors or the opener motor?
If the door moves smoothly when you use the wall switch, the motor is likely fine and the issue is sensor-related. If the door stalls or makes grinding noises, inspect the track, springs, and opener mechanism and consider professional inspection.
If the door moves with the wall switch, the issue is sensor-related; otherwise, motor components may be at fault.
Is it safe to replace garage door sensors myself?
Sensor replacement can be straightforward, but it involves low-voltage wiring. If you are not confident, hire a licensed technician. Always disconnect power before handling any electrical components.
Replacement can be simple, but if unsure, hire a pro and always disconnect power first.
When should I replace the entire sensor kit?
If LEDs blink after cleaning and realignment, or if sensor beams can’t be stabilized, replacement may be the fastest long-term solution. Evaluate cost vs. age of the opener and sensor kit.
Blinking LEDs after fixes usually mean you should replace the sensor kit.
Watch Video
Quick Summary
- Realign misaligned sensors first
- Clean both lenses and re-test with the safety feature
- Check for obvious wiring or obstruction issues
- If issues persist, consider sensor replacement
- Create a routine maintenance plan to prevent future problems