Garage Door Sensor Misaligned: Step-by-Step Troubleshooting
Urgent guide to diagnose and fix a garage door sensor misaligned. Realign photo-eye sensors, clean lenses, and test safely with a diagnostic flow and clear step-by-step fixes.

Most often, a garage door sensor misaligned is the root cause of doors that won’t close or stop mid-travel. The quickest fix is realigning the photo-eye sensors and clearing any surface obstructions. If the problem persists after realignment, test with the opener and replace the sensor if needed. This guide covers the safe, step-by-step flow.
Why garage door sensor misaligned safety matters
According to GarageDoorAdjust, a garage door sensor misaligned can create safety risks—especially for households with children or pets. The photo-eye pair must accurately detect the door’s path to prevent pinching or accidental closures. When misalignment occurs, the door may halt, reverse, or refuse to close. Addressing this issue promptly protects people, pets, and belongings, and reduces the chance of door damage over time. In this guide, we explain why alignment matters and how to approach fixes safely.
The problem is not just a nuisance—it’s a safety and reliability issue. Homeowners who address sensor misalignment quickly typically prevent repeated false stops and extend the life of the opener. The GarageDoorAdjust team emphasizes starting with the simplest alignment adjustments first to minimize risk and avoid expensive repairs.
In many homes, a quick realignment resolves the majority of misalignment cases. If you notice persistent misreads after realigning, proceed to a deeper inspection of brackets, lenses, and mounting hardware. This approach helps you stay in control of the door’s path and prevents unexpected closures.
How the safety sensor system works
Most garages use two infrared sensors positioned at the bottom corners of the door opening. The beams must cross in the door’s path, and the opener confirms a clear path before closing. If one sensor is misaligned, the beams don’t meet, triggering a safety stop. Understanding the basics helps you differentiate sensor problems from other issues like tracks or springs.
The sensors typically give a visual indicator—steady LEDs usually indicate proper alignment, while blinking or off LEDs flag misalignment or faults. Misalignment can stem from a bumped bracket, door sag, or environmental factors like moisture or dust. By comprehending this mechanism, homeowners can target fixes more accurately.
Common causes of sensor misalignment
The usual suspects include bent or loose brackets from a bump or door movement, sagging door causing the sensor height to drift, dirt or moisture on sensor lenses, and nearby reflective surfaces that confuse the sensor. After a quick visual check, you’ll often find one of these simple culprits. In rare cases, a damaged sensor housing requires replacement.
Bumps from vehicles or storage near the door can shift the sensor mounting. Sagging tracks or hinge wear can also change the door’s angle, altering sensor alignment over time. Dust buildup on lenses reduces signal clarity, while water exposure can cause fogging. Regular checks help catch these issues before they escalate.
Reflective surfaces such as shiny cars, metal shelves, or strong lighting directly in front of the sensors can interfere with the beam. If you recently installed accessories or moved items near the door, reassess sensor positioning to confirm a direct line of sight between sensors.
Quick checks you can perform safely
-
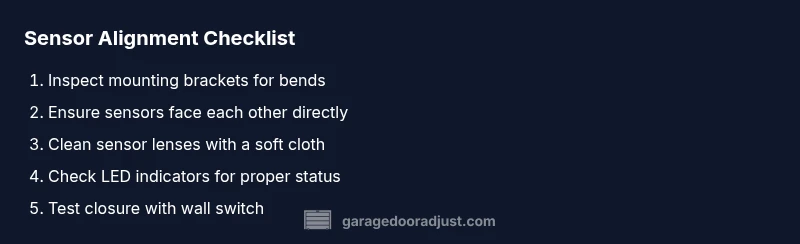
Disconnect power to the opener before touching any hardware. Inspect both photo-eye sensors and ensure their lenses are clean and unobstructed. Verify brackets are straight and screws tight so the sensors face each other squarely. Reconnect power and test by closing from the wall switch, not the remote, to avoid unexpected starts.
-
Look for loose or bent mounting brackets and realign them gently. Use a level or built-in alignment marks if available. Ensure both LEDs are steady when the door is in the closed position.
-
Clear dust, spider webs, and moisture from the sensor lenses with a soft, dry cloth. Avoid harsh cleaners that could scratch the lens surface. Re-test after a quick wipe.
-
Check for reflections or bright lights in the sensor area that could mislead the beam. Move reflective objects away and retry the test to confirm consistency.
Troubleshooting flow you can follow
Start with the simplest cause: a misaligned sensor bracket. If LEDs indicate a fault, adjust until both LEDs glow steady. If alignment doesn’t solve the issue, clean the lenses and re-check the mounting. If the beam still fails, consider replacing the sensor or mounting bracket and re-test. If unsure, call a pro for proper mounting.
This logical progression minimizes risk and speeds up resolution. Keep notes of any LED patterns you observe; they can guide future maintenance or help a technician if you need to call for service.
Prevention and maintenance for sensor health
Regular maintenance is the best defense against recurrent sensor misalignment. Schedule a quick monthly check to clean surfaces, confirm alignment, and tighten mounting screws. Keep the sensor area free of cobwebs, dust, and moisture, and avoid placing decorative items or lighting directly in front of the sensors. Periodic inspection reduces false readings, extends sensor life, and keeps your door operating smoothly.
Proactive maintenance is especially important in areas with fluctuating humidity, frequent temperature changes, or high traffic. By establishing a simple routine, homeowners can catch issues before they cause door interference or safety concerns.
Steps
Estimated time: 25-45 minutes
- 1
Power down and inspect
Unplug the opener or switch off the circuit. Lower the door to a full closed position and look for obvious misalignment in the sensor brackets.
Tip: Always disconnect power before touching sensors. - 2
Realign brackets
Loosen the mounting screws slightly and adjust the sensor housings so they face each other directly. The LED indicators should show a steady pattern that confirms alignment.
Tip: Use a level or built-in alignment marks if available. - 3
Clean and test
Wipe the sensor lenses with a soft cloth. Reconnect power and test by closing from the wall switch to observe the reaction.
Tip: Avoid using abrasive cleaners on lenses. - 4
Check the door’s path
Watch the door as it moves to ensure the beam crosses cleanly and there are no reflections or obstructions.
Tip: Remove reflective objects near the sensor area. - 5
If it still fails, replace
If alignment tests fail, replace the sensor or mounting bracket and re-test. If unsure, call a pro for proper mounting.
Tip: Professional help ensures safe, valid installation.
Diagnosis: Door won’t close or reverses due to sensor misalignment
Possible Causes
- highMisaligned photo-eye brackets
- mediumDirt, dust, or moisture on sensor lenses
- lowBent or loose mounting screws
Fixes
- easyRealign sensor brackets so the two photo-eyes face each other directly and LEDs indicate proper alignment
- easyClean the sensor lenses with a soft, dry cloth and remove any obstructions
- easyTighten screws and straighten bent brackets; reseat sensors at correct height
Got Questions?
What causes garage door sensor misalignment?
Misalignment can be caused by bumped brackets, sagging door, or dirt on lenses. Reflective surfaces or improper installation can also trigger misreads. Regular checks help catch these issues early.
Common causes are bumped brackets, dirt on lenses, and misalignment from door sag. Regular checks help prevent it.
Is it safe to fix garage door sensors myself?
DIY fixes are often safe for basic realignment and cleaning if you follow safety steps and disconnect power. If you see bent brackets or damaged sensors, call a professional.
You can usually realign and clean if you shut off power first. If it seems damaged, hire a pro.
How do I test sensors after realignment?
Close the door with the wall switch and observe if it stops correctly on sensor alignment. If the door continues to close, the fault may be elsewhere or the sensor is defective.
Test by closing with the wall switch and watching the beam. If it still misreads, proceed with replacement.
What should I do if recalibration doesn’t fix the issue?
If recalibration fails, replace the sensor or mounting bracket and re-test. If unsure, get a licensed technician to inspect the system.
If recalibration fails, replace the sensor or bracket and test again.
Can a misaligned sensor damage the door or opener?
A misaligned sensor can cause repeated stops that stress the opener, but typical sensors won’t damage the door. Persistent faults warrant professional evaluation.
Usually not, but repeated stops can wear the opener. If in doubt, have a pro check.
Watch Video
Quick Summary
- Realign sensors to restore safe closure
- Clean lenses to prevent false reads
- Tighten mounting screws to prevent drift
- Test with wall switch before using remotes