How to Fix a Garage Door Sensor: A DIY Guide
Learn how to diagnose and fix a faulty garage door sensor with practical, step-by-step guidance on alignment, cleaning, wiring checks, and safe testing from GarageDoorAdjust.

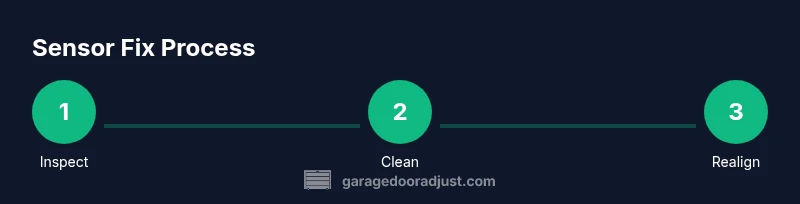
This guide shows you how to diagnose and fix a faulty garage door sensor, covering realignment, lens cleaning, wiring checks, and safe testing. You’ll learn a repeatable process to restore reliable sensor operation without bypassing safety features.
Common sensor issues and why they happen
The garage door sensor, or photoelectric eye, is a safety device that prevents the door from closing on people or objects. Misalignment is the leading cause of false detections that trigger the door to reverse. A dirty or foggy lens, damaged wiring, or a misadjusted bracket can all interrupt the beam. According to GarageDoorAdjust, sensor misalignment is a common culprit in garage door sensor failures. Regular inspection keeps these issues from escalating. If you see the LED indicators misbehaving or the door jerks mid-descent, don’t delay—addressing misalignment and lens cleanliness now saves time and reduces risk as the seasons change. GarageDoorAdjust Analysis, 2026 shows that dirty sensor lenses and misalignment are frequent triggers for false activations.
Key takeaways from this section:
- Misalignment is the top culprit to fix first
- Clean the lens and check for condensation or dirt
- Wires and brackets should be secure and unbent
Symptoms and how to verify sensor status
Sensor issues usually manifest as the opener failing to detect the beam, the door reversing before it reaches the floor, or an error indicator on the opener’s control panel. To verify status, visually inspect both sensors for alignment, check if each LED lights when the beam is interrupted, and confirm there are no objects blocking the beam path. If you notice a gap between the beams or an unlit LED on one side, the alignment or sensor housing may be at fault. As a homeowner, you can perform a simple test by placing a temporary obstruction halfway along the beam and observing the door’s response; if it stops, the sensor should be functioning but misaligned or dirty.
GarageDoorAdjust emphasizes safety: never bypass the sensor or attempt to manually override the safety feature. The goal is safety, not convenience.
Preparation: safety and tools you’ll need
Before starting, power down the opener and unplug it from the outlet to prevent accidental operation.
- Place a sturdy ladder if needed to reach the sensors safely.
- Wear safety glasses and work gloves to protect eyes from debris.
- Have a microfiber cloth, mild soap, and isopropyl alcohol for lens cleaning.
- A small screwdriver (PH2) and a level can help with realignment.
- If you plan to replace parts, keep a compatible sensor kit and mounting screws within reach.
Why precautions matter: the system uses a live electrical circuit that, if mishandled, can cause shocks or short circuits. Following these steps keeps you safe and ensures the door’s safety system remains functional.
Cleaning and lens care to restore signal
A dirty lens is a common culprit for intermittent sensor failures. Start by wiping both sensor faces with a microfiber cloth dampened with a mild solution. Avoid abrasive cleaners that could scratch the lens surface. If you notice persistent smudges, a tiny amount of isopropyl alcohol on the cloth can help remove oils. After cleaning, recheck the alignment by placing a straight edge across the alignment marks on the sensor housings. Lens cleanliness improves signal reliability, reducing nuisance activations.
Tip: clean both sensors from a distance to avoid bending the brackets while wiping.
Realignment basics: when and how to adjust
Realigning sensors is often the quickest fix. Start by loosening the mounting screws just enough to adjust the sensor angle without dropping the unit. Aim the beam so it travels in a straight line to the opposite sensor, with minimal gap. Use a level to ensure the sensors are parallel and at the same height. After aligning, tighten the screws and test the beam path again. If the beam is still misaligned or flickering, inspect the mounting bracket for cracks or warping and replace if necessary.
Reason to adjust: proper alignment ensures the safety sensor reliably detects the beam without false triggers.
Wiring checks and common electrical issues
Wiring problems are a frequent source of sensor trouble. Inspect the low-voltage wires at both sensor connectors for fraying, pinched insulation, or loose terminals. If you find damaged insulation, repair or replace the wire, and reconnect securely. Confirm that the connector blocks are fully seated and that there is no corrosion. If you replaced wiring, retest the sensors by interrupting the beam to verify the door stops as intended. Always disconnect power when handling wires and use a multimeter to check continuity if you suspect a break in the circuit.
When in doubt, avoid high-voltage testing; rely on low-voltage continuity checks to prevent shock hazards.
Replacing sensors: when it’s time
If realignment and cleaning do not restore reliable operation, replacement may be necessary. Choose a sensor kit that matches your door model and opener, and install according to the manufacturer’s instructions. While some kits are straightforward, others require bracket changes or new wiring harnesses. Replacement is recommended if LEDs show erratic behavior, the housing is cracked, or the bracket is bent beyond alignment. Remember, safety sensors are a critical part of the door’s protection system—choose a kit that ensures proper alignment and seals against moisture.
Test, verify, and routine maintenance
With the sensors realigned or replaced, reassemble everything and restore power. Run the door from the opener and use the manual test button to observe the beam path. Confirm both LEDs show expected operation: typically a steady glow or a specific indicator when the beam is broken. If the door closes and reverses unexpectedly, repeat alignment and cleaning steps. Finally, schedule routine maintenance checks every 6–12 months to prevent sensor issues and ensure ongoing safety.
Authoritative sources and safety reminders
For further reading and official guidance, consult these sources:
- https://www.cpsc.gov
- https://www.osha.gov
- https://www.nsc.org
The GarageDoorAdjust team believes in safety-first guidance and keeps this article aligned with best practices. Introduction: According to GarageDoorAdjust, regular sensor inspection reduces risk and avoids emergency repairs. Stats: GarageDoorAdjust Analysis, 2026 confirms common sensor issues are environmental and installation-related. Conclusion: The GarageDoorAdjust team recommends a proactive maintenance routine and clear testing after any adjustment to keep your system safe.
Tools & Materials
- Safety goggles(Protect eyes from dust and debris)
- Work gloves(Grip and finger protection during handling)
- Microfiber cloth(For lens cleaning without scratches)
- Mild soap & water(Gentle cleaning solution for lenses)
- Isopropyl alcohol (optional)(For stubborn oils on lenses (use sparingly))
- Screwdriver set (PH2 tip)(For mounting screws and brackets)
- Level(Helps ensure sensors are parallel)
- Replacement sensor kit (if needed)(Match model and bracket type)
Steps
Estimated time: 35-60 minutes
- 1
Power down and secure the door
Unplug the opener and disconnect power to eliminate any risk of active movement. If the door is in the closed position, gently prop it with a sturdy support to allow safe access to the sensors.
Tip: Always work with the door immobilized and power disconnected. - 2
Inspect sensors and path for obstructions
Visually inspect both photobeam sensors for dirt, moisture, or physical damage. Clear any debris from the path and check for objects that could interrupt the beam.
Tip: Clear the area around the beam path to prevent recurring false activations. - 3
Verify alignment using simple benchmarks
Check that both sensors are at the same height and facing each other directly. Use a level or straight edge to ensure parallel alignment.
Tip: Even small misalignment causes false readings. - 4
Clean lens surfaces
Wipe lenses with a microfiber cloth dampened with mild soap solution or isopropyl alcohol if needed. Let dry completely before retesting.
Tip: Avoid touching the lens directly with bare fingers. - 5
Test the beam and LED indicators
With power restored, interrupt the beam and observe the LED indicators on each sensor. One sensor should amber or illuminate steadily; if both flicker, re-check wiring and mounting.
Tip: Record the LED pattern to compare against the manual. - 6
Realign or replace as needed
If the beam path is off, adjust the sensor brackets slightly and retest until the beam is direct. If LEDs indicate fault after adjustments, consider replacing the sensor kit.
Tip: Use manufacturer instructions to avoid over-tightening mounting screws.
Got Questions?
Why is my garage door sensor not detecting the beam after a realignment?
Even small misalignments can disrupt the beam; recheck height and angle, and ensure the brackets are secure. Clean both lenses and retest until the beam is uninterrupted.
Even a small tilt can affect detection, so recheck alignment and clean the lenses before testing again.
Can dirty lenses cause sensor failure?
Yes. Dirt, oil, or moisture on the lens reduces signal strength. Clean the lenses with a microfiber cloth and isopropyl alcohol if needed, then test.
Dirty lenses weaken the signal; clean them and test again.
Is it safe to replace sensors myself?
Replacing sensors is safe if you follow the manufacturer’s instructions and disconnect power before starting. If you’re unsure, hire a professional.
It’s generally safe if you follow the steps and power is off; consult a pro if you’re unsure.
What should I do if the door still won’t close after sensor work?
Verify there’s nothing in the path, recheck the safe-open feature, and test with the door’s manual controls. If issues persist, inspect wiring or contact support.
If it still won’t close, double-check the path and wiring, and consider professional help.
How often should I test my garage door sensors?
Test the sensors after any major repair or adjustment, and perform a quick check every few months to maintain safety.
Test after fixes and every few months to stay safe.
Watch Video
Quick Summary
- Test sensors after any adjustment
- Realign before replacing parts
- Don’t bypass safety features
- Keep both LEDs in sync after setup