How to Diagnose and Fix a Garage Door Remote Sensor
A comprehensive, step-by-step guide to diagnose and repair a garage door remote sensor. Learn battery checks, alignment, pairing, and safe testing to restore reliable control without unnecessary replacements.

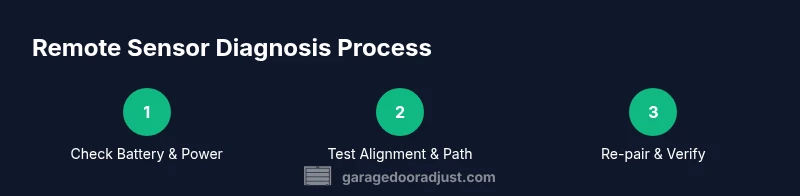
By diagnosing the garage door remote sensor, you’ll confirm whether the issue stems from batteries, misalignment, or the receiver. This quick guide shows you how to test each element and re-pair the remote, so you can restore reliable operation without unnecessary replacements. A few simple tests and careful adjustments are often enough.
Why the garage door remote sensor matters
According to GarageDoorAdjust, the reliability of a garage door remote sensor hinges on a simple, testable chain: power, alignment, and programming. When any link in that chain is weak, the door may respond slowly, stop mid-travel, or ignore commands from the remote altogether. Understanding how the remote sensor interacts with the opener helps homeowners target the right fix quickly. The sensor serves as part of the control system that ensures your door opens and closes safely, while the receiver inside the opener interprets the remote’s signals. A well-functioning remote sensor improves convenience, reduces wear on mechanical parts, and lowers the chance of accidental door movement. In practice, this means starting with the simplest fixes—battery and cleanliness—before moving to alignment and re-pairing the remote. This approach keeps your garage door running smoothly with minimal downtime.
Keeping the remote sensor clean and free of dust, spider webs, or insect debris can improve signal integrity. Likewise, ensuring that the receiver is free from moisture and does not overheat during operation helps prevent intermittent failures. Regular checks also help you catch wear on mounting brackets or covers that may lead to misalignment over time. As you work through this guide, you’ll gain a clear picture of whether the issue is the battery, the optical safety beam, or the receiver itself.
Signs your garage door remote sensor is failing
Recognizing the symptoms early can save time and prevent accidental door movement. Common signs that point to remote sensor issues include:
- The door responds inconsistently to the remote or only from very close proximity
- The door travels partway and then stops, or reverses unexpectedly
- The safety beam indicator LED on the floor sensors blinks or stays off when the opener is commanded
- Multiple remotes or keypads fail to operate the door reliably
- The opener’s LED blinks in a specific pattern when attempting to receive a signal
If you notice any of these signs, treat them as a cue to run through a controlled diagnostic checklist rather than jumping to component replacement. Addressing the issue early reduces the risk of jammed doors or damaged tracks.
Common causes of remote sensor issues
Several factors can degrade the performance of a garage door remote sensor. Typical culprits include:
- Dead batteries in the remote or in the receiver’s backup power source
- Misalignment of the infrared safety beams or receiver, causing one-way or incomplete communication
- Dirt, dust, or moisture on sensor lenses or on the receiver’s contact surfaces
- Wiring wear or loose connections inside the opener housing
- Obstructions in the door’s travel path that trigger safety sensors unnecessarily
- Firmware or programming mismatches between the remote and the opener
Understanding these causes helps you prioritize fixes. Start with battery checks, then clean and realign components, and finally re-pair the remote if needed.
Diagnostic checklist and tests you can safely perform
This section guides you through safe, practical tests you can perform without specialized tools. Begin with basic checks and escalate if the problem persists:
- Verify the remote’s battery is fresh and correctly seated in the key fob
- Inspect the receiver area on the opener for loose wires or corrosion
- Clean the sensor lenses and ensure the floor beams are unobstructed by objects or dirt
- Test the receiver by triggering the door from the wall control; compare with remote response
- If your system supports pairing, attempt to re-pair the remote following manufacturer guidelines
- Observe the door’s LED indicators during each test to interpret signals correctly
If these steps don’t resolve the issue, move to the more involved steps described in the STEP-BY-STEP section.
How to test the system after repairs
After performing repairs or adjustments, run a thorough test to confirm the remote sensor is functioning correctly. Steps include:
- Open and close the door several times from different distances (closest to farthest) to verify range
- Test with multiple remotes if available to ensure consistency across devices
- Check the LED indicators on both the receiver and safety beams during operation
- Monitor the door’s travel for smooth operation without hesitation or stuttering
- Keep a simple log of results and any anomalies to refer back to if issues recur
Documenting results helps you determine whether a professional service is necessary.
Maintenance to extend sensor life
Preventive maintenance saves time and reduces the chance of future failures. Implement these practices:
- Schedule semi-annual checks of battery health for remotes and the opener’s receiver
- Clean sensor surfaces and beams regularly, especially in dusty, humid, or outdoor environments
- Inspect mounting brackets for looseness and re-tighten any fasteners
- Keep the area around the opener free from clutter; ensure the door travels unobstructed
- Periodically re-pair remotes after firmware updates or power outages to maintain reliable communication
With routine care, your garage door remote sensor remains dependable year after year.
Tools & Materials
- Screwdrivers (Phillips #2 and flathead)(Use the appropriate driver for mounting screws)
- Multimeter (optional)(For checking circuit continuity if you’re comfortable)
- Replacement receiver module (vendor-compatible, optional)(Only if the receiver inside the opener must be replaced)
- Fresh batteries (alkaline or lithium for remotes)(Install new batteries in each remote and inspect the opener’s battery connections)
- Soft cloth and isopropyl alcohol(Clean sensor lenses and contact surfaces)
- Soft brush or compressed air (optional)(Remove dust from sensor housings without scratching lenses)
- Step ladder(Access high mounting points safely)
Steps
Estimated time: 45-60 minutes
- 1
Identify the sensor and prep safety
Power down the opener and locate the receiver inside the unit, along with the floor safety beams if present. Confirm you’re working with the correct remote sensor assembly and avoid touching live electrical components. This step sets the stage for safe, accurate tests.
Tip: Take a photo of wiring before adjusting to aid reassembly. - 2
Check and replace the battery
Open the remote’s housing and inspect the battery; replace it with a fresh one if there’s any doubt about charge. Also inspect the opener’s backup battery area if applicable. After replacement, reseal the housing securely.
Tip: Use fresh batteries; old batteries can leak and damage contacts. - 3
Inspect alignment and clean surfaces
Carefully examine the safety beam lenses and the receiver alignment on the opener. Clean both with a soft cloth and isopropyl alcohol, ensuring lenses are free of dust, moisture, and fingerprint smudges. Misalignment is a common cause of intermittent operation.
Tip: Graphically align the safety beams using the marks on the mounting brackets. - 4
Re-pair the remote to the opener
Follow the manufacturer’s pairing procedure to re-link the remote with the opener. This often involves pressing a learn/pair button while transmitting remote signals, then confirming a successful connection via LED indicators.
Tip: Do not skip the pairing step even if the remote seems to work from a short distance. - 5
Test the system and document results
Operate the door from different distances and across multiple remotes to confirm consistent performance. Record the results and note any remaining irregularities, which may indicate deeper issues.
Tip: If the door hesitates or reverses, re-check beams and wiring for hidden faults.
Got Questions?
What are common signs of a failing garage door remote sensor?
Common signs include inconsistent remote response, door stopping mid-travel, and blinking LEDs on safety beams. If several remotes show issues, the receiver or alignment is more likely at fault.
Look for inconsistent remote responses or doors stopping mid-travel; the receiver or alignment might be faulty.
How do I test the sensor alignment?
Inspect both safety beam lenses for dirt and misalignment. Use a level or built-in alignment guides from the manufacturer. Reposition the beams so they face each other clearly and are parallel to the floor.
Check the safety beams are clean and aimed at each other; adjust until they face each other squarely.
Can I replace the remote sensor myself?
Yes, in many cases the receiver or sensor can be replaced by a DIYer with basic tools. Follow the opener’s manual and ensure the replacement part is compatible with your model.
You can usually replace the sensor with a matching part using the user manual guidance.
What battery type should I use?
Use a fresh, manufacturer-approved battery for the remote and check the receiver’s backup battery if applicable. Do not mix old and new batteries in the same circuit.
Use a fresh battery and avoid mixing old and new ones.
My remote still won’t work after batteries and pairing; what next?
Double-check wiring at the opener, inspect for corrosion, and re-test with another remote. If the problem persists, the sensor or logic board may require professional service.
If it still fails after batteries and pairing, inspect wiring and consider professional help.
Is it safe to tamper with safety beams?
Do not bypass safety beams. They are essential for preventing injuries. If misaligned or damaged, repair or replace them rather than attempting a workaround.
Never bypass the safety beams; fix or replace them to keep people safe.
Watch Video
Quick Summary
- Verify power and battery health first.
- Keep sensor surfaces clean and aligned.
- Re-pair remotes when needed and test range.
- Never disable safety features—repair, not bypass.