Garage Door Remote Problems: Troubleshooting Guide
Facing garage door remote problems? This GarageDoorAdjust guide covers diagnostics, fixes, and prevention to restore reliable remote control. Learn quick wins.

Most garage door remote problems come from a weak battery, a mispaired remote, or interference. Start with the simplest fix: replace the battery and re-pair the remote to the opener. If the issue persists, check for interference and the opener’s antenna. This guide walks homeowners through a step-by-step diagnostic flow to restore reliable remote control.
Common Garage Door Remote Problems
According to GarageDoorAdjust, garage door remote problems typically show up in a handful of predictable ways. The remote may stop working altogether from any distance, work only at close range, flash its LED oddly, or respond intermittently. You might notice that the wall switch still operates the door, but the remote fails, or that other remotes in the house seem to work while this one does not. The root causes split into three categories: a weak or dead battery, mispairing or a reset of the opener, and radio interference from nearby devices or structural obstacles. The GarageDoorAdjust Team emphasizes starting with the simplest checks. By targeting these areas first, homeowners can triage most faults quickly without calling a technician. In many cases, the problem is a simple battery swap or a quick re-pairing sequence, not a major replacement.
How a Garage Door Remote Communicates
A garage door remote sends a coded radio signal to the opener receiver. Most modern systems use rolling codes to prevent unauthorized access. The transmitter in your remote, the receiver in the opener, and the antenna on the opener all contribute to reliable operation. If the code isn’t recognized or the signal can’t reach the receiver, the door won’t respond. Range is influenced by batteries, the condition of the antenna, metal objects between the remote and receiver, and weather conditions. Understanding these signals helps pinpoint the fault—whether it’s a weak battery, a mispaired remote, or interference from nearby wireless devices, as noted by the GarageDoorAdjust Team.
Quick Checks You Can Do Right Now
Before diving into repairs, perform these quick checks:
- Inspect the remote’s battery; replace with the correct type and ensure proper orientation.
- Check whether the wall-mounted keypad or switch still controls the door. If yes, the issue is likely remote-specific.
- If available, test with a second remote. If that one works, the first remote is faulty.
- Confirm compatibility of frequency between the remote and the opener. Some older remotes won’t work with newer openers.
- Move away from potential interference sources (Wi‑Fi routers, cordless phones, cordless cleaners) and retest.
- If the door responds to the keypad or wall switch but not the remote, focus on the remote’s pairing or battery.
Diagnostic Flow: Symptom to Diagnosis
This section aligns with a practical diagnostic flow:
- Symptom: Remote does not operate the opener from any distance or stops working after a few feet.
- Causes: 1) Weak or dead battery (high); 2) Remote and opener not paired or reset (high); 3) Radio interference (medium).
- Fixes: 1) Replace the remote battery (easy); 2) Re-pair the remote to the opener (easy); 3) Reset the receiver and check for interference (medium).
Following this flow helps you quickly separate root causes from symptoms, reducing unnecessary parts replacement. GarageDoorAdjust Analysis, 2026 suggests keeping a routine of battery checks and periodic re-pairing to prevent cascading issues.
Step-by-Step Fixes for the Most Common Cause
- Check the remote battery: Remove the cover, inspect for corrosion, and replace with a fresh battery of the correct size. Re-test the remote.
- Re-pair the remote: Access the opener’s programming mode and follow the exact steps for your model to re-link the remote. Test the result.
- Test the range: Stand near the opener and methodically walk away while pressing the remote to confirm range before deeming it fixed.
- Inspect the antenna: Ensure the antenna is hanging straight and undamaged; reposition or gently straighten if necessary.
- Clear interference: Move electronics away from the opener and reset the remote pairing to see if signal clarity improves.
- Consider replacement: If the remote housing is cracked or the internal circuitry shows damage, replacement may be more economical than repair.
Estimated total time: 25-40 minutes.
Safety, Maintenance, and Prevention Tips
Safety first: disconnect power only when you intend to service the opener electronics; otherwise, keep the unit powered and follow manufacturer safety instructions. Lubricate tracks and moving parts periodically to maintain smooth operation. Regularly test remotes from different angles and distances to catch weak batteries early. Consider labeling remotes by their paired opener to prevent cross-pairing in multi-car setups. The GarageDoorAdjust Team recommends keeping an up-to-date remote inventory and refreshing batteries at least once per year to prevent sudden failures.
When to Call a Pro
If you’ve exhausted battery checks, re-pairing, and interference controls, and the remote still fails while the wall switch works, it’s time to consult a pro. A technician can diagnose receiver board wear, antenna damage, or control-board failures—issues that require hands-on diagnostics and specialized tools. Do not attempt to replace internal opener components unless you’re trained. Early professional assessment can prevent accidental damage and ensure safety.
Real-World Scenarios and Quick Solutions
Scenario A: You replaced the battery, but the remote still doesn’t work at the distance you expect. Solution: Re-pair the remote, then re-test at range; if no improvement, verify frequency compatibility and consider a different remote. Scenario B: A new router nearby causes intermittent remote failures. Solution: Move the router or other wireless devices away from the opener, or change the opener’s frequency if supported. Scenario C: The remote works for one car but not another. Solution: Re-pair remotes individually and check if one remote needs replacement due to age or damage.
Additional Resources and Troubleshooting Tools
- Spare batteries and a small screwdriver kit for quick battery swaps
- The opener’s user manual and model-specific pairing instructions
- A second remote for testing and replacement planning
- A smartphone app (if your opener supports it) for troubleshooting alerts
- A basic voltage tester if you suspect power issues at the control board
Steps
Estimated time: 25-40 minutes
- 1
Check the remote battery
Open the remote, inspect for corrosion, and replace with a fresh battery of the correct size. Reassemble and test the remote at the opener.
Tip: Keep spare batteries on hand for quick fixes. - 2
Re-pair the remote to the opener
Enter the opener’s pairing mode as described in your manual and press the remote button until the LED signals a successful link. Test from a normal distance.
Tip: Follow model-specific steps exactly to avoid failed pairing. - 3
Test range and angles
With the remote freshly paired, stand at various distances and angles to determine if range has improved. Note any dead zones.
Tip: Move to a clear line of sight if needed. - 4
Inspect the opener antenna
Check that the antenna is intact, not bent or damaged, and hanging downward. A damaged antenna can significantly reduce range.
Tip: Do not bend the antenna excessively; gentle adjustment may help. - 5
Check for interference sources
Power down or relocate potential interference devices (routers, cordless phones) and re-test.
Tip: If interference persists, try a different remote or location. - 6
Consider replacement
If the remote is old or physically damaged, replacement is often more reliable than repair.
Tip: Choose a remote compatible with your opener and future upgrades.
Diagnosis: Remote doesn't operate the opener from any distance or without re-pairing
Possible Causes
- highWeak or dead remote battery
- highRemote and opener not paired or reset
- mediumRadio interference from nearby devices
Fixes
- easyReplace the remote battery with the correct type and test
- easyRe-pair the remote to the garage door opener following the model's pairing procedure
- mediumReset the opener receiver and re-pair all remotes after confirming interference sources
Got Questions?
Why is my garage door remote not working after replacing the battery?
If a new battery doesn’t fix it, check the battery orientation and ensure the contact points are clean. Re-pair the remote to the opener and test at close range, then gradually extend distance.
If the new battery doesn’t fix it, check orientation and clean contacts, then re-pair and test at close range before testing farther away.
How do I re-pair a remote to my garage door opener?
Consult your opener’s manual for the exact pairing steps. Typically you enter pairing mode on the opener and then press the remote’s button until a light blinks or confirms a link.
Open pairing mode on the opener, press the remote’s button until the light confirms the link.
Can interference from Wi-Fi or cameras affect remote operation?
Yes, nearby wireless devices can interrupt the signal. Try relocating devices, turning off nonessential transmitters, or re-pairing after minimizing interference.
Yes, nearby wireless devices can interfere with the signal; try moving devices away and re-pairing.
Is it time to replace the remote if none of the fixes work?
If the remote is damaged, old, or fails repeatedly after proper pairing and battery checks, replacement is the most practical option.
If it’s old or damaged, replacing the remote is usually best.
What if the wall control works but the remote doesn’t?
That points to a remote-specific issue (battery, pairing, or transmitter), not the opener’s receiver.
If the wall switch works but the remote doesn’t, focus on the remote itself.
Should I service the opener or the remotes first?
Start with the remotes and the receiver; if problems persist, inspect the opener’s electronics with a professional.
Fix the remotes first; if problems continue, call a pro to inspect the opener’s electronics.
Watch Video
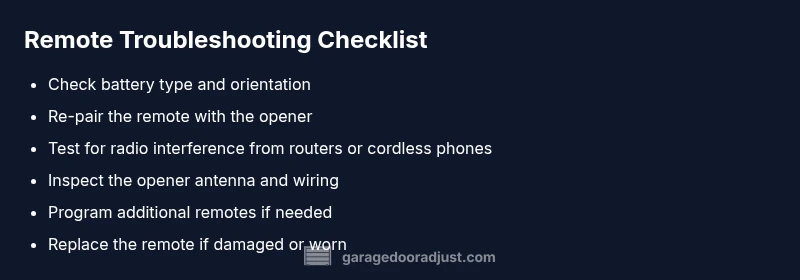
Quick Summary
- Test batteries first and re-pair next
- Rule out interference before replacing components
- Follow model-specific pairing steps exactly
- Call a pro for receiver or control-board issues
- Regular maintenance prevents remote problems