What to Do When Garage Door Remote Won't Work: Urgent Troubleshooting Guide
A homeowner-friendly, step-by-step troubleshooting guide to fix a garage door remote that won't work, from battery swaps to re-pairing and prevention.

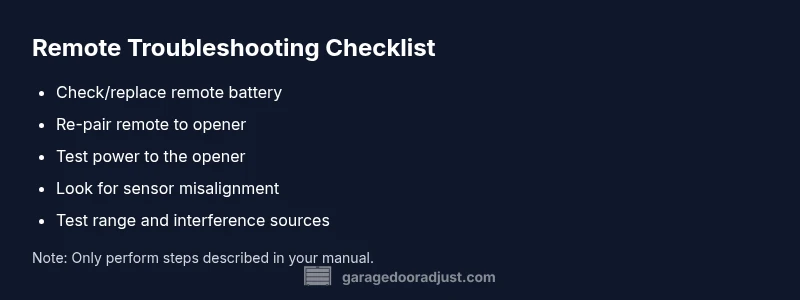
The most likely causes are a dead battery or a mispaired opener. Start by replacing the remote battery and re-syncing the remote to the opener following the manufacturer’s steps. If problems persist, check the power to the opener and any safety sensors. This fast triage solves many non-working-remote cases.
Common Causes at a Glance
According to GarageDoorAdjust, many remote problems start with a simple battery check or pairing step. The GarageDoorAdjust team found that mispairing, weak batteries, and interference from nearby devices are frequent culprits. Before tearing apart the opener, rule out these basics. Expect the fix to be quick, often resolved by replacing a battery, re-pairing, or clearing interference. If the remote still won’t work, you may be facing a receiver issue or a more complex wiring problem, which will require a deeper check. Conceptually, think of the remote and the opener as a two-part system: the remote must reliably transmit a signal that the receiver can interpret. A slight mismatch or drained power breaks the link. This section will guide you through a safe, methodical path to restore control without unnecessary delays.
- Keep a calm, methodical approach instead of guessing. - Gather your tools before starting (batteries, a flashlight, your opener’s model number).
Important safety note: Do not attempt any wiring or sensor adjustments unless you have explicit instructions from the opener’s manual. If something feels risky, stop and call a professional. By following this plan, you’ll quickly identify whether you can fix it yourself or if a trained technician is needed.
Step 1: Confirm the Basics
The fastest way to fix a non-working remote is to verify the simplest possibilities first. Start with battery health: a remote can appear dead even when it still has a bit of life left. Remove the cover and test or replace the coin cell battery with a fresh alkaline type recommended by your opener’s maker. While you’re there, inspect the remote for visible damage such as cracks in the shell or corrosion on the contacts. If your remote uses replaceable batteries, keep a spare on hand and swap it in during troubleshooting. Next, ensure you’re trying the correct remote for the correct opener, especially if your garage has multiple devices.
- Use the spare remote if you have one to isolate whether the issue is device-specific. - Confirm that the opener’s power is on and that there is no power outage affecting the unit. - Check the battery door and seals; a loose or misaligned battery can prevent contact.
Pro tip: Label remotes and keep a simple note of which remote belongs to which door. This can save time on future troubleshooting.
Step 2: Test the Opener Receiver and Power
If the battery is fine, turn to the receiver that governs the door operation. A non-responsive receiver could be the reason the remote isn’t working. First, confirm the opener is powered; check the outlet and circuit breaker if necessary. Listen for the garage door’s motor when you press the wall switch; if the door doesn’t respond from the switch either, there could be a power or sensor alignment issue rather than a remote problem. Inspect any indicator lights on the opener. Some models have a status LED; if it’s blinking in an unusual pattern, consult the manual to interpret the code. Ensure there are no cobwebs or debris in the sensor area that might cause the opener to think something is obstructing the door.
- Try a wall switch test as a diagnostic baseline. - Check the indicator LED on the opener for status signals. - Look for obvious obstructions or misaligned safety sensors that could block operation.
Important caution: Do not bypass safety features to make the door operate; safety sensors are there to prevent injury.
Step 3: Re-sync or Re-pair the Remote
A mispaired remote is a common reason for a non-working unit. Re-pairing the remote to the opener reestablishes the communication link. Start by removing the existing pairing if your model supports it, then re-enter pairing mode as described in the manual. This process usually involves pressing a learn button on the opener and then pressing the remote button to confirm the pairing. If your opener supports rolling code or frequency-hopping, ensure the remote is compatible and set to the correct mode for your system. Some remotes have a one-time-use code that expires if you replace the battery significantly; in that case, you may need to reprogram from scratch.
- Follow the exact steps from your model’s pairing instructions; even small deviations can fail pairing. - If your remote has multiple buttons, program only those that control the door to reduce interference. - After pairing, test the remote both from short and longer range to ensure consistency.
Tip: If the remote has a dedicated learn/erase button, consider wiping all remotes from memory and re-pairing fresh to avoid stale codes.
Step 4: Check for Interference and Range Issues
Radio interference can prevent a remote from reaching the receiver, especially in crowded living spaces with lots of wireless devices. Common culprits include wireless routers, baby monitors, and cordless phones. Move closer to the opener and try the remote from different angles; keep the remote within the recommended range described in your manual. If interference is suspected, temporarily power down nearby devices to test whether the remote’s range improves. Some models offer a frequency filter option; check the settings to ensure the unit is not set to a conflicting channel. Note that metal fences, wiring, and even metal doors can disrupt signals in some installations.
- Test at several distances and angles to map usable range. - Temporarily power down nearby devices to identify interference sources. - Consider relocating the opener receiver or changing the remote’s frequency if the option exists.
Important: Do not relocate critical safety features; any modification should follow the manufacturer’s guidance. If you detect persistent interference, a professional can reprogram the system to operate on a more stable channel.
Step 5: Replace Batteries and Inspect the Remote Conditionally
If the battery is new but the remote still isn’t working, the remote’s electronics might be failing. Try a brand-new battery type recommended by the opener’s model. If you attempted multiple batteries and the issue persists, inspect the remote’s buttons for sticking or corrosion and ensure the IR or RF transmission window is clean. Clean the contact points gently with a dry cloth. If the remote’s case has moisture or corrosion, it’s time to replace the remote. When replacing, match the replacement to your opener model; universal remotes can work but have higher failure rates and limited features.
- Avoid using damaged remotes or third-party replacements that aren’t explicitly compatible. - Test immediately after battery replacement to confirm a fix. - Keep a spare remote to avoid future downtime.
Pro tip: Keep the original remote and the replacement to compare signals with a simple LED test; many remotes flash when transmitting but may still fail at the receiver end.
Step 6: Reset the Opener and Reprogram if Needed
If nothing else works, a full reset of the opener and reprogramming of all remotes may be required. The reset procedure varies by model; some use a master reset button, while others require holding the learn button for several seconds. Before you reset, write down the current remotes and ensure you have the manuals for each device. After reset, reprogram each remote and test the system thoroughly. If the unit is near the end of its life, a replacement opener might be more cost-effective than ongoing troubleshooting. Always complete essential safety checks after any reset.
- Only perform a reset if you’ve consulted the manual; incorrect resets can erase all remotes. - Reprogram remotes one-by-one and test in multiple rooms. - If you’re unsure, seek professional help to avoid accidental lockouts or safety issues.
Notebook tip: Document the reset steps and the results, so you have a reference for future maintenance.
Step 7: When to Call a Pro and Prevention Tips
If you’ve tried all the steps and the remote still won’t work, or you suspect a faulty receiver, a licensed technician can diagnose and repair the opener’s control board or sensor network. Professionals can also evaluate motor strength, wear, and alignment, which are critical for reliable operation. Ongoing prevention is essential: lubricate moving parts as recommended, test the remote regularly, replace batteries proactively, and keep the opener and sensors clean and unobstructed. For homeowners seeking peace of mind, enrolling in a routine maintenance plan with a trusted technician can prevent future outages and extend the life of your system.
- Schedule regular inspections of the opener and sensors. - Keep a log of remote failures and fixes to identify recurring issues. - Invest in a reliable, compatible remote and opener to minimize compatibility issues.
Conclusion (for this section): If the remote won’t work after comprehensive troubleshooting, you’re not alone; the solution is often straightforward, but a pro can address hidden receiver or control-board problems safely and efficiently.
Step 8: Prevention and Maintenance for Long-Term Reliability
To avoid future episodes of a remote mysteriously stopping, commit to a short, proactive maintenance routine. Replace batteries at least twice a year, and test remotes monthly from various angles and distances. Keep the remote clean and dry, store it away from heat sources, and inspect the receiver housing for cracks or moisture intrusion. Verify weather-sealing on the garage door fits your climate, as moisture and temperature fluctuations can affect electronics over time. If you notice intermittent signals, schedule a professional check to prevent a sudden outage during critical moments. A little preventive care now saves time and stress later.
- Build a simple yearly checklist for battery replacement and system test. - Keep your manual in a safe, accessible place for quick reference. - Consider upgrading to a newer system if you repeatedly hit compatibility issues.
Final safety reminder: Never bypass safety sensors to force operation; this can cause injury or property damage. Following the steps above will generally restore reliable remote use and prolong the life of your garage door system.
Steps
Estimated time: 60-90 minutes
- 1
Verify remote battery
Open the remote, inspect the battery, and replace it with a fresh one if there’s any doubt about its life. Test the remote immediately after replacement to confirm basic function.
Tip: Keep spare batteries on hand and label each remote with its door. - 2
Check opener power
Ensure the opener is powered and that the outlet or circuit is delivering electricity. If the unit has no LED indicators, check the manual for power-status signals.
Tip: Reset the unit if you see unusual LED blinking patterns. - 3
Re-pair the remote
Enter pairing mode on the opener, then press the remote button to re-link it. Test from multiple distances to confirm reliability.
Tip: Only pair the remotes you actually use to reduce interference. - 4
Check for interference
Move away from routers, cordless phones, and other wireless devices. Try the remote near the opener from several angles to see if range improves.
Tip: If interference is persistent, consider updating to a newer protocol-compatible remote. - 5
Test safety sensors
Inspect the door’s safety beams for obstructions or misalignment; a misbehaving sensor can prevent operation even if the remote is fine.
Tip: Clean sensor lenses with a dry cloth and ensure a clear path. - 6
Reset and reprogram if needed
If all else fails, perform a factory reset on the opener and reprogram all remotes following the manual.
Tip: Record each step so you can reference it if you need to redo the process. - 7
Call a pro
When the receiver or control board shows signs of wear or damage, a professional technician should diagnose and repair.
Tip: Ask for a preventive maintenance plan to avoid future outages.
Diagnosis: Garage door remote won't work
Possible Causes
- highDead or weak battery in remote
- highMispaired remote or receiver pairing lost
- lowInterference from nearby devices
- lowPower issue to the opener
- lowFaulty receiver or control board
Fixes
- easyReplace remote battery with recommended type
- easyRe-pair or reprogram the remote to the opener
- easyTest for interference and adjust range
- easyVerify opener has power and reset if needed
- mediumConsult a professional for receiver or control-board issues
Got Questions?
Why does my garage door remote stop working even after I changed the battery?
There could be pairing issues or interference. Re-pairing the remote to the opener or checking for nearby signal sources often resolves the problem. If the LED on the opener behaves oddly after a battery change, refer to the manual for status codes.
Battery change helps most times, but if it still fails, re-pair the remote and check for interference; the opener may show a status LED code you can reference.
Can interference from other devices affect remote range?
Yes. Devices like routers or cordless phones can interfere with the remote signal. Move devices away and test at different distances. If interference persists, consider updating to a remote and opener that use less crowded frequencies.
Yes, other wireless devices can interfere with the signal. Try moving devices and testing range; consider upgrading if interference continues.
Should I reset the opener to fix remote issues?
A reset can fix stubborn pairing problems, but it erases existing remotes. After resetting, reprogram each remote carefully following the manual.
Resetting the opener can solve stubborn pairing issues, but you’ll need to reprogram remotes afterward.
When is it time to call a professional?
If you suspect a receiver or circuit-board problem, or if the door behaves unpredictably after multiple fixes, contact a licensed technician for a thorough diagnosis and safe repair.
Call a pro if the receiver or control board seems compromised or if the door behaves abnormally after troubleshooting.
Can I use a universal remote with my garage door?
Universal remotes can work with some openers but may not support all features or be compatible with newer security codes. Check compatibility before purchasing.
Universal remotes might work with some openers but always check compatibility first.
What maintenance helps prevent remote issues?
Regularly replace batteries, keep sensors clean, and perform annual inspections of the opener and mounting hardware to maintain reliable operation.
Keep batteries fresh, clean sensors, and do annual inspections to prevent future issues.
Is it safe to repair the opener myself?
Only perform tasks that are clearly described in the manual and within your skill level. If unsure, stop and hire a professional to avoid injury or property damage.
Only do what the manual allows; if unsure, call a professional for safety.
Watch Video
Quick Summary
- Start with battery and pairing checks
- Test both remote and wall switch for baseline
- Re-pair remote only with manufacturer guidance
- Avoid forcing operation in safety-prohibited scenarios
- Consult a pro for receivers or control-board issues