Why Is My Garage Door Opener Not Working? A Troubleshooting Guide
Urgent, step-by-step guide to diagnose and fix a garage door opener that won't operate. Learn safety tips, troubleshooting flow, and prevention strategies to minimize future breakdowns.

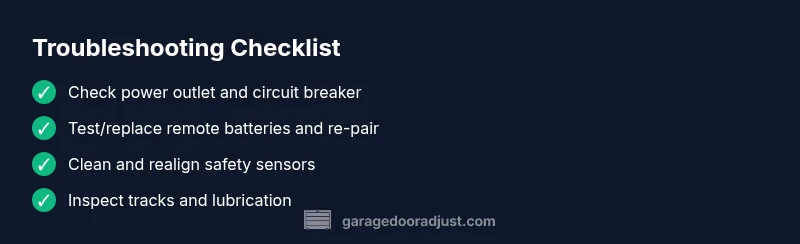
If your garage door opener won't respond, the most likely causes are a power issue, dead remote battery, misaligned safety sensors, or a tripped circuit. Start by checking the outlet and breaker, testing the remote with fresh batteries, and confirming sensor beams are clear. If the door still won't move, continue with the diagnostic flow below and avoid forcing the door.
Understanding the Symptoms
When your garage door opener stops working, it can manifest in several ways: the wall control button does nothing, the remote fails to respond, the door moves only partially, or the door closes and reverses unexpectedly. The most common culprits are power-related issues, battery life for remotes, misaligned safety sensors, or a blown fuse in the opener circuit. According to GarageDoorAdjust, start by confirming whether the opener is receiving power, then verify the remote’s battery status and sensor alignment. If simple fixes don’t restore function, the problem likely lies deeper in the electrical system or mechanical components. Document the exact symptoms to guide the diagnostic flow and keep yourself safe as you work through checks step by step.
Safety First: Why You Should Never Forcibly Manually Move the Door
Never attempt to crank or force the door with the opener engaged. Doors can be heavy and unbalanced, and forcing them can cause injury or damage to torsion springs, tracks, or the motor. If you hear grinding, popping, or resistance, stop immediately and proceed with safe, lower-risk checks. Always unplug the opener before inspecting internal wiring, and wear eye protection when near moving parts. Safety is the single most important factor in any DIY garage door repair.
Electrical and Power Checks You Can Do
Power issues are the leading cause of non-working openers. Verify the opener is plugged into a live outlet, check the circuit breaker or fuse box for trips, and inspect any GFCI outlets on the same circuit. If you have a battery backup, ensure it’s charged or replaced as needed. Use a simple lamp or tester to confirm power availability at the outlet. If power is cycling on and off or you notice frequent trips, a professional should assess the panel and wiring to prevent further hazards.
Remote and Receiver Troubleshooting
A worn or weak battery is a frequent culprit for remote failure. Replace the batteries with high-quality alkaline or lithium bottles, and re-synchronize the remote with the receiver according to your model's instructions. If multiple remotes fail, the issue may be the receiver or control board rather than the remotes themselves. In that case, you’ll typically need to reset or replace the receiver during professional service.
Sensor Alignment and Safety Beams
Modern openers rely on infrared safety sensors positioned near the door tracks. If the beams are blocked, dirty, or misaligned, the opener will refuse to operate for safety reasons. Clean the sensor lenses gently with a soft cloth, realign them so they face each other directly, and ensure the wires are intact. After re-alignment, test the door using the wall control and the remote. If the lights on the sensors blink or indicate a fault, consult the manual to interpret the codes and address the issue.
Mechanical Issues: Tracks, Rollers, and Springs
Even when electrical components function, mechanical problems can prevent the door from moving smoothly. Check tracks for obstructions and ensure they are straight and properly bolted. Lubricate rollers and hinges where appropriate, but avoid over-lubricating or getting oil on the door itself. If you hear grinding or the door binds, it may indicate bent tracks, loose springs, or worn rollers that require a technician’s inspection. Do not attempt spring work unless you’re trained; springs store tremendous energy and pose serious risks.
Diagnostic Flow: From Symptom to Solution
Use a structured flow: verify power, test remote batteries, check safety sensors, inspect the receiver, and assess mechanical binding. If a step reveals a fault, address it before moving on. If you encounter a fault you can’t safely fix, stop and call a professional. This flow minimizes risk while maximizing the chances of a quick resolution. Remember to document the sequence of steps and outcomes to share with a technician if needed.
Prevention: Maintenance Tips for a Smoother Opener
Establish a simple maintenance routine: wipe down sensors, inspect tracks every 6 months, lubricate moving parts annually, and replace batteries annually or as needed. Keeping the opener and remote firmware up to date (where applicable) can prevent compatibility issues. Set a reminder to perform these checks and store spare parts (batteries, bulbs, and basic tools) in a dedicated box for quick access.
Steps
Estimated time: 20-40 minutes
- 1
Check power and outlet
Unplug, inspect the outlet, and ensure the opener is receiving power. If unsure, test with a known device and reset the circuit if needed. Restore power before moving to the next step.
Tip: A simple plug-in tester can quickly confirm power availability. - 2
Test and replace remote batteries
Open the remote case, replace with fresh batteries, and re-pair with the receiver following the manual. If pairing fails, test with a spare remote.
Tip: Always use the recommended battery type for your model. - 3
Inspect safety sensors
Clear any obstructions between sensor eyes, wipe lenses, and ensure alignment markers point at each other. Re-test the door with the wall control.
Tip: Sensor misalignment is a frequent cause of non-operation. - 4
Check tracks and rollers
Visually inspect tracks for dents or obstructions. Ensure rollers move freely and fastenings are tight. Lubricate pivot points sparingly.
Tip: Do not lubricate along the belt or track surfaces excessively. - 5
Test door balance manually
With the door closed, disconnect the opener using the manual release and lift the door halfway. If it stays put, the balance is good; if it falls or rises, call a pro.
Tip: If you’re unsure about springs, call a professional immediately. - 6
Test wall control and keypad
Operate the door using the wall control; then test any keypad or remote. If one fails, the issue may be in the control wiring or receiver.
Tip: Document any code errors you see on the keypad. - 7
Call a professional when needed
If you identify a fault you cannot safely fix (springs, cables, or motor failure), stop and book a professional inspection.
Tip: Professional help prevents injuries and prevents further damage.
Diagnosis: Garage door opener fails to operate or respond to remote
Possible Causes
- highPower issue (outlet, circuit breaker, or GFCI trip)
- highDead or weak remote battery
- mediumSensor beams blocked or misaligned
- lowReceiver or motherboard fault
- lowDoor binding or track misalignment
Fixes
- easyCheck outlet and reset the breaker; test with a lamp to confirm power. Restore power and retest.
- easyReplace remote batteries and re-pair the remote with the opener; try a known-good remote if available.
- easyClean and realign safety sensors; ensure clear beams and proper alignment; retest with door open/close cycle.
- hardIf the receiver or motherboard shows signs of failure, consult a professional; avoid DIY board replacement.
- hardIf the door is binding or tracks are damaged, call a pro; adjustments can be dangerous.
Got Questions?
Why won't my remote open the garage door even though the opener is plugged in?
Remote issues are often battery-related or require re-pairing with the receiver. Replace the batteries and re-sync per the manufacturer’s instructions. If multiple remotes fail, the receiver may be at fault and require professional service.
Remote not opening the door is usually battery or pairing related. Replace batteries and re-sync; if problems persist, the receiver may need a professional check.
The door moves a little and then stops. What should I check first?
Check for sensor misalignment, track obstructions, and spring tension. If the door rises or falls unexpectedly, stop testing and call a professional to prevent injury.
If the door stops after moving, first check sensors and tracks. If you feel resistance or uneven movement, contact a pro.
Can I DIY sensor realignment safely?
Sensor realignment is generally safe if you follow the manual and avoid touching the belt or springs. If the beams are damaged or misaligned, stop and consult a technician.
Realigning sensors is usually safe if you follow the manual, but avoid touching the springs. If in doubt, get a pro.
Is it safe to adjust tracks myself?
Track adjustments can be risky due to pinched fingers and misalignment that can cause the door to fall. If you notice dents or misalignment, call a professional.
Track adjustment can be risky; if you see misalignment or damage, contact a pro.
How often should I perform basic maintenance on a garage door opener?
Perform basic checks every 6 months: inspect tracks, test safety features, lubricate moving parts, and replace batteries in remotes as needed.
Do basic checks twice a year and replace remote batteries when needed.
Watch Video
Quick Summary
- Start with power and battery checks to save time.
- Address safety sensors before expecting full operation.
- Avoid DIY on springs or high-tension components.
- Document steps for a technician if needed.