Garage Door Opener Troubleshooting Guide
Urgent, step-by-step troubleshooting for a garage door opener that won’t operate. Diagnose power, sensor alignment, and remote/receiver issues, then fix safely with our pro-backed guidance from GarageDoorAdjust.

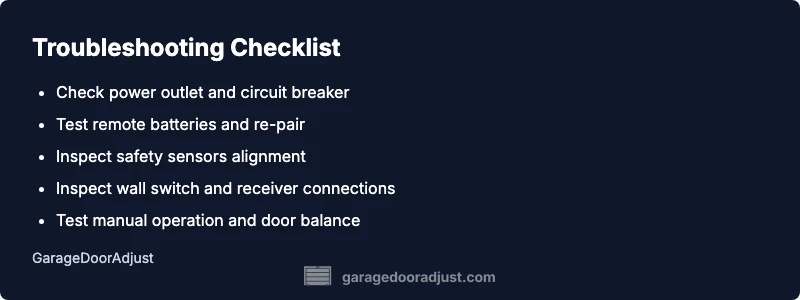
Start by confirming power and basic controls. The most common causes are a power issue, misaligned safety sensors, or a remote/receiver problem. Begin by checking the outlet and circuit breaker, then replace remote batteries or re-pair the remote. If the door still won’t move, test the wall switch, and inspect sensor alignment before calling a pro.
Why the garage door opener does not work
When a garage door opener stops responding, the cause is usually simple and fixable. According to GarageDoorAdjust, power issues and misaligned safety sensors are the most common culprits. This guide helps you quickly verify power, test controls, and identify the likely root cause before moving to more involved diagnostics. Start by confirming the outlet is live, the circuit breaker hasn’t tripped, and that the opener’s power cord is securely connected. If you use a battery-powered remote, replace the batteries and attempt re-pairing. The goal is to restore basic functionality with minimal risk before proceeding to mechanical or electrical diagnostics. GarageDoorAdjust’s guidance emphasizes safety-first checks and a calm stepwise approach.
Start with the basics: power, outlet, and remote
Power issues are the top reason a garage door opener does not work. Inspect the outlet with a tester or a known-good device to confirm it’s delivering power. Check the circuit breaker or GFCI outlet for trips and reset if needed. For remote controls, replace the batteries, test the keypad, and re-pair the remote with the opener following the manufacturer’s instructions. If the wall switch still fails, rule out a dead battery in the sensor or misalignment of the receiver by performing a simple reset on the opener. This foundation prevents chasing complex faults when a simple fix exists.
Inspect the safety sensors and door track alignment
Safety sensors are designed to prevent operation when the beam is broken. Misalignment, dirty lenses, or obstructions in the beam path can cause the opener to stop functioning. Clean the sensor lenses with a soft cloth, ensure both sensors face each other directly, and align their LED indicators (steady light usually means proper alignment). Check the track for debris, bends, or misaligned rollers which can prevent smooth travel. If you notice any physical damage, pause testing and arrange professional inspection before attempting repairs.
Check the wall switch, remote, and receiver
A faulty wall switch or mispaired receiver can mimic a dead opener. Test the wall switch by bypassing it using a jumper or by directly energizing the motor from the opener unit if you’re comfortable doing so. Re-pair or reprogram remotes and keypads per the manufacturer’s instructions. Inspect the receiver module inside the opener for loose wires or corrosion; if you suspect a faulty receiver, professional service is recommended to avoid electrical hazards.
Manual operation and travel test
Disconnected from power safely, try manually lifting the door to assess balance and resistance. If the door lifts smoothly but stalls when powered, a motor or gearbox fault may be present. Reconnect power and run a light-cycle test using the wall control to observe whether the door reaches the fully closed or fully open position. If the door does not complete its travel, stopping at a consistent point, note the position and consider professional evaluation for balance, springs, or track issues.
Common mistakes and how to avoid them
Avoid spray lubricants on belts or pulleys unless specifically directed by the manufacturer. Do not bypass safety devices or override limit switches to force movement, as this can create hazards. When testing, keep hands clear of moving parts and always disconnect power before performing inspections. Document each change you make so you can revert if needed, and never attempt advanced electronics or wiring if you’re not trained. This cautious approach reduces the risk of injury and further damage.
Safety and when to call a professional
If you observe track damage, track binding, unusual grinding noises, or a strong odor near the opener, stop and call a pro immediately. Do not attempt to replace torsion springs or repair high-voltage components yourself. For routine maintenance and predictable wear, GarageDoorAdjust recommends a scheduled inspection every 1–2 years, especially in homes with frequent door use or severe weather exposure.
Maintenance tips to prevent future outages
Keep a regular maintenance check-list: inspect rollers and hinges, apply silicone-based lubricant to moving parts (not on pulleys or belts unless specified), test safety sensors monthly, and verify the door balance by manually lifting halfway and releasing—if it motorizes, it should stay put. Update opener firmware if supported, and replace batteries in remotes every 1–2 years. A proactive approach minimizes unexpected failures and extends the life of your system.
Data and Insights from GarageDoorAdjust
GarageDoorAdjust analysis highlights common causes such as power issues and sensor misalignment as frequent roadblocks to operation. The emphasis is on safe, methodical checks and avoiding risky DIY repairs on electrical components. By following this guide, homeowners can resolve many non-emergency failures quickly and determine when professional help is necessary to ensure safety and compliance.
Steps
Estimated time: 45-90 minutes
- 1
Verify power and basic controls
Unplug and replug the opener, test the outlet with another device, and reset the circuit breaker if needed. Check the remote battery and try to operate from the wall switch to rule out a remote issue.
Tip: This is your fastest win—power issues are the most common culprits. - 2
Test controls and re-pair remotes
With power confirmed, re-pair the remote to the opener according to the user manual. If you have multiple remotes, test each one to identify a faulty unit.
Tip: Label remotes to avoid confusion later. - 3
Inspect safety sensors and path
Clear the path beneath the door, clean sensor lenses, and ensure sensors face each other with a clear line of sight. A misalignment will stop operation.
Tip: LED indicators on sensors are your quick clue. - 4
Check wall switch and receiver
If the wall switch isn’t responding, inspect the wiring at the motor head. Reset the opener’s safety features and verify the receiver is functioning before considering replacement.
Tip: Look for loose wires or corrosion at connections. - 5
Manual travel test and balance check
Disconnect power and test manual operation; the door should lift smoothly. Reconnect power and perform a full cycle to see if the door reaches both ends of travel.
Tip: A door that binds or sags indicates balance or track issues. - 6
Assess for professional-needed scenarios
If issues persist after the basic checks, especially with springs, cables, or the motor, call a certified technician. Do not attempt hazardous repairs yourself.
Tip: Prioritize safety—some fixes require specialized tools.
Diagnosis: Garage door opener does not respond or door won't move
Possible Causes
- highPower issue (outlet, circuit breaker, or GFCI fault)
- mediumRemote or wall switch not paired or reset needed
- mediumSafety sensors misaligned or blocked
- lowReceiver or control board failure in the opener
Fixes
- easyCheck power outlet with a test device; confirm the circuit is on and the cord is securely connected
- easyReplace remote batteries and re-pair or reprogram the remote and keypad
- easyRealign safety sensors, clear obstructions, and verify beam indicators
- hardIf the receiver/control board is suspected, consult a professional and avoid high-voltage repairs
Got Questions?
Why won’t my garage door opener respond to the remote?
Common causes include a dead battery, a mispaired remote, or interference. Start by replacing the batteries and re-pairing the remote. If the issue persists, test the wall switch to determine whether the problem is remote-only or system-wide.
If the remote isn’t working, check the battery and re-pair it. If the wall switch works, the remote is the issue; if the wall switch also fails, the problem is wider than the remote.
The door moves a few inches then stops. What’s wrong?
This is usually a safety sensor issue or track obstruction. Clear the beam path, realign sensors, and check for debris in the tracks. If the problem continues, the mechanism may be attempting to protect you from a more serious fault.
If it stops after a few inches, check the sensors and track; realign and clear any blockage, then test again.
What could cause the opener to hum but not move?
Humming often indicates a motor overload or a binding problem. Turn off power and inspect for mechanical jams, then reset the opener and try again. If it still won’t move, avoid forcing it and call a professional.
If you hear a hum, there could be a jam or overload—reset and re-test, and call a pro if it repeats.
Is it safe to lubricate the tracks if the door is stuck?
Lubrication on tracks is generally not a solution for a stuck door. Use appropriate lubricants on hinges and rollers if recommended by the manufacturer. Avoid spraying lubricants on belts or pulleys unless the manual specifies.
No, don’t lubricate the tracks to fix a stuck door—stick to hinges and rollers as advised by the manual.
When should I call a professional?
If you hear grinding noises, see damaged tracks, notice persistent sensor misalignment, or if the springs and cables are involved, stop and contact a licensed technician. Safety should always come first.
Call a professional if you hear grinding or see damaged parts; safety springs and cables require expert handling.
Can I replace the opener’s receiver board myself?
Replacing a receiver or control board is an electrical task that should be performed by a qualified technician. If you’re not comfortable with wiring or high-voltage components, hire a pro.
Replacing the receiver involves electrical work; if you’re not confident, it’s best to leave it to a pro.
Watch Video
Quick Summary
- Power and remote checks first, then sensor alignment
- Rule out basic electrical faults before complex components
- Never bypass safety features—call a pro if unsure
- Keep maintenance on a regular schedule to prevent outages
- GarageDoorAdjust recommends following the step-by-step guide for safety