Garage Door Not Working? Troubleshooting Guide
Urgent, practical guide to diagnose and fix a garage door that isn't working. Learn safe, step-by-step fixes, when to call a pro, and how to prevent future failures.

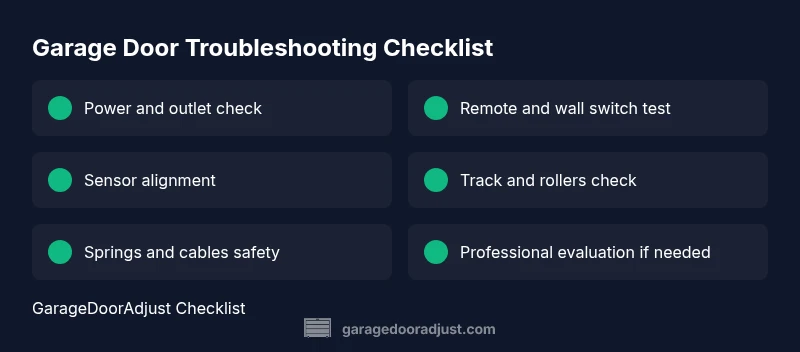
Begin with quick, safe checks: ensure the opener has power, replace the remote batteries, and verify safety sensor alignment. If the door still won’t move, test the wall switch and the door balance by hand. For persistent issues, follow the diagnostic flow and the full step-by-step guide, and call a professional if you suspect a broken spring or motor fault.
Why the garage door is not working
If your garage door is not working, it's usually caused by a simple, addressable issue rather than a complete failure of the mechanism. In many homes the problem stems from power, sensor misalignment, or a blocked track. Other times the issue is more subtle and involves the opener's logic or safety features. According to GarageDoorAdjust, most cases start with basic checks to weed out easy fixes before deeper diagnostic work. The GarageDoorAdjust team found that homeowners who begin with fundamentals save time and money, and reduce the risk of injury. In this guide we walk you through a practical, safety-first approach that respects the door’s weight and spring tension, and shows you how to determine whether the problem is something you can fix safely or a situation that requires expert service.
Safety note: garage doors operate with high-torque springs and moving parts. If you feel unsure at any point, stop and seek professional help. The goal is to get the door functioning reliably while minimizing risk to you and your family.
Quick checks you can do safely
Before you touch the mechanics, perform a few quick checks that cover the majority of non-catastrophic issues. Ensure the opener is plugged in and the outlet has power by testing a simple lamp in the same outlet. Replace remote batteries and verify you’re using the correct remote for the unit. If you have a wall switch, press it and watch the door closely for any movement. Inspect the safety beams (the infrared sensors) for misalignment or obstruction; they must face each other directly with a clear path. Finally, look for obvious obstructions on the tracks, such as toys or debris, and verify the door is not physically jammed by hand—lift gently and note if it’s unusually heavy or sticky. These steps are low-risk and frequently resolve the issue. The goal is to rule out the simplest causes first.
Common failure points explained
There are a few failure points that commonly cause a garage door not to work. Power issues are frequent because outlets and power surges can trip the opener’s circuit. Sensor problems are also common; misalignment or dirty lenses can stop the door from closing for safety reasons. The drive system—whether it's chain, belt, or screw—can wear, slip, or stall under load. Torsion springs and cables are critical for lifting the door; if they break or lose tension, the door may stay put or crash down. Finally, the logic board or remote receivers can fail, causing unresponsive controls. Understanding these categories helps you target your checks without guessing at the wrong component. The GarageDoorAdjust analysis, 2026, emphasizes starting with power, sensors, and basic mechanical binding before delving into electronics.
If you recently vacuumed or cleaned around the opener, ensure that any wiring remains intact and that there are no tripped boards or damaged connectors.
Testing the safety sensors and opener
Testing the safety sensors helps verify that the door’s safety features are functioning. First, unplug the opener and manually inspect the sensor lenses—clean them gently with a dry cloth and recheck alignment. Reconnect power and test with the remote, the wall switch, and the exterior keypad if you have one. A simple trick: place a small object in the beam’s path and attempt to close the door—if it reverses smoothly, the sensor is at least partially working; if it doesn’t reverse, re-check alignment and obstruction. If the door still won’t respond to the remote, check the opener’s light codes or blinking patterns in the user manual. This process helps you distinguish between sensor issues, loose wiring, and motor faults without jumping to worst-case assumptions.
If you see error indicators on the opener itself, consult the manual and reset the system if instructed.
Using the diagnostic flow to identify the issue
A structured diagnostic flow reduces guesswork. Start with a symptom: the door won’t open, won’t close, or opens and stops mid-way. Then list probable causes—prioritize high-fidelity checks first: power supply, remote and sensor alignment, track obstructions, and spring status. Apply the corresponding fixes gradually, testing after each step to see if the problem is resolved. If you reach the point where you suspect a broken spring or motor failure, stop and call a professional; these parts require special tools, training, and safety procedures. End each step by confirming the door’s movement under manual and powered operation to ensure the issue is fully addressed. GarageDoorAdjust emphasizes using a calm, methodical approach so you don’t miss a simple cause or risk injury.
Step-by-step: practical fixes for common issues
- Power and remotes: Unplug the opener, wait 10 seconds, plug back in, and verify the light turns on. Replace the remote batteries if needed. 2) Safety sensors: Clean and realign the lenses; ensure the beam has a clear path. 3) Tracks and rollers: Inspect for debris and smooth movement by hand; lightly lubricate any metal-on-metal contact points. 4) Wall control: Test from both the wall switch and the remote to isolate control sources. 5) Balance test: Disconnect the opener (pull the emergency release lever) and lift the door manually; it should stay put if balanced. If it drops or lifts unevenly, springs or tracks may be at fault. 6) Reconnect and test: Reattach the opener, run a full open/close cycle, and observe for hesitations or unusual noises. 7) If unresolved, escalate: Do not attempt to adjust springs yourself; contact a licensed professional. Time estimates vary, but this sequence typically takes 30–60 minutes for non-dramatic issues and longer if parts require replacement.
Safety reminders and maintenance
Always unplug the opener before performing internal checks. Wear protective gloves and eye protection when handling moving parts or springs. If you notice any crackling, burning smells, or exposed wiring, stop immediately and seek professional help. Keep children and pets away from the work area. When in doubt, err on the side of caution and call a pro rather than attempting risky repairs yourself. Maintenance is simpler than you think: keep tracks clean, lubricate moving parts, and check hardware tightness to prevent future failures.
Maintenance tips to prevent future failures
After you’ve resolved the current issue, preventive maintenance reduces the chances of recurrence. Lubricate the moving parts every 3–6 months with a light garage-door-specific lubricant, focusing on rollers, hinges, and track joints. Tighten loose hardware and ensure the tracks are clean. Test the safety reversing sensor monthly and recalibrate if necessary. Inspect the springs and cables during routine checks; do not adjust springs yourself unless trained. Schedule professional inspections annually to catch wear early, especially if you use your door daily. By adopting a simple maintenance routine, you can extend the life of the mechanism, maintain safe operation, and reduce emergency repair costs. The GarageDoorAdjust team recommends documenting maintenance tasks to track wear over time.
Real-world scenarios and quick fixes
Consider the most common real-life situations: a door that hums but won’t lift (likely spring tension or track binding); a door that drops quickly (safety sensor or misalignment); a door that opens partially then stops (limit switch or motor overload). For a hum without movement, unplug and safely test the springs; if you hear grinding, the opener gears or belt may need replacement. If the door moves only when you assist it halfway, check the balance with your door; misbalance indicates internal wear. Each scenario has a distinct fix path, and following the diagnostic flow will guide you to safer, more reliable results. This approach empowers homeowners to handle small faults and escalate only when necessary.
Steps
Estimated time: 45-90 minutes
- 1
Check power and reset
Unplug the opener for 10 seconds, plug back in, and confirm the opener light activates. If it does not, test another device on the same outlet to verify power.
Tip: A simple outlet test saves misdiagnosis. - 2
Test remote and wall switch
Replace remote batteries and verify that both the remote and wall switch trigger door movement. If only one control works, the other may need replacement or reprogramming.
Tip: Keep batteries fresh for reliable signals. - 3
Inspect safety sensors
Check for misalignment or dirty lenses; clean with a dry cloth and ensure both sensors face each other. A misaligned sensor can prevent operation.
Tip: Alignment toys and glare can throw off sensors. - 4
Check tracks and rollers
Look for obstructions in the tracks and ensure rollers move freely. Remove debris and lubricate moving parts lightly with garage-door lubricant.
Tip: Avoid over-lubricating, which can attract dust. - 5
Test door balance manually
Disconnect the opener (emergency release) and lift the door halfway. If it falls or drifts, springs or balance are off; do not adjust springs yourself.
Tip: A balanced door should stay put when paused. - 6
Reconnect and test
Reconnect the opener, then run a full open/close cycle. Listen for grinding, note resistance, and observe safety reversal behavior.
Tip: Document any sounds or hesitations for the pro when you call. - 7
Call a professional if unsure
If you suspect a broken spring, damaged track, or electrical fault, stop DIY work and contact a licensed technician. These repairs require specialized tools and safety procedures.
Tip: Safety first: springs and torsion systems can cause serious injury.
Diagnosis: Garage door is not working
Possible Causes
- highPower issue
- mediumSensor misalignment
- lowTrack obstruction
- lowSpring or cable wear
Fixes
- easyCheck power outlet and reset the breaker; plug the opener back in and test
- easyRealign safety sensors and clear obstructions; retest movement with door balanced
- easyClear tracks and lubricate rollers; test open/close cycle again
- hardIf springs or cables show wear or damage, call a professional immediately
Got Questions?
My garage door won’t open even though the opener light is on. What should I check first?
Check power continuity, the remote battery, and sensor alignment. If these pass, test the wall switch and the manual release to ensure the door is balanced. If the door still stalls, there may be an issue with the opener’s drive system or springs, which requires professional inspection.
Check power, battery, and sensors first. If it still won’t move, consider the opener drive or springs and call a pro if needed.
How can I tell if a spring is broken?
A broken spring may show a gap, visible wear, or the door feels significantly heavier than usual. If you suspect a break, do not attempt to repair it yourself and contact a licensed technician immediately.
Look for a visible gap or heaviness when lifting. Don’t DIY spring work; call a pro.
Can I adjust the torsion springs myself?
No. Torsion springs operate under high tension and can cause severe injury. Only licensed technicians with proper equipment should adjust or replace springs.
Spring adjustment is dangerous; leave it to a professional.
What does it mean if the door stops mid-cycle?
Mid-cycle stopping can indicate sensor interference, track binding, or motor overload. Check sensor alignment and tracks first, then test the limit switches. If unresolved, seek professional inspection.
If it stops mid-cycle, check sensors and tracks before calling a pro.
Is a sudden loud grinding a sign of a major problem?
Loud grinding can indicate worn bearings, gears, or misalignment. Stop using the door and consult a technician to prevent further damage.
Loud grinding isn’t normal—stop and call a pro.
How often should I maintain my garage door?
Perform basic maintenance every 3–6 months: check hardware, clean tracks, lubricate moving parts, and test safety sensors. Schedule a professional inspection annually.
Do quick checks every few months and a yearly pro inspection.
Watch Video
Quick Summary
- Start with power, sensors, and tracks before deeper diagnostics
- Balance safety and professional limits; call a pro for springs
- Regular maintenance reduces emergency repairs
- Document steps and tests for accurate troubleshooting