How to Fix a Garage Door Remote: A Homeowner’s Guide
Learn how to fix a garage door remote with a clear, step-by-step process: diagnose common causes, replace the battery, re-pair with the opener, and prevent future issues. By GarageDoorAdjust, this guide helps homeowners troubleshoot quickly and safely.

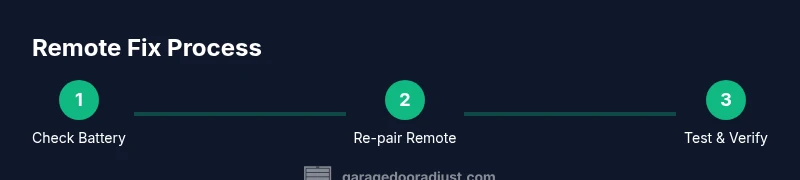
In this guide you will learn how to fix a garage door remote: diagnose common causes (dead battery, worn buttons, programming mismatch), reset and re-pair the remote, and verify operation with your opener. You'll need fresh batteries, a small screwdriver, and access to your garage door receiver. No special tools required for most fixes.
Common Causes of Garage Door Remote Issues
If your garage door remote suddenly stops working, the cause is usually easy to identify. According to GarageDoorAdjust, the most frequent culprits are a weak battery, worn button contacts, or a mismatch between the remote and the opener's learning memory. Other sources of trouble include interference from nearby electronics, a damaged remote shell, or a receiver in the opener that has lost its pairing. Approach the problem methodically: start with the simplest fix (battery) and move toward more involved checks (learn sequence and hardware). This approach reduces guesswork and helps homeowners avoid unnecessary replacements. Throughout this process, remember that patience and a calm workspace yield better results and fewer mistakes. The GarageDoorAdjust team emphasizes clarity over force, especially when handling plastic remotes and delicate learning circuits.
Battery Checks and Replacements
Battery issues are the most common reason remotes fail. Begin by removing the cover to expose the coin cell, if applicable. Inspect for corrosion on the contacts; any white or green residue means cleaning is needed or the button may be failing. Replace with the correct battery type as indicated by the remote’s markings. When inserting, align the polarity exactly as shown in the compartment. After replacement, press the buttons to confirm the circuit responds with a small LED flash or audible click. If the LED remains faint or unresponsive, the battery may be defective or the remote may require internal repair. Keep spare batteries on hand to avoid downtime and frustration.
Re-Pairing and Programming the Remote
Pairing a remote with a garage door opener is a common step after battery replacement or if the remote has never been paired. Locate the Learn or Program button on the opener itself (often near the antenna) and press it briefly to put the receiver into learn mode. Then press and hold the remote button you want to use for 3–5 seconds. The opener should respond with a click or light flash, indicating a successful pairing. Some models require you to perform a specific sequence in the opener’s manual or a small reset of the receiver. If pairing fails, repeat the process from the beginning and ensure you’re within a reasonable range of the receiver during the learn phase. Always confirm the pairing by testing from a few feet away and near the door.
Interference and Range: Why Signals Fail
Even when the battery and pairing are correct, interference can disrupt signal transmission. Common culprits include Wi‑Fi routers, cordless phones, baby monitors, and other wireless devices operating on similar frequencies. Physical obstructions like metal shelving, vehicles, or thick walls can also shorten the effective range. To minimize interference, move other wireless devices away from the opener, and keep the remote within a clear line of sight to the receiver. If you notice intermittent responses, test the remote from gradually increasing distances and with the door both open and closed to gauge consistency. The goal is reliable operation within your typical garage layout.
Button Wear and Remote Case Maintenance
Buttons that stick or feel mushy often indicate wear on the rubber contact or shell damage. If you notice sticky residues, clean the button area with a dry microfiber cloth and a tiny amount of isopropyl alcohol on a swab. Avoid soaking or using excessive moisture. Inspect the remote casing for cracks or warping that could allow moisture or dust to affect the circuit board. If the internals are exposed or the buttons no longer depress evenly, consider replacing the remote shell or the entire remote. Regular cleaning and gentle handling extend the life of the remote and prevent misreads when you press a button.
Learn Menu and Receiver Limitations
Some remotes use different learning modes or require multiple remotes to be paired onto the same receiver. Check whether your remote is compatible with your opener model and whether the receiver has a limit on how many remotes can be stored. If you’ve recently replaced the opener or added a new remote, ensure the correct model is being used and that the receiver is still within its pairing limit. If your model uses rolling code or frequency-hopping, you may need to reset the receiver or update the firmware according to the manufacturer’s instructions. This step helps prevent future pairing conflicts and improves long-term reliability.
Testing and Verification
After you complete repairs or re-pairing, test the remote at multiple points around the garage. Stand inside the garage to verify an immediate response when pressing the button, then step outside and attempt to operate the door from different distances. Confirm that both fully closed and fully open states respond consistently. If you have a secondary remote, test it as well to rule out a single-shot failure. Document the results in a simple log so you know what worked and what didn’t for future reference. Testing thoroughly now saves you time later and gives you confidence in your fix.
Common Mistakes to Avoid
Rushing through battery replacement or attempting to force open the remote housing can damage the internal circuit and void warranties. Avoid mixing up battery orientations or using the wrong type, which can leak or short the circuit. Do not skip the pairing step after replacement, as an unpaired remote will appear to work but not control the door. Refrain from placing the remote near strong magnets or heat sources, which can degrade the components. Finally, never attempt to diagnose high-voltage components inside the opener unless you are trained, as this can be dangerous.
When to Replace vs Repair
Not all remote failures are repairable. If the remote’s PCB is cracked, the buttons are permanently stuck, or the case is severely damaged, replacement is usually the most cost-effective option. If the fix is small—battery replacement, light cleaning, or re-pairing—the remote can be restored to full function at minimal cost. Compare the price of a replacement remote with your opener’s safe operating life and warranty terms. In some cases, it may be prudent to replace the entire system if multiple remotes fail or the receiver is outdated.
Maintenance Tips to Prevent Future Issues
Regular maintenance reduces the chance of future remote failures. Keep the remote sealed and away from moisture, heat, and dust. Clean the battery contacts and button surfaces every few months to prevent corrosion. Replace batteries yearly or when you notice reduced responsiveness, and have spare batteries on hand. If you use a universal remote, ensure it is compatible with your opener and re-pair after any service work. Finally, keep a backup remote in a known place so you’re not locked out of the garage when one remote fails.
Safety and Tools Checklist
Safety comes first when working with garage door equipment. Disconnect the garage door from the opener if you must intervene near the track or spring area, and never place fingers in the track or under moving parts. Use the correct tools to avoid damaging the remote or opener. Wear eye protection if you’re cleaning contacts or removing hardware. Finally, consult the opener’s manual for model-specific safety notes and avoid making changes that could affect the door’s balance or reverse safety mechanism.
Next Steps If It Still Fails
If you’ve gone through all the steps and the remote still won’t work, the issue may be with the opener receiver itself or a deeper compatibility problem. Consider testing with a different remote or contacting the manufacturer’s support. If your system is older, a replacement remote or even a new opener may be the most reliable long-term solution. The GarageDoorAdjust team recommends seeking professional assistance when you suspect the receiver hardware is at fault or when dealing with high-torque door mechanisms.
Tools & Materials
- Fresh battery (type specified by your remote)(Check the battery type printed on the remote or in the manual)
- Small screwdriver (Phillips #0 or flathead)(To open the remote housing without damage)
- Lint-free cloth(For cleaning contacts and removing residue)
- Paperclip or reset tool(Useful for re-engaging small reset or learn buttons)
- Owner’s manual or opener learn guide(Helpful for model-specific pairing steps)
Steps
Estimated time: 25-40 minutes
- 1
Check battery and replace if needed
Power is the first thing to verify. Remove the remote cover and inspect the battery. If the battery shows signs of bulging, corrosion, or is visibly depleted, replace it with the correct type. After inserting the new battery, press a few buttons to confirm the circuit responds.
Tip: Use a fresh battery and keep spare ones on hand to avoid downtime. - 2
Open the remote housing
Use a small screwdriver to gently pry the housing apart along the seam. Work slowly to avoid cracking plastic clips. Set the cover aside and inspect the battery contacts for dirt or corrosion.
Tip: Take a photo of the internal layout before removing components to aid reassembly. - 3
Install the fresh battery with correct orientation
Insert the new battery ensuring the polarity matches the diagram inside the compartment. If you see corrosion, clean the contacts with a dry cloth. Snap the battery into place and ensure it sits firmly.
Tip: Align the battery in the correct direction; a reverse insertion won’t power the remote. - 4
Clean contacts and inspect the shell
Wipe the battery contacts and interior housing to remove any residue. Look for cracks or bent connectors and correct gently if possible. A clean, undamaged path improves electrical contact.
Tip: Avoid using liquids; moisture can damage the circuit board. - 5
Reassemble the remote housing
Carefully snap the two halves back together, ensuring all clips engage. Press the buttons a few times to verify they depress smoothly. Reinstall the outer screws if present.
Tip: Test the remote on a flat surface to hear a click when resealed. - 6
Put the opener into learn mode
Locate the Learn/Program button on the opener unit and press it briefly to enter pairing mode. The indicator light or LED will show it’s ready to pair.
Tip: If you’re unsure of the button location, consult the owner’s manual for your model. - 7
Pair the remote to the opener
Within a few seconds of entering learn mode, press and hold the remote’s chosen button until you hear a click or see the LED flash. This confirms the pairing.
Tip: Keep the remote within a few feet of the opener during this step. - 8
Test operation around the garage
From inside the garage and from outside the door, test the remote at several distances. Ensure the door opens and closes reliably and the opener ignores stray signals.
Tip: If the door reverses unexpectedly, stop and recheck safety sensors and alignment. - 9
Document results and plan next steps
Record whether the battery replacement and pairing resolved the issue. If not, note any additional symptoms to guide future troubleshooting or a call to support.
Tip: Keep this log with the remotes and the opener manual.
Got Questions?
Why won't my garage door remote work after replacing the battery?
If a new battery doesn’t fix the issue, the problem may be with the remote’s circuitry, the receiver in the opener, or an improper re-pairing. Double‑check battery orientation and ensure the remote is correctly paired to the opener.
A new battery isn’t always enough. Verify orientation and the pairing sequence, and rule out receiver or remote damage.
How do I re-pair the remote with the opener?
Enter the opener’s Learn or Program mode, then press the remote’s button for several seconds until the opener signals a successful pairing. Consult your model’s manual for any model-specific steps.
Put the opener in learn mode and hold the remote button until you hear a signal. Check the manual for model-specific details.
Can distance or interference cause remote failure?
Yes. Signals can be disrupted by nearby devices or structures. Move away from potential interference sources and test the remote from various distances to confirm consistent operation.
Interference can block signals. Move away from other wireless devices and test at different distances.
Is a damaged remote safe to use?
A physically damaged remote should not be used. Replace the remote to avoid shorts or unreliable performance and to protect the opener’s receiver.
If the remote is cracked or wet, replace it rather than trying to repair it.
Should I replace the remote or the receiver?
If multiple remotes fail or the receiver shows signs of wear, replacement of the remote or receiver may be warranted. Compare costs and warranties before deciding.
If several remotes fail or the receiver is old, it may be better to replace the component that is most likely to fail soon.
How long should a garage door remote battery last?
Battery life depends on usage and the environment. Regular checks and timely replacements prevent unexpected failures.
Battery life varies with use—check periodically and replace as needed.
Watch Video
Quick Summary
- Identify battery issues first; they are the most common cause.
- Re-pairing after battery replacement is often required for reliable operation.
- Interference can reduce range; relocate other wireless devices when testing.
- If the remote continues to fail, weigh replacement versus receiver issues and seek professional help.