Garage Door Opener Remote: Troubleshooting, Programming & Replacement
Learn how to diagnose, reprogram, and replace a garage door opener remote. This guide covers battery checks, pairing with your opener, troubleshooting range, and essential home-safety tips.

This guide shows homeowners how to diagnose issues with a garage door opener remote, reprogram it to work with their opener, and replace a lost or faulty unit. You’ll learn battery checks, pairing procedures, range troubleshooting, and safety basics. Gather your remote, your opener model, and a spare battery before starting.
How a garage door opener remote communicates
A garage door opener remote uses radio frequency signals to send a command to the opener motor. When you press a button, the remote transmits a code that matches the receiver inside the opener. The system relies on three factors: the correct frequency, a successful pairing (or learning) process, and a strong, unobstructed line of sight for reliable range. Understanding these basics helps you diagnose why a remote may fail—whether the issue is the battery, the pairing memory, or interference from nearby devices.
Tip: If you recently installed new electronics nearby (router, baby monitor, cordless phone), interference is more likely. Move the opener area or re-pair the remote after clearing interference.
Diagnosing common remote issues
Before you jump into reprogramming, run through a quick checklist to identify the root cause:
- Check the battery: a weak battery is the most common culprit. Replace with a high-quality CR2032 coin cell if needed.
- Inspect the remote for damage: cracks, moisture, or corrosion can disrupt signals.
- Verify compatibility: ensure the remote is designed for your specific opener model and frequency.
- Test the LED indicator: when you press a button, a quick blink usually signals power and transmission. A dead LED may indicate a dead battery or a faulty remote.
- Consider interference: other remotes or devices on similar frequencies can interfere with signal reception.
If the LED blinks but the opener doesn’t respond, the problem is often pairing or receiver memory rather than power. In that case, you’ll need to re-pair the remote or reset the opener’s learning memory.
Tip: Keep a spare remote on hand for quick testing and to confirm whether the issue is with a single remote or the opener system.
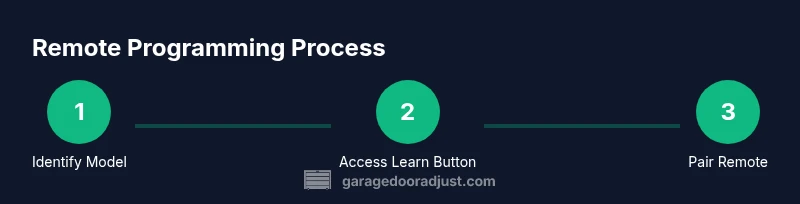
How to program or re-pair your remote with the opener
Programming methods vary by brand and model, but the universal steps are:
- Locate the Learn/Program button on the opener unit; you may need to remove the light cover or panel to access it.
- Prepare the remote you want to pair with the opener. Ensure it has a fresh battery and is within a few feet of the opener.
- Press and release the Learn button on the opener (the indicator LED usually blinks or stays lit).
- Within 30 seconds, press and hold the remote button you want to program until you hear a click or see the LED blink, confirming the pairing.
- Test the remote from a distance to ensure consistent operation. If it fails, try again or consult the model’s manual for model-specific steps.
If your opener uses a different programming method (infrared or a keypad unit), follow the manufacturer’s instructions. Always re-test after each attempt to isolate issues.
Tip: If you’re pairing multiple remotes, repeat the steps for each remote, ensuring you don’t overwrite existing pairings unintentionally.
Replacing a lost or damaged remote
If programming fails after battery replacement and correct pairing, the remote may be beyond repair or incompatible with newer openers. Consider replacing with a new remote that matches your model’s frequency and learning protocol. When buying, check the opener model number, frequency (often printed on the receiver), and the compatibility list from the manufacturer. After replacement, repeat the pairing steps to establish a fresh connection.
Tip: Always purchase from reputable retailers or the manufacturer’s site to avoid counterfeit or incompatible remotes. Keep the original user manual or a digital copy for reference when pairing.
Maintenance tips to extend remote life
- Protect from moisture and heat: store remotes away from direct sunlight and humid areas.
- Replace batteries promptly: weak batteries extend signal latency and reduce reliability.
- Clean the case and button contacts: light electrical contact cleaner can help if inputs become sluggish.
- Use a protective keychain mount: prevent drops that could crack the housing and disturb the internal antenna.
- Periodically test all remotes: confirm each remote still operates the opener reliably from typical distances.
Following these practices reduces the likelihood of unexpected failures and keeps your entry points secure.
Tools & Materials
- Compatible garage door opener remote(s)(Have at least one spare for testing; ensure model compatibility with your opener.)
- Battery (CR2032 coin cell)(Use a fresh battery; dispose of old batteries properly.)
- Screwdriver (if needed to access Learn button)(Phillips or flat-head depending on cover screws.)
- Ladder or sturdy step stool(Access the wall-mounted Learn button comfortably.)
- Opener manual or model-specific guide(Helpful for model-specific pairing steps.)
Steps
Estimated time: 20-45 minutes
- 1
Identify opener model and locate Learn button
Find the exact opener model on the unit or in the manual. Locate the Learn/Program button on the receiver, often behind a light cover near the rail. This step establishes which pairing method you’ll use.
Tip: Note the button’s color and the LED behavior for later reference. - 2
Replace the remote battery
Open the remote housing (if required) and replace the battery with a fresh CR2032 coin cell. Reassemble carefully to avoid misalignment of contacts.
Tip: Only press the old battery out; don’t bend spring contacts. - 3
Test the remote power and LED indicator
Press a button and observe the LED. A dim or absent LED usually means a dead battery or a damaged remote.
Tip: If the LED doesn’t light, don’t press repeatedly; replace the battery and retest. - 4
Put the opener into Learn mode
Press and release the Learn button on the opener. A blinking LED indicates the unit is ready to pair. If there’s a wall switch, ensure it’s in the correct position.
Tip: Hold the button briefly to avoid triggering a different function. - 5
Pair the remote
Within 30 seconds, press and hold the desired button on the remote until you hear a click or see the LED on the opener respond. This confirms the pairing.
Tip: Pair one remote at a time to avoid overwriting other devices. - 6
Test the remote at typical distances
Move a short distance away from the door and press the remote to test range. Repeat from further locations if needed.
Tip: If you experience intermittent response, check batteries and consider RFID-like interference sources. - 7
Add additional remotes (if needed)
Repeat the pairing steps for each additional remote, ensuring each one is linked to the opener correctly.
Tip: Label remotes with room or user name for easy identification. - 8
Document the settings and test again
Record the pairing details and confirm all remotes work from common entry points. Store essential manuals for future reference.
Tip: Update household records to avoid future confusion during maintenance.
Got Questions?
Will any remote work with my garage door opener?
Not all remotes are compatible. Check model numbers, frequency, and learning protocol to ensure the remote is designed for your opener.
Compatibility depends on the opener's frequency and the remote's learning method.
How do I reset my remote to pair with the opener?
Enter the opener's Learn mode and then press the remote button you want to pair until the opener acknowledges. Some models require a different sequence; refer to the manual.
Put the opener in Learn mode, then press the remote button until you hear a confirmation.
What should I do if the remote works intermittently?
Intermittent function is often caused by weak batteries, interference, or misalignment. Replace the battery, re-pair, and check for nearby devices that could cause interference.
Intermittent operation usually points to battery, pairing, or interference issues.
Can I use a universal remote with my garage door opener?
Some universal remotes are compatible; verify model compatibility and programming steps with your specific opener. If unsure, stick with an official remote.
Universal remotes can work, but you must confirm model compatibility and follow proper programming steps.
What maintenance reduces remote failures?
Keep batteries fresh, store remotes properly, clean contacts, and test remotes regularly to catch issues early.
Regularly check batteries, clean contacts, and test remotes to prevent failures.
If my remote is physically damaged, what now?
Replace with a compatible remote. If you’re unsure about compatibility, contact the manufacturer or a local garage-door pro.
If damaged, replace with a compatible remote and consult the manufacturer if unsure.
Watch Video
Quick Summary
- Check batteries first to rule out power issues.
- Follow model-specific pairing steps for reliable results.
- Test range after programming to confirm successful pairing.
- Keep manuals and model numbers handy for future fixes.