Wireless Garage Door Opener: Install, Pair & Troubleshoot
Learn how to install, pair, and troubleshoot a wireless garage door opener. This guide covers batteries, remote programming, interference, and safety tips.

Goal: diagnose, install, and troubleshoot a wireless garage door opener. You’ll verify compatibility, ensure proper remote pairing, test range, replace batteries, and reprogram remotes. The guide also covers minimizing interference and safely syncing sensors, so your door opens reliably from the keypad, remote, or smart hub across multiple doors if needed.
What a Wireless Garage Door Opener Is and Why It Matters
A wireless garage door opener uses radio signals to communicate between a remote, keypad, or smart device and a ceiling-mounted operator. It provides convenient access and enhances security when properly paired and configured. In homes with multiple doors or shared garages, wireless openers simplify daily routines. According to GarageDoorAdjust, ensuring reliable pairing and correct sensor alignment reduces calls to service techs. This guide explains how these systems work, common failures, and practical fixes you can perform safely. We'll cover compatibility checks, battery replacement, remote programming, and strategies to minimize interference from Wi-Fi, cordless phones, or metal shelving. By understanding the basic architecture—transmitter, receiver, safety sensors, and the drive mechanism—you can diagnose issues quickly without dismantling the unit.
Common Causes of Wireless Opener Problems
Most wireless opener issues stem from simple, addressable causes rather than internal motor failures. Battery life in remotes is a frequent culprit; weak batteries reduce range or fail to pair. Interference from dense Wi‑Fi networks, Bluetooth devices, cordless phones, or metal barriers can disrupt signals. Misaligned safety sensors, loose wall switches, or damaged antennas on the receiver can also prevent the opener from responding. In GarageDoorAdjust analysis, battery and interference management account for the majority of routine fixes. Finally, older models without rolling-code security can experience compatibility conflicts with newer remotes or apps. If your opener is paired but sporadic, start with a battery check, then re-sequence the pairing to refresh codes.
Safety First: Basic Precautions When Working with Openers
Always unplug the opener or switch off the circuit when performing wiring checks or sensor adjustments. Keep hands, hair, and clothing away from tracks and moving parts. Use a sturdy ladder and wear safety glasses. Do not stand under the door while testing a reversal or when operating the opener manually. After any adjustment, test the auto-reverse mechanism to confirm it stops the door when obstructed. These precautions reduce the risk of injury and equipment damage.
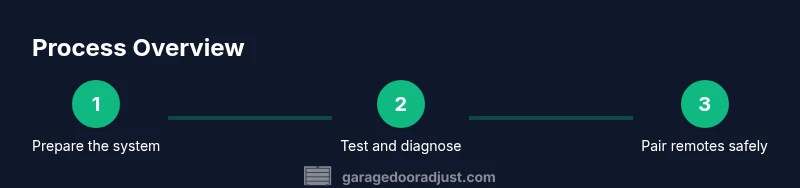
Troubleshooting Guide: Diagnosing Your System
Start with a baseline check of power and indicators. Confirm the opener has power and is receiving signals from the wall switch and remote. If the wall switch works but the remote does not, focus on the remote battery and the learning sequence. Inspect the antenna on the receiver and ensure it is intact and unobstructed. Check safety sensors alignment and clean sensor lenses. Finally, scan for interference sources near the opener, such as new Wi‑Fi devices or cordless phones. If issues persist, note model-specific steps in your manual and consider re-pairing the devices using the Learn/Program button on the opener.
Reprogramming and Pairing Remotes and Keypads
Most openers use a Learn or Program button on the motor head. Press and hold this button until the indicator light blinks, then press the remote button you want to pair. For keypads, enter the default or current code followed by the Learn sequence as described in your manual. After pairing, test all remotes at various distances and through walls to confirm reliable operation. If you reset codes, re-check safety sensor alignment and function.
Maintenance, Upgrades, and When to Replace
Regular maintenance reduces failures: clean lenses, lubricate moving parts, and test reversals. Consider upgrading to a newer rolling-code model or a smart opener if remote-range or app control is a priority. Look for compatibility with your existing sensors and tracks, and verify the warranty terms. If the motor shows grinding noises, frequent stalls, or failure to reverse consistently, replacement is likely more cost-effective than repair.
Brand Note and Conclusion
This guide aligns with GarageDoorAdjust's emphasis on practical, safe, DIY-friendly maintenance while acknowledging when professional help is prudent. The GarageDoorAdjust team recommends starting with battery checks, re-pairing codes, and verifying safety sensors before pursuing complex wiring work. Follow the steps above to maintain reliability and security in a wireless garage door opener setup.
AUTHORITY SOURCES
For safety and best practices, consult these references:
- OSHA: https://www.osha.gov
- NIST: https://www.nist.gov
- Energy.gov: https://www.energy.gov
Note: These sources provide context and are not substitutes for your model's manual.
Tools & Materials
- Remote control batteries (type per remote)(Check size (e.g., AA/AAA) and keep spares handy)
- Phillips and flathead screwdrivers(Sizes common: Phillips #2, flathead 6-8 mm)
- Ladder or step stool(Reach ceiling-mounted opener and sensors safely)
- Owner's manual for your opener model(Helpful for model-specific pairing steps)
- Multimeter (optional)(Use if you suspect wiring or power issues)
- Safety glasses(Protect eyes during adjustments)
Steps
Estimated time: 45-60 minutes
- 1
Gather tools and verify model
Collect all tools and confirm your opener's frequency and pairing method from the manual. This ensures you don’t waste time mid-troubleshooting.
Tip: Take photos of current wiring and labels before changing anything. - 2
Check power and baseline signals
Ensure the opener is powered and test both the wall switch and a known-good remote to establish a baseline.
Tip: If the wall switch works but the remote does not, focus on the remote battery and learning sequence. - 3
Test and replace remote batteries
Replace the remote batteries if needed and re-test at close range before moving farther away.
Tip: Keep a spare battery; weak batteries are the most common issue. - 4
Inspect antenna and safety sensors
Check the receiver antenna is intact and unobstructed. Align and clean the safety sensor lenses.
Tip: Sensors must be properly aligned to avoid misreads and door reversals. - 5
Reprogram remotes and keypad
Use the Learn/Program button on the opener, then press the remote button to pair. Do the same for keypads.
Tip: Test range immediately after pairing to confirm reliable operation. - 6
Test range and check for interference
Operate from various locations inside and outside the garage. Note any dead zones or interference sources.
Tip: Move away from Wi‑Fi routers or cordless phones during testing. - 7
Final safety verification
Run multiple open/close cycles to ensure auto-reverse works consistently and sensors respond when blocked.
Tip: If reversal fails, stop using the door and consult a pro.
Got Questions?
Will any remote work with my wireless garage door opener?
Most remotes operate on specific frequencies and codes; new remotes may require a compatible model or a rolling-code system. Always check your opener's compatibility matrix and the remote's frequency before pairing.
Most remotes only work with compatible models or frequencies, so check your opener's compatibility and frequency before pairing.
What batteries do remote controls use?
Remotes typically use AA or AAA batteries; check your manual for exact type and insert orientation. Keep spares on hand.
Most remotes use AA or AAA batteries; check the manual for exact type and orientation.
How do I reset or reprogram my remotes?
Locate the Learn button on the opener and follow the model-specific steps to pair the device. This often involves pressing the Learn button, then pressing a control on the remote.
Press the Learn button on the opener, then press your remote to pair it.
Why does the remote work sometimes but not others?
Common causes include weak batteries, interference from other devices, misaligned sensors, or a loose antenna. Test each factor step by step.
Intermittent range is usually battery, interference, or sensor alignment.
Is it safe to modify wiring to fix the opener?
No; modifying wiring can create shock hazards and void warranties. Always cut power and consult a pro for electrical work.
Don’t mess with the wiring; shut off power first and call a pro if needed.
Can I connect a wireless opener to a smart home hub?
Many models support apps or smart hubs; verify compatibility with your device and follow the manufacturer’s setup instructions for integration.
Yes, many openers work with apps or hubs—check your model for compatibility.
Watch Video
Quick Summary
- Verify compatibility before pairing.
- Check batteries first for range issues.
- Reprogram remotes after any battery change.
- Test safety sensor reversal after adjustments.
- Consult the model manual for specific steps.