Garage Door Remote Installation: A Complete How-To
Learn to install and pair a garage door remote with your opener. This guide covers compatibility, safety, testing, and maintenance for reliable daily use.

In this guide you will install and pair a garage door remote with your opener, test the range, and add extra remotes if needed. You’ll need a compatible remote, fresh batteries, and access to the opener’s learn button. Follow the step-by-step instructions for a safe, reliable setup that works in daily use.
Understanding garage door remote basics
Understanding how a garage door remote works helps you pick the right unit and pair it correctly. In essence, remotes send a radio signal to a receiver in the opener. The receiver interprets the signal and actuates the motor to raise or lower the door. Most residential openers use either a fixed code or rolling code system, and the remote must match. According to GarageDoorAdjust, the most common pairing failures come from mismatched frequencies or outdated receivers, so the compatibility check is the first step. In this section we cover frequency bands, learning methods, and how to read your opener model number. You’ll encounter terms like rolling code and code type—these indicate security features that modern remotes implement to prevent unauthorized opening. If you’re upgrading from an older remote, you’ll notice a tighter pairing process because many newer openers have enhanced security. The goal is to select a remote that matches both the frequency and the code type, and then learn it to your opener to enable reliable operation. This chapter also touches on whether a universal remote can work with your system and how to avoid common mismatches that cause doors to respond inconsistently. Throughout, plan to test the remote at different distances and angles, since walls, vehicles, or metal shelving can affect range. Armed with the right remote and a good understanding of your system, you’ll be ready to move to the next steps.
Compatibility and selecting the right remote
Choosing the right remote starts with knowing your opener’s frequency and code type. Most residential systems use 315 MHz or 390 MHz, and the remote’s compatibility must align with your receiver. If your opener uses rolling codes, ensure the remote supports rolling code technology; fixed-code remotes won’t learn. Check the model number on your opener or its manual, then compare it to the remote’s compatibility list. The GarageDoorAdjust team emphasizes verifying frequency bands and learning methods before purchase to prevent wasted effort. When shopping, look for remotes labeled for your brand or a universal model explicitly stating compatibility with your opener. If you already own a compatible remote, skip to the pairing steps. If not, purchase from a reputable source and avoid very old remotes that may not pair reliably with newer openers. Remember that some openers require a separate receiver module for third-party remotes, although many modern units pair directly. In all cases, confirm one more time that you have the correct code type and frequency to prevent misfires or erratic operation.
Safety considerations before you install
Safety comes first when working with powered doors. Disconnect power to the opener if you will be handling internal components or opening the device housing. Wear safety glasses to protect your eyes from small parts and springs, and keep children and pets away from the workspace. If your garage door has safety sensors near the floor, avoid bypassing or disabling them; they protect against injuries and property damage. Have fresh batteries ready for the remote and test the system while the door is in a controlled position (not while people are nearby). If you are unsure about electrical safety in your region, refer to local codes and safety guidelines. As a precaution, review the manufacturer’s instructions and avoid forcing covers or connectors. This is also a good time to inspect weather seals and track alignment, ensuring the door opens and closes smoothly before you begin programming.
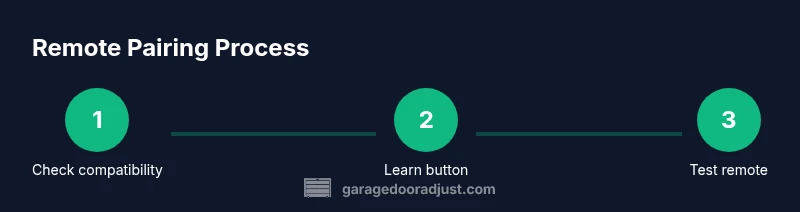
Step-by-step overview of the installation process
This section provides a high-level view of the steps you’ll perform in the following detailed steps. First, verify compatibility and prepare the remote. Next, access the indoor opener and locate the Learn/Program button. Then, insert a fresh battery into the remote and set the remote to pairing mode as instructed by the manufacturer. On the opener, initiate Learn mode, then press the remote button to create a link. Finally, test the remote from various distances and angles, and repeat for any additional remotes. This overview helps you understand sequencing and timing, which reduces the chance of failed pair attempts. For tricky models, you may need to remove a cover or loosen a small screw; consult your manual for model-specific steps. If your door has an integrated wall switch or keypad, decide whether you want to program those devices as well to maintain consistent behavior across control points.
Common issues and troubleshooting after installation
Many pairing problems stem from simple mistakes: dead batteries, incorrect button presses, or conducting pairing while the opener was not in Learn mode. If the remote won’t pair, recheck the frequency, ensure the battery is fresh, and confirm you are using the correct Learn button sequence for your model. Some openers require you to hold the Learn button for a certain duration, while others use a single press. If the door does not respond consistently, check the remote’s range and angle because metal walls, cars, or stored tools can block the signal. If multiple remotes are not working, you may need to reset the opener’s memory and re-pair each remote from scratch. Always re-test after adjustments and ensure safety sensors are aligned and unobstructed. By following these steps, you minimize frustration and ensure reliable operation over time.
Maintenance tips to keep remotes reliable
Keep remotes in good condition by replacing batteries on a regular schedule and wiping the housing with a soft, dry cloth to remove dust and oils. Avoid exposing remotes to moisture or extreme temperatures, which can degrade the battery and circuitry. If a remote starts to fail, try re-pairing it before replacing it; sometimes re-learning cures intermittent behavior. Store remotes away from metal objects that could interfere with the signal and consider labeling remotes for different doors if you have more than one. Periodically check the opener’s antenna for signs of wear and ensure the wall control panel is functioning.
Authoritative sources and next steps
To support safe and effective practice, consult established safety and standards resources. For general safety guidelines and electrical considerations, visit:
- https://www.osha.gov
- https://www.cpsc.gov
- https://www.nist.gov
These sources provide context on safe handling, electrical basics, and consumer product safety that complement this guide. By applying best practices and staying informed, you can complete future remote installations with confidence.
Tools & Materials
- Compatible garage door remote(Ensure it matches your opener’s frequency (315 MHz or 390 MHz) and code type.)
- CR2032 or similar coin-cell battery(Replace if the old battery is weak.)
- Opener access tool (small screwdriver, if needed)(Used to remove the cover on some models.)
- Clear workspace and spare batteries(Have extras on hand for multiple remotes.)
Steps
Estimated time: 15-30 minutes
- 1
Check compatibility and prepare the remote
Review your opener model to confirm frequency and code type. Gather a fresh battery for the remote and any required tools. This step prevents wasted effort and ensures the pairing will succeed on the first try.
Tip: Double-check the exact model number and frequency before purchasing the remote. - 2
Access the opener and locate the Learn button
Unplug or switch off the opener if your model requires it. Remove the light cover if needed and locate the Learn/Program button. Some models hide this button behind a panel or under the light cover.
Tip: If you can’t find the button, consult the manual or manufacturer’s site for your exact model. - 3
Insert battery and set remote to pairing mode
Install a fresh battery in the remote. Press and hold the remote’s button to prepare it for pairing, following the remote’s instructions (some remotes require you to press and hold for several seconds).
Tip: If your remote has a small set button, use it to activate pairing mode. - 4
Put the opener into Learn mode and pair
Press or hold the Learn button on the opener until the light blinks or a beep indicates Learn mode is active. Then press the remote button to pair; the opener should respond with a signal or light.
Tip: Timing matters—don’t delay between Learn activation and remote button press. - 5
Test the remote and pair additional remotes
Test the remote by pressing the open/close button. If you have multiple remotes, repeat the process for each one. Confirm reliable operation from different spots in the garage.
Tip: Pair any extra remotes immediately to avoid future re-pairing. - 6
Finalize and safety check
Reassemble any covers, reattach safety sensors if you disturbed them, and ensure the door operates smoothly with the new remote. Tidy the workspace and store the manual for future reference.
Tip: Always re-check safety sensors and door balance after any changes.
Got Questions?
Do I need a new opener or receiver to use a new remote?
Not always. If your opener supports the remote’s frequency and code type, you can pair without replacing hardware. Some older systems require a receiver upgrade. Check your model’s compatibility guide before buying a new remote.
Most openers can pair with a compatible remote, but some older systems may need hardware upgrades.
Why won’t my remote pair after following the steps?
Common causes are dead batteries, using the wrong Learn button, or attempting pairing while the opener isn’t in Learn mode. Recheck compatibility, replace the battery, and retry the Learn sequence.
Pairing usually fails due to battery or wrong Learn mode—recheck the steps and retry.
Can I program multiple remotes at once?
Yes. After pairing the first remote, you can typically repeat the Learn sequence for additional remotes. Some models require you to reset memory between remotes, so consult your manual.
Yes, you can pair more remotes by repeating the Learn sequence per device.
What if the Learn button on the opener is not responding?
Verify power to the opener, check for blown fuses, and ensure the button isn’t stuck. If needed, perform a soft reset as recommended by your manufacturer.
If Learn is unresponsive, power and wiring checks are a good first step.
Is it safe to install a remote myself?
Yes, with proper precautions. Disconnect power before handling hardware, keep children away, and follow the manufacturer’s instructions. If you’re unsure, seek professional help.
Yes, DIY is fine with caution and following the manual.
How often should I replace remote batteries?
Battery life depends on usage, but a good rule is to check and replace every 1-2 years, or when the remote starts to fail.
Check batteries every year and replace as needed.
Watch Video
Quick Summary
- Prepare compatibility first and gather batteries.
- Follow Learn mode timing for reliable pairing.
- Test range in multiple spots to ensure consistent control.
- Pair additional remotes in the same session to avoid rework.
- Keep safety sensors and door balance in check after programming.