How to Garage Door Remote Replacement: A Step-by-Step Guide
Learn a safe, comprehensive method to replace your garage door remote. Confirm compatibility, program the new remote, and secure your opener with expert tips from GarageDoorAdjust.

You’ll learn how to replace a garage door remote safely and effectively. This guide covers compatibility checks, selecting a replacement, and programming the new remote to your opener, plus security tips and common pitfalls. You’ll need a compatible replacement remote, fresh batteries, a paper clip or pin for the learn button, and your opener’s model information. According to GarageDoorAdjust, verify compatibility before purchase.
Understanding remote compatibility and safety
Replacing a garage door remote starts with understanding compatibility and safety. Not all remotes work with every opener, and attempting to program the wrong frequency can create frustration or cause the device to malfunction. According to GarageDoorAdjust, the most reliable replacements come from models that clearly list compatibility with your specific opener brand and frequency. Before you buy, locate your opener’s model number and frequency in the owner’s manual or on the opener housing. This information will guide you to a replacement that can pair quickly and stay stable over time. In addition to compatibility, consider safety: always test the door with the remote from a safe distance and stand clear of the door path during testing. If you’re unsure about any step, pause and consult the manual or a professional.
- Know whether your system uses a fixed code or rolling code. Rolling-code remotes are more secure but may require a slightly different programming sequence.
- Ensure you’re within a safe testing area. Do not stand under or directly in the door’s path during testing.
- Keep a spare remote in a secure location so you’re not left without access if one remote fails.
Among homeowners, the GarageDoorAdjust team finds that compatibility verification saves time and reduces frustration, making the replacement smoother. This upfront step is the single most important part of a successful remote swap.
Confirming compatibility: opener type, frequency, and remote code
Compatibility confirmation is the backbone of a successful remote replacement. Start by identifying three critical factors: the opener brand and model, the frequency (MHz) the opener uses, and whether it employs a fixed code or rolling code system. The process usually involves checking the opener label for a model number, checking the manual for frequency information, and inspecting the remote itself for any code-switch mechanisms.
- Opener type: Some brands use standardized frequencies, while specialty models may require a specific remote.
- Frequency: Most garage door openers operate around common bands (commonly 300-400 MHz in older models, with newer units often using 315/390/433 MHz). Your replacement must match this frequency to allow proper communication.
- Code system: rolling codes change with every use for security, while fixed codes stay constant.
If you have a rolling-code system, ensure the replacement supports the same rolling-code protocol. If you’re unsure, contact the opener manufacturer or check the model’s compatibility table. Verifying these details prevents the waste of time and money on a remote that won’t program.
When you’re done, double-check that your chosen remote appears on the manufacturer’s compatibility list. Keep a copy of your opener model and frequency handy for future replacements or home upgrades.
Choosing the right replacement remote
Choosing the right replacement remote is not just about matching a model number. You’ll want to consider range, button count, and security features. If you frequently open your garage after parking far away, a remote with extended range is worth the extra cost. If you share access with family members, you might prefer a multi-user remote with easily managed codes. For households with multiple vehicles, a simple, compact design can be easier to carry and store.
- Look for compatibility with rolling-code systems if security is a priority.
- Check the battery type and expected life; some remotes use coin-cell batteries while others rely on standard batteries.
- Compare range claims from manufacturers; real-world range can vary by walls, metal objects, and distance.
GarageDoorAdjust’s guidance emphasizes selecting a remote that matches your opener’s frequency and code system while offering the features you actually need. If you’re replacing an old remote, consider upgrading to a newer model that improves security and reliability.
What you’ll need before you start
Before you dive into programming, assemble the essentials so you don’t interrupt the process. This preparation saves steps and helps you stay focused on the task at hand. Gather the items below and place them on a clean surface near the garage.
- Replacement remote compatible with your opener
- Fresh batteries (as required by the remote)
- Paper clip or small pin for the Learn/Program button
- Owner’s manual or model information for the opener
- Small screwdriver (optional, for remote housing)
Having these items ready ensures you can complete the replacement in one sitting. If you’re uncertain about battery type or button location, consult the manual before starting.
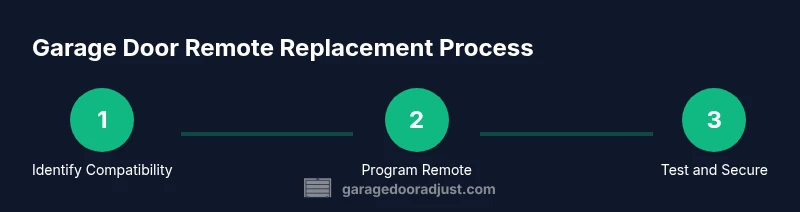
Step-by-step overview for replacement
Here is a high-level roadmap to guide you through the process without getting bogged down in the details. You’ll move from preparation to programming in clear, actionable steps. If you get stuck, pause and refer back to the manual or the manufacturer’s support site.
- Verify compatibility and note the necessary information. 2) Gather your replacement remote and required tools. 3) Open the new remote housing if needed and insert fresh batteries. 4) Locate the Learn/Program button on the opener and prepare to initiate pairing. 5) Use the Learn button, then press the button on the new remote to complete the pairing. 6) Test the remote at various distances and from multiple angles to confirm reliable operation. 7) Reconcile any existing remotes to ensure they all work with the updated system.
Tip: If your remote requires a pairing code, write it down and store it with your home records to simplify future replacements.
Estimated time: 25-45 minutes depending on your openness to troubleshooting and your familiarity with the device.
Programming the new remote (typical method)
Programming a new garage door remote usually follows a consistent pattern across brands, though some devices use slightly different terminology or button sequences. Start with safety checks, then perform the pairing. The most common method involves a Learn/Program button on the opener itself and a button on the remote. The general steps are:
- Stand within one car length of the opener and locate the Learn button. It may be under the light cover or on the side of the motor head. If the button is recessed, use a paper clip to press it.
- Press and release the Learn button. You’ll typically have 30 seconds to complete the next step.
- Within 30 seconds, press and hold the desired button on the new remote until you see a visual cue (light blink or beep) that confirms a successful pairing.
- Test the remote to ensure it opens and closes the door.
If the opener requires a code to be entered, follow the manual’s instructions for code input. Reclaim any safety measures and avoid testing with the door fully open to prevent accidents.
Troubleshooting common pairing issues
Even with careful preparation, you may run into pairing hiccups. Common issues include remote not entering pairing mode, incorrect frequency, or multiple remotes interfering with the unit.
- If the Learn button doesn’t illuminate or the door doesn’t respond, confirm you’re within an appropriate range and the opener is powered. Some units require a press-and-hold sequence rather than a quick press.
- If the remote won’t pair, verify you’re using the correct frequency and code system. Re-check the opener model number and the remote model.
- If you hear a beep but the door won’t respond, try clearing all remotes from the opener, then re-start the programming sequence for each remote.
Security note: If you’ve recently moved or replaced a lockable remote, re-program all other remotes to prevent unauthorized access.
Maintenance, security practices, and final checks
After you’ve replaced and programmed your remote, take a few minutes to reinforce maintenance and security. Keep a spare battery charge and replace them as needed. Regularly inspect the remote’s housing and seals to prevent moisture intrusion. Dust and debris can affect the button’s responsiveness over time.
- Store remotes away from metal surfaces that could interfere with the signal.
- Avoid leaving remotes inside a vehicle in extreme heat, which could damage batteries and circuits.
- Periodically test all remotes to ensure they maintain a reliable signal across different distances.
Security-focused tips: reprogram after vehicle or home changes, and keep your remote in a secure location to prevent loss or theft.
Authority sources
For safety and best practices, consult trusted sources:
- https://www.osha.gov
- https://www.energy.gov
- https://extension.illinois.edu
Tools & Materials
- Replacement garage door remote (compatible with opener)(Choose a model that matches your opener’s frequency and code system (rolling vs fixed) and check compatibility before purchase.)
- Fresh batteries(Ensure you know the correct battery type for your remote.)
- Paper clip or small pin(To press recessed Learn/Program button if needed.)
- Owner’s manual or opener model number(Helpful for confirming compatibility and programming steps.)
- Small screwdriver (optional)(Needed only if remote housing requires opening.)
Steps
Estimated time: 25-45 minutes
- 1
Identify opener compatibility
Locate your opener’s model number and frequency in the manual or on the unit. Confirm whether your system uses a fixed code or rolling code to choose a compatible remote.
Tip: Record model, frequency, and code type for future reference. - 2
Gather tools and replacement remote
Collect the replacement remote, fresh batteries, a paper clip, and the opener manual. Having everything handy reduces interruptions during programming.
Tip: Double-check the remote’s compatibility chart before opening any housing. - 3
Prepare the replacement remote
If required, open the remote case gently and install fresh batteries according to the polarity markings. Reassemble if you opened the housing.
Tip: Do not force buttons or mechanisms; gentle handling prevents damage. - 4
Access the Learn/Program button on the opener
Find the Learn/Program button on the motor head or reaction panel. If recessed, use a paper clip to press and hold the button for the recommended duration.
Tip: Some units require a brief press; others need a held press for several seconds. - 5
Pair the new remote
Within the window after triggering Learn, press and hold the desired button on the new remote until the opener acknowledges (blink or beep).
Tip: Perform the pairing within the allotted time frame (usually 30 seconds). - 6
Test the remote at multiple ranges
Test from the doorway, then from the driveway or street if applicable to verify reliable operation. Confirm both open and close actions work.
Tip: If range is insufficient, check antenna alignment and consider replacing the extender module if present. - 7
Finalize and secure
Test all existing remotes, and if needed reprogram them to ensure security. Store manuals and model information for future replacements.
Tip: Keep a written log of all remotes and their programming
Got Questions?
Do I need a professional to replace a garage door remote?
Most replacements can be done by homeowners with basic tools and the opener manual. Complex systems or damaged wiring may require a technician. If you’re unsure, consult the manufacturer’s support or a local pro.
Most people can program a new remote themselves. If your opener is unusually difficult or shows signs of wiring issues, consider professional help.
Can I reuse my old remote’s code after replacement?
If your new remote supports the same rolling-code or fixed-code system, you can typically reuse the same code. Always reprogram all remotes to ensure security after replacement.
Yes, usually you can reuse the code if the new remote matches the old system, but reprogram all remotes afterward for security.
What if the remote won’t pair after programming?
Check alignment, ensure you’re within range, verify battery health, and confirm that you pressed the Learn button within the correct window. If needed, reset the opener and retry.
If pairing fails, verify range and battery, then try the steps again, ensuring you complete the Learn sequence in time.
How far should the remote work from the opener?
Range varies by model and environment. If the remote consistently fails at a close distance, inspect the antenna, check for interference, or consult the manual for recommended distance.
Ranges depend on your setup; test from varying distances to find the effective reach.
Is it safe to program the remote myself?
Yes, programming a garage door remote is considered a standard DIY task when you follow the manual and observe safety precautions.
DIY programming is generally safe if you follow the steps in the manual and keep hands clear of the door.
What should I do if I lose the remote or the button is missing?
If the Learn button is missing, check the opener model or consult the manufacturer’s support. You may need an alternative programming method or a pro visit.
Losing the remote or a missing button may require manufacturer support or a service call.
Watch Video
Quick Summary
- Verify compatibility before buying
- Program the remote using the Learn button sequence
- Test range and reliability after programming
- Reprogram other remotes for security
- Maintain remotes and replace batteries regularly