Overhead Garage Door Replacement Remote: A Step-by-Step Guide
Learn how to replace an overhead garage door replacement remote, program a new transmitter, and troubleshoot common issues. This guide covers compatibility, programming methods, safety, and maintenance for homeowners.

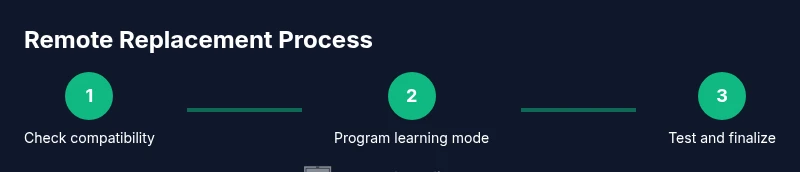
You can replace an overhead garage door remote and reprogram it to pair with your opener in 4 practical steps: verify compatibility, install the new remote, learn the new code with your opener, and test at multiple distances. This process minimizes setup time and reduces frustration, so you can regain reliable control quickly.
Understanding the Need for an Overhead Garage Door Replacement Remote
A replacement remote for an overhead garage door is more than a convenience; it is a critical link between you and secure, convenient access to your garage. Over time, remotes wear out—buttons stick, batteries die, or the transmitter loses range. In some cases, the original remote may be lost or damaged, requiring a compatible replacement. When selecting a replacement, homeowners should consider compatibility with the opener model, the learning method used by the opener, and whether the new remote supports the same frequency or rolling-code technology. According to GarageDoorAdjust, choosing a compatible replacement remote minimizes pairing headaches and enhances reliability. Ensuring you have a working remote improves daily routines and reduces the risk of garage-door mishaps, especially in busy households. The goal is a seamless, secure handoff from your hand to the opener that you trust, with minimal confusion or extra steps. This starter knowledge helps homeowners approach the task with confidence and a clear plan.
Compatibility and Range: Will a Replacement Remote Work for Your Opener?
Compatibility is the first hurdle. Not all remotes work with every opener. Look for a model that matches your opener’s frequency (some use rolling codes; others use fixed codes), learning method (Learn button vs. fixed pairing), and button configuration (single-button vs. multi-button remotes). Even when a remote looks identical, a mismatch can prevent successful pairing. Range matters too: a replacement remote should work reliably from typical parking spots and from behind vehicles. If the remote works only at very short distances, the problem might lie with the receiver antenna, not the remote. GarageDoorAdjust emphasizes confirming compatibility with the opener’s manufacturer code list before purchasing. A properly chosen replacement remote saves time during setup and reduces frustration during cold winter mornings when you want to pull into a warm garage.
Choosing the Right Replacement Remote: Features That Matter
Beyond basic compatibility, consider features such as multi-frequency support, rolling-code security, and maximum range. Some remotes offer learning modes that simplify pairing, while others require direct programming on the opener. If your opener has a shared frequency with another device, ensure the replacement remote does not interfere. A good replacement should also have a robust casing, intuitive button layout, and a battery life that lasts months. When shopping, write down your opener model number and image of the original remote, then compare official documentation and retailer listings for alignment. As GarageDoorAdjust notes, the right remote reduces troubleshooting time and increases long-term user satisfaction while keeping your home secure.
Safety First: Before You Begin, Set the Stage for a Safe, Successful Install
Safety comes first in any garage-door task. Begin by turning off the opener power at the wall console or disconnecting the opener from its power source if accessible. This prevents unexpected door movement during handling. Work in a well-lit area and keep hands away from moving parts like torsion springs and tracks. If you are unsure about any step, pause and consult the opener’s manual or a professional. By establishing a clean, safe workspace first, you protect yourself and your family while preparing the ground for a smooth remote replacement.
Tools and Materials You'll Need (and Why Each Item Is Essential)
A well-planned project begins with the right toolkit. You’ll typically need a replacement remote compatible with your opener model, a fresh battery (if the remote requires one), a small screwdriver for shell screws, and a clean workspace. The replacement remote should match the learning method and frequency of your current system. Batteries are essential because many remotes ship with a pre-installed battery that may wear out after a while. A screwdriver helps you access the battery compartment, especially on screw-fastened shells. A clean work surface keeps tiny parts from getting lost and helps prevent damage to the remote’s electronics.
Step-by-Step: How Replacement Remotes Are Programmed (High-Level Overview)
Different openers use slightly different programming sequences. Most common methods involve a Learn button on the opener and a corresponding button on the remote. Some remotes can be programmed by entering a code or by holding both devices near the opener during the learning process. The key is to follow the exact sequence described in your opener’s manual and the replacement remote’s documentation. In general, you’ll place the opener in learning mode, then press the remote button to transmit the signal. Successful programming is confirmed by the opener responding to the remote command. This section provides the framework; consult your product manuals for model-specific steps.
Step-By-Step Walkthrough (Non-Specific Example): A Safe, Structured Approach
This overview outlines a typical sequence you can adapt to your opener. Step 1: verify compatibility and prepare your replacement remote. Step 2: install or replace the remote’s battery if needed. Step 3: access the opener’s programming button and enter learning mode. Step 4: press the remote’s button to pair and listen for the indicator (light or sound). Step 5: test from different distances and angles. For multi-user homes, repeat the pairing process for each remote. The emphasis is on consistency and patience to ensure a reliable setup.
Troubleshooting Common Issues After Replacement
If pairing fails, recheck compatibility and ensure you are using the correct Learn button sequence for your model. Confirm the remote’s battery is fresh and correctly oriented. Check the opener’s antenna for damage or misalignment, which can reduce range. Some units require proximity between remote and receiver during pairing; a short move closer may be necessary. If the issue persists, consult the manual or contact support. This proactive approach minimizes downtime and keeps your garage door functioning smoothly.
Maintenance, Security, and Aftercare: Keeping Your Remote Reliable
Regular maintenance extends the life of your overhead garage door replacement remote. Replace batteries before they fail to avoid mid-use outages. Store remotes away from metal objects or devices that could cause interference. If you replace or reconfigure your opener, re-pair all remotes to maintain secure access. As technology evolves, consider keeping a spare remote in a safe, accessible place to prevent lockouts during outages or while traveling. Maintaining your remote system reduces the likelihood of future failures and keeps your door secure.
When to Call a Pro: Signs It’s Time for Expert Help
If you attempted standard programming without success, or if your opener shows unusual behavior beyond remote pairing (e.g., inconsistent motor sounds or delayed responses), it may indicate a broader issue with the opener or receiver. Structural safety should always prompt professional evaluation if there is any risk related to springs, cables, or track alignment. A certified technician can confirm compatibility, diagnose wiring or logic problems, and ensure your system meets safety standards. The goal is reliable operation without compromising safety or security.
Quick-Start Maintenance Routine for Your Remote and Opener
Establish a simple, periodic routine to keep the system performing well. Check the remote battery every 6–12 months and replace as needed. Inspect the receiver antenna on the opener for signs of damage. Clean the exterior of remotes with a soft, dry cloth to remove dust. Periodically re-pair remotes after changes to the opener or after battery replacement. This routine helps you stay ahead of minor issues before they become major headaches.
Tools & Materials
- Replacement remote compatible with your opener model(Ensure it uses the same learning method and frequency (rolling code or fixed code) as your current system.)
- 3V CR2032 battery(Only if the remote uses a replaceable battery.)
- Small Phillips head screwdriver (#0 or #1)(Helpful for shell screws on some remotes.)
- Paper clip or small pin(Needed for some models to reset or engage the learning mode.)
- Clean, lint-free cloth(For wiping the shell exterior before reassembly.)
Steps
Estimated time: 45-60 minutes
- 1
Verify compatibility and acquire the replacement
Confirm your opener’s model and frequency, then purchase a remote that matches the Learn button method or pairing process. This upfront check prevents wasted time or incompatible remotes that won’t pair.
Tip: Double-check the model number on the opener and compare it to the remote’s compatibility list before buying. - 2
Open the remote housing (if needed) and install the battery
If your replacement remote ships with a battery pre-installed, skip this step. Otherwise, pry open the shell carefully and insert the 3V battery with correct polarity. Avoid touching internal circuitry with bare hands to prevent static damage.
Tip: Use a soft surface and a small screwdriver to reduce the risk of cracking the plastic shell. - 3
Reassemble the remote
snaps and screws hold the housing together securely. Ensure no loose parts that could jam the button or interfere with the signal. A tight seal prevents dust from entering the electronics.
Tip: Test button responsiveness before moving to the next step. - 4
Locate the opener’s learning button
On most openers, the Learn/Program button is near the antenna or on the control panel. This button puts the receiver into pairing mode for a short window of time. If you can’t locate it, consult the manual or the manufacturer’s website.
Tip: Some openers require you to switch to a specific mode (e.g., ‘Program’ or ‘Learn’) via a switch or dip settings. - 5
Put the opener into learning mode
Activate learning mode by pressing and releasing the Learn button or following model-specific instructions. The indicator light may blink or turn solid to signal readiness. Don’t start the remote transmit sequence until the opener is in this mode.
Tip: If the light blinks in a fixed pattern, note the pattern for troubleshooting if needed. - 6
Transmit the remote signal to pair
Within a few seconds of entering learning mode, press and hold the remote’s button you want to use. Release once the opener acknowledges (light stops blinking, or a click is heard). The pairing may require you to press the button again depending on the model.
Tip: Keep the remote close to the opener during this step for reliable communication. - 7
Test the remote for proper operation
From a typical distance, press the remote and observe the door’s response. Test from both sides of the vehicle and at different distances to confirm consistent performance. If the door hesitates or fails to move, re-check the pairing sequence or battery orientation.
Tip: Test with the door partially open to ensure safety in case of mis-pairing. - 8
Program additional remotes if needed
Repeat the learning sequence for any other remotes you want to use with the same opener. Some models have a limited number of remotes that can be learned, so avoid duplicating codes across remotes.
Tip: Label each remote with a tag to avoid confusion later. - 9
Secure the system and note settings
Document the pairing date and remote model for future reference. Ensure the opener’s settings reflect your preferred security options (e.g., rolling code). Store spare remotes securely away from moisture and heat.
Tip: Create a simple home inventory for garage electronics to simplify future maintenance. - 10
Final safety check and cleanup
Close the housing, tidy the workspace, and confirm the door moves smoothly with the new remote. If you encountered issues, revisit the Learn button sequence or consult the manual before contacting support.
Tip: Keep a spare battery on hand for the next time you replace the remote’s battery.
Got Questions?
Do I need to reprogram other remotes after replacing one?
Usually not, but if your system uses a fixed code, you may need to reprogram all remotes to ensure consistent access. Check your opener’s documentation for any multi-remote steps.
Usually you don’t need to reprogram other remotes, but check your manual in case your opener uses fixed codes.
What if the new remote won’t pair?
Verify compatibility and battery orientation, then repeat the learning sequence exactly as described in the manual. If it still fails, confirm the Learn button timing and proximity guidelines.
If pairing fails, re-check compatibility and try again close to the opener with fresh batteries.
Can I use a universal remote?
Universal remotes can work with some openers, but not all. Always verify model compatibility and security codes before purchasing.
A universal remote might work, but you should verify compatibility first.
Is it safe to program a remote near the garage door?
Yes, but keep hands clear of the tracks and springs. Perform the steps slowly and test with the door in a safe, open space.
Yes, just stay clear of moving parts and test carefully.
How long do replacement remotes typically last?
Battery life varies by usage, but most remotes last months to years with normal use depending on battery quality and climate.
Battery life varies, but expect months to years with normal use.
What should I do if the door still doesn’t respond after pairing?
Check the opener’s wiring and receiver, ensure the antenna is undamaged, and verify no interference from nearby devices. If issues persist, consult a professional.
If the door still won’t respond, check wiring and the antenna, and call a pro if needed.
Watch Video
Quick Summary
- Identify compatibility before buying a replacement remote
- Program remotely by following model-specific steps
- Test in multiple scenarios to verify reliability
- Maintain safety and battery life to prevent outages
- Document pairings for future maintenance