Can You Get a New Garage Door Remote? A Quick Guide
Learn how to replace or add a garage door remote, verify compatibility, and program a new remote with your opener. Practical steps, safety tips, and troubleshooting for homeowners.

Yes. You can get a new garage door remote by purchasing a brand-specific or universal model that’s compatible with your opener. After buying, you’ll pair it using your opener’s Learn button or touchpad. Brand-specific steps vary, but the process is quick and homeowner-friendly.
Why you might want a new garage door remote
Losing a remote, or finding the current one unreliable, is more common than you might think. According to GarageDoorAdjust, replacing a remote is usually a straightforward DIY task that many homeowners can handle in under an hour. The demand for replacements has grown as more people install smart openers and desire a backup in case the primary remote fails. A new remote not only restores convenience but can improve security—modern units often come with rolling-code technology that helps prevent code capture.
When deciding whether to replace, consider: is your old remote functioning at all, or has the battery corroded contacts? If your opener is still under warranty or you paid a service plan, check whether remotes are covered. In many cases, a simple battery change is insufficient; a paired remote must be recognized by the receiver inside the opener. If you have multiple vehicles or a keyless entry pad, replacing with a compatible remote can streamline control for everyone, reduce the risk of losing access, and ensure you can operate the door during power outages.
Compatibility and how to choose a new remote
Compatibility is the most important factor when replacing a garage door remote. Brand-specific remotes are designed to work with a particular opener family, while universal remotes try to cover multiple brands. Rolling-code remotes add security by changing the signal with each use, but they require support from both the remote and the opener’s receiver. If your opener uses rolling code, make sure the new remote supports this feature; if not, a universal option may not communicate reliably.
To start, locate your opener’s model number and the remote’s type. Your model number is typically found on the opener housing or in the manual. Once you know the exact model, confirm compatibility with the seller or manufacturer’s site. If you have a smart home setup, consider a remote that can pair with your app or voice assistant, but verify that the app integration is compatible with your current system.
Brand vs universal remote: Pros and cons
Brand-specific remotes typically pair quickly, offer reliable performance, and ensure compatibility with security features of your opener. They’re a safer choice if you want to preserve warranty terms and maximize reliability.
Universal remotes can save money and consolidate control for multiple openers, but they may require more setup steps and aren’t guaranteed to support every security feature your opener uses. If you’re unsure about compatibility, start with a brand-specific remote for a guaranteed match, then consider a universal option only if you’re confident it supports your model’s code type.
How to buy the right remote
Begin by confirming the exact model number of your opener and the remote type you need (brand-specific or universal). Check the packaging or the seller’s compatibility list, and read the product description for rolling-code support. If you’re shopping online, filter by your opener brand and model number, then compare features like code type, battery type, and range. Keep your manual handy so you can reference any required pairing steps once the remote arrives.
If your opener is older, you may want to consider replacing the unit or upgrading to a newer remote that includes modern security features. Always purchase from reputable retailers to avoid counterfeit remotes that may fail to program correctly or pose security risks.
Step-by-step programming overview
Programming a new remote is usually a two-part process: first, prepare the opener (location of the Learn button, memory reset options), then pair the remote by sending a signal from the remote while the opener is in programming mode. The exact sequence varies by brand, but most openers use a Learn button on the motor housing and a button press on the remote to complete pairing. After programming, test the remote from different distances and angles to ensure consistent operation.
If your remote doesn’t pair on the first attempt, double-check compatibility, battery installation, and the correct Learn-button procedure for your model. Some openers require you to clear the memory before adding a new remote, while others allow multiple remotes to be stored without erasing existing ones.
Troubleshooting common issues after programming
If the remote won’t program, verify that the remote is compatible with your opener and that you’re within the pairing window. Ensure the batteries are fresh and seated correctly. Check for interference from other wireless devices and make sure you’re not attempting to program when the opener is blocked by metal or concrete obstacles. If you hear no indication (no light or beeps) during programming, try the process again with the remote button pressed for a longer duration, as some models require a longer press.
Safety, warranties, and maintenance
Always follow the manufacturer’s safety guidelines when accessing the opener motor housing. If your opener is connected to a door with a malfunctioning spring or track, do not attempt remote programming until the door has been inspected by a professional. Replacing a remote should not affect warranty terms, but improper installation or attempting to bypass security features can create risks. Keep remotes away from children and store them in a secure location.
Quick recap: key considerations for homeowners
- Verify compatibility before buying a replacement remote.
- Decide between brand-specific or universal remotes based on your needs.
- Follow the Learn button method or respective brand instructions to program.
- Test the remote at multiple distances and keep a spare as a backup.
Tools & Materials
- Compatible replacement garage door remote(Select a remote confirmed compatible with your opener brand/model (rolling code if supported))
- Opener model number/serial information(Found on the opener housing or in the manual; helps verify compatibility)
- Owner's manual or online access(Helpful for brand-specific pairing instructions)
- Fresh batteries for remote(Some remotes ship without batteries or require a replacement)
- Pen and paper or device for notes(Record model numbers and steps for future reference)
Steps
Estimated time: 15-30 minutes
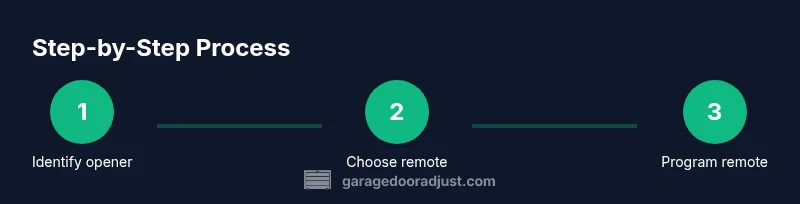
- 1
Identify your opener and remote type
Locate the model number on the opener housing and confirm whether you need a brand-specific remote or a universal option. This step ensures the remote you buy will pair correctly with your system.
Tip: Take a photo of the model label for quick reference when shopping. - 2
Choose the replacement remote
Select a remote that matches your opener’s code type (rolling or fixed) and brand. If you’re uncertain, ask the retailer to verify compatibility before purchase.
Tip: If your system supports rolling codes, prioritize remotes that advertise rolling-code compatibility. - 3
Install fresh batteries
Open the remote’s battery compartment and install the correct battery type. A fresh battery ensures the remote transmits a strong, clean signal during programming.
Tip: Test the battery contact springs for corrosion and clean gently if needed. - 4
Locate the Learn button on the opener
Find the Learn button on the motor housing of your garage door opener. It is typically near the antenna and may be recessed; you may need a flashlight to identify it.
Tip: Consult the manual for the exact location if you can’t see it clearly. - 5
Prepare the opener for programming
If your opener requires memory reset, perform that step as instructed by the manual before programming. Otherwise, proceed to the pairing step within the Learn window.
Tip: Some models require you to hold the Learn button for several seconds to enter programming mode. - 6
Program the remote
While the opener is in programming mode, press and hold the remote button you want to use. Release only after you observe a confirmation (such as a light flash or beep).
Tip: Only press one button per remote during the initial programming to avoid confusion. - 7
Test the remote
From a comfortable distance, press the programmed button and watch the door respond. Test from different angles and with the door in various positions to ensure reliable operation.
Tip: If the door doesn’t respond, repeat the programming sequence or try a different remote button. - 8
Troubleshoot if needed
If programming fails, confirm compatibility, verify the Learn window timing, and ensure there are no interference sources nearby. Reattempt with clean batteries and a clear line of sight.
Tip: Some models require reattempts or a specific timing for the Learn button press. - 9
Label and store backups
Label your new remote and keep a spare in a secure place. Having an extra remote avoids future headaches if one remote is misplaced.
Tip: Create a small cue or note with pairing details for future reference.
Got Questions?
Can I use a universal remote for my garage door opener?
Universal remotes can work with many openers, but you must verify compatibility with your model. Some brands restrict universal remotes or require additional steps for rolling-code systems.
Universal remotes can work with many openers, but you should check compatibility and the specific setup steps for your model.
What should I do if the remote won’t program?
Double-check compatibility, ensure fresh batteries are installed, and repeat the Learn button sequence within the programming window. If it still fails, try a different remote or contact the manufacturer.
If it won’t program, verify compatibility and batteries, then retry the pairing steps or seek assistance from the manufacturer.
Do I need to reprogram other remotes when adding a new one?
Most systems don’t require reprogramming existing remotes, but some models may have memory limits. If unsure, reprogram all remotes to ensure consistent operation.
Usually you don’t have to reprogram others, but it can be a good idea to reprogram all remotes for consistency.
Is it safe to store a spare remote near kids?
Store spare remotes in a secure place away from children and pets. Use secure codes where possible and avoid placing remotes near metal objects that could interfere with signals.
Keep spare remotes out of reach of children and in a secure place.
What should I do about battery life for remotes?
Replace remote batteries when performance declines or a low-battery indicator appears. Use the recommended battery type for your model to avoid corrosion.
Replace batteries when performance drops and use the right battery type for your remote.
Watch Video
Quick Summary
- Verify compatibility before buying.
- Use the Learn button method to program.
- Test the remote at multiple distances.
- Keep a backup remote and spare batteries.