Can You Get a Universal Garage Door Remote? A Step-by-Step Guide
Discover whether you can get a universal garage door remote, how to test compatibility with your opener, and a clear step-by-step programming guide. Includes safety tips, troubleshooting, and brand guidance from GarageDoorAdjust.

Yes. A universal garage door remote exists for many systems and can control multiple openers from different brands. However, compatibility varies by model and opener age. Some newer residential systems use rolling codes or proprietary signals that limit universal remotes, and non-compatible units may require a replacement receiver or learning mode.
What is a universal garage door remote?
Universal garage door remotes are designed to work with multiple brands and models by learning from your existing remote or by using a widely-supported set of compatibility codes. They can simplify your toolkit if you have more than one opener or plan to replace an old remote. According to GarageDoorAdjust, most home systems can be controlled by a compatible universal remote, but there are important caveats. Some manufacturers use rolling codes or proprietary communication methods that cannot be replicated by every universal remote. In those cases a single remote cannot operate all doors, and using a dual remote or separate openers might be necessary. When selecting a universal remote, you should verify the opener’s brand, model, and the type of codes used by the control system. You should also check whether the remote supports a learning mode, fixed codes, or rolling codes. This information is typically in the opener’s manual or on the manufacturer’s website. The GarageDoorAdjust team found that many users do not realize the difference between a universal remote that can be programmed by a learning method and one that requires hard-coded remote codes. In practice, a well-supported universal remote will provide clear pairing steps and a straightforward indicator light to confirm successful programming.
How universal remotes interact with different openers
Universal remotes interact with openers using a mix of learning modes and code transmission methods. Some remotes can learn signals from your current remote, while others rely on a database of brand-specific codes. A few newer systems employ rolling codes, which change each time the door is operated for security. If your opener uses rolling codes, you’ll need a universal remote that specifically supports that feature. Always consult the manual and verify that the universal remote you choose lists your opener brand and model in its compatibility chart. GarageDoorAdjust emphasizes checking both the opener’s compatibility and the remote’s user guide before purchasing to avoid wasted time or money. For households with multiple doors, a single universal remote can simplify control—provided all doors share compatible signaling methods and code formats.
Compatibility caveats and red flags
Not all universal remotes are created equal. A key caveat is support for older versus newer openers: very old models may not communicate with modern universal remotes at all, while mid-range devices typically cover a broad span of brands. Red flags include remotes that promise “universal” control without listing specific brands or codes, and devices that require internet access or subscription services to function. In these cases, you risk partial compatibility or ongoing fees. If a remote claims universal status but can only operate a single brand, treat it as brand-specific rather than universal. The takeaway is to confirm exact compatibility and avoid remotes that lack a formal compatibility list or clear programming steps.
How to verify compatibility before you buy
Before purchasing, collect your opener’s model number, brand, and any available documentation. Use the compatibility charts provided by the universal remote manufacturer and compare them with your opener. If in doubt, contact the remote’s customer support with your model details. Reading user reviews can reveal real-world compatibility issues not listed in official charts. For added assurance, take a photo of your opener’s label and keep a copy of the manual. The GarageDoorAdjust team recommends confirming whether your opener uses learning mode, fixed codes, or rolling codes, and ensuring the remote supports those features. This due diligence helps prevent frustration and returns.
Step-by-step programming overview
Programming a universal remote involves two general approaches: learning mode and fixed-code entry. In learning mode, you align the universal remote with the opener by following the remote’s prompts and the opener’s pairing sequence. In fixed-code entry, you select the correct brand and code from a list and input it manually. Some remotes also offer a hybrid approach, supporting both methods for broader compatibility. Always start in a well-lit area, with the door in a closed position, and keep hands clear of the door at all times. If the opener has safety sensors, ensure they are unobstructed and functional before testing.
A practical comparison of programming methods
Learning mode is usually faster and more forgiving, as the remote copies the signal from an existing controller. Fixed-code entry is more reliable for older openers or models with well-documented code sets. However, fixed-code remotes require the exact code string for your brand and can feel opaque if the codes arent clearly documented. For most homeowners, learning mode offers a simpler path to success, while fixed-code entry can be a good fallback if the learning process fails. In either case, verify that the door operates smoothly from both the wall switch and the remote after programming, and avoid overpowering the learning button by holding it too long.
Step-by-step programming tips and tricks (summary)
- Hold the learning button until the indicator light flashes, then press the button on the universal remote to teach it the signal.
- If codes are required, look up the exact brand and model in the remote’s code list and enter the code with the remote’s keypad.
- Some remotes require clearance time between steps; donorget to pause briefly after each action.
- If the door does not respond, recheck batteries and ensure you re-positioned the remote close to the opener.
- For multi-door setups, label remotes to keep track of which one controls which door and avoid cross-pairing issues.
Troubleshooting if pairing fails
If pairing fails, start with basic checks: confirm power to the opener, verify battery life in the remote, and ensure you have the correct mode selected. Double-check the compatibility list for your opener brand and model. Some devices require you to reset the remote or erase its memory before trying again. If multiple attempts fail, consult the manufacturer’s troubleshooting guide or seek help from a qualified technician. Remember to maintain safety sensors and avoid forcing the remote during pairing to prevent damage.
Alternatives to universal remotes
If you discover that a universal remote wont reliably control your opener, consider alternatives such as using the original brand remote, upgrading to a compatible smart opener, or using a manufacturer-sanctioned smartphone app. Many modern openers offer app-based control and security features, which can be more convenient in a smart home setup. When evaluating alternatives, compare installation requirements, ongoing costs, and compatibility with existing devices. GarageDoorAdjust recommends weighing the benefits of a smart system versus a traditional remote for long-term value.
Safety and maintenance considerations
Always prioritize safety when testing and programming any garage door remote. Regularly test the door’s auto-reverse function and sensor alignment after programming. Keep remote batteries fresh and avoid exposure to moisture or extreme temperatures, which can degrade signal reliability. If you notice unusual door movement or sensor misreads, stop using the remote and inspect the hardware. The GarageDoorAdjust team emphasizes periodic maintenance and firmware updates for any smart or hybrid opener to maintain performance and safety.
The GarageDoorAdjust perspective and recommendations
From the GarageDoorAdjust vantage point, universal remotes are a practical option for households with multiple openers or older remotes. However, compatibility is never guaranteed, so a careful comparison and testing routine is essential. Our team advocates starting with a reputable remote that explicitly lists your opener brand in its compatibility charts and provides clear, step-by-step programming instructions. If a universal remote proves unreliable, consider a brand-specific or smart-home solution to ensure consistent operation and enhanced safety.
Tools & Materials
- Universal garage door remote(The primary device to set up; verify it lists your opener brands in its manual.)
- Original remote (optional)(Helpful for learning mode or confirming compatibility if available.)
- Ladder or stable step stool(Used to reach the opener console safely.)
- Batteries(Fresh batteries for the universal remote and any testing devices.)
- Small screwdriver (flathead or Phillips)(Only for certain screw-access openers or mounting panels.)
- Pen and paper(For noting codes or steps during programming.)
- Smartphone or tablet (optional)(Some remotes use companion apps or provide QR codes for setup.)
Steps
Estimated time: 25-45 minutes
- 1
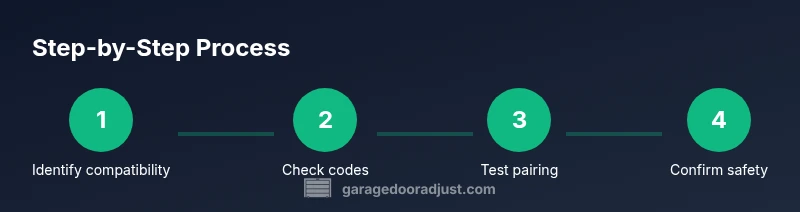
Identify compatibility
Locate your opener’s model number and brand. Check the universal remote's compatibility list and read the manual to confirm that your opener is supported. If you borrow the old remote, compare signals to ensure you know the code environment you’re entering.
Tip: Take a photo of the opener’s label for quick reference. - 2
Gather required tools
Collect the universal remote, batteries, and a helper if possible. Ensure you have a clear space to work and a safe ladder position to reach the opener panel.
Tip: Have the original remote handy in case you need to copy a signal. - 3
Put the opener in programming mode
Power the opener if needed and press the learning/pairing button on the receiver until the indicator light behaves as described in the manual. Do not press the button repeatedly; let the receiver reset if required.
Tip: Keep fingers away from moving parts while pairing. - 4
Program the universal remote
Using the universal remote, choose the correct mode (learning or code-entry) per the guide and perform the required action to teach the remote the signal. If using code-entry, select the brand and enter the code exactly as shown.
Tip: Avoid forceful button presses; ensure you hear a confirmation cue before proceeding. - 5
Test the remote
With the door closed or in a safe position, press the remote control to operate the door. Test multiple presses to confirm consistency. If unsuccessful, try again from different angles and check battery status.
Tip: Test both the wall switch and remote to ensure full compatibility. - 6
Troubleshoot and adjust
If the door doesn’t respond, recheck the compatibility, re-enter the code or retry learning, and verify that the door sensors are functioning. Reset the remote memory if recommended and retry the process.
Tip: Document which steps succeeded to avoid repeating unsuccessful attempts. - 7
Finalize and document
Label the remote for the door it controls and store the user manual and codes in a safe place. Consider updating any related safety safeguards and note the unit’s firmware or software version if applicable.
Tip: Keep a record of the pairing date for maintenance reminders.
Got Questions?
Can I use any universal garage door remote with my opener?
Not every universal remote will work with every opener. Always check the compatibility list for your brand and model, and verify whether learning or code-entry is required.
Most universal remotes work with many openers, but always confirm compatibility and the programming method before purchasing.
What if my opener uses rolling codes?
If your opener uses rolling codes, choose a universal remote that explicitly supports rolling codes and follow its specific pairing steps. Some universal remotes cannot handle rolling codes.
For rolling codes, pick a remote that lists rolling-code support and follow its instructions precisely.
Do I need the original remote to pair a universal one?
Having the original remote is helpful for learning mode, but not always required. Check the universal remote’s guide to see if it can learn signals without the original.
Often you can pair without the original, but some remotes need it for learning mode.
What safety steps should I follow during programming?
Keep hands clear of the door, test sensors, and never disable safety features. If the door behaves oddly, stop and recheck all connections and codes.
Always test safely and don’t bypass safety features during programming.
Why doesn’t a universal remote pair even though it’s listed as compatible?
Reasons include incorrect mode (learning vs code entry), weak batteries, or a codes mismatch. Recheck compatibility and retry steps carefully.
Incorrect mode or codes can prevent pairing; double-check and retry.
Are universal remotes more expensive than brand remotes?
Prices vary by brand and features. Look for remotes with clear compatibility listings and positive user reviews to balance cost and reliability.
Prices vary; focus on compatibility and reliability rather than price alone.
Watch Video
Quick Summary
- Verify opener compatibility before buying.
- Know whether your opener uses learning or fixed codes.
- Test door safety sensors after programming.
- Consider alternatives if universal remotes fail to pair.
- Document the setup for future maintenance.