Set Up a Garage Door Remote: A Step-by-Step Guide
Learn how to set up a garage door remote with a clear, step-by-step process. This guide covers compatibility, tools, pairing steps, troubleshooting, and safety tips for reliable operation.

By the end of this guide, you will confidently set up a garage door remote to control your opener. You’ll need a compatible remote, access to the opener's learn button, and the door must be in a functional state. We’ll walk through a simple, step-by-step pairing process and common troubleshooting tips.
Why Set Up a Garage Door Remote Correctly Matters
According to GarageDoorAdjust, a properly configured garage door remote reduces misfires, enhances security, and minimizes wear on the opener. When a remote is paired correctly, you get reliable operation every time you press the button, and you lower the risk of accidentally triggering the door from across the yard. This section explains how remotes interact with your opener, why the learn button method works, and how common user errors can disrupt pairing. You’ll learn how rolling-code technology improves security and why keeping remotes up to date matters for households with multiple users. The goal is to provide a clear, safe path to a successful setup, so you can enjoy a quieter, safer garage and avoid unnecessary trips to the hardware store.
Compatibility and Choosing the Right Remote
Not all garage door remotes work with every opener. Start by identifying your opener brand and model, as well as the remote's compatibility. Look for remotes that use rolling codes and match the frequency range of your opener. If you have a LiftMaster, Genie, or Craftsman model, some remotes are universal, but you’ll still want to verify compatibility with the manual or the manufacturer's website. When choosing a remote, consider range, battery type, and how many remotes you want to pair. Having a backup, simpler remote for guests or temporary use is often worthwhile. This section also covers how to interpret the model number and what to do if you need to replace a lost remote.
Preparation: What You Need
Before you begin, gather the necessary tools and information. You’ll need a remote that is compatible with your opener, fresh batteries, and your opener’s model number or manual. Have a ladder or stable stool if the learn button is mounted high. Keep a notepad to record the results of each pairing attempt, and ensure the garage is clear of people and objects for safe testing. If your opener has a status light, check that it’s functioning; a malfunctioning light could indicate a power issue or a sensor problem that affects operation.
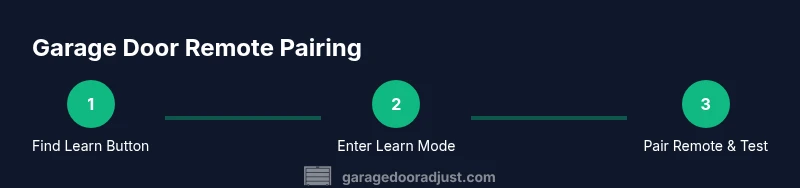
Step-by-Step Overview
This section provides a concise overview of the typical pairing flow. You’ll locate the learn button, clear existing codes if needed, put the opener into learn mode, and then activate the remote to complete the pairing. The exact sequence can vary by model, but the core concepts remain consistent: engage the opener’s learning mode, signal the remote, and verify operation from the doorway. Use this overview as a mental map before you dive into the detailed, model-specific steps in the dedicated STEP-BY-STEP block.
Common Troubleshooting When Pairing Remotes
If the remote won’t pair, start with the basics: verify battery health, confirm compatibility, and ensure you are within the recommended range. Check for interference from nearby devices and confirm you are using the correct learn button for your opener model. If the indicator light on the opener doesn’t respond, power issues or sensor misalignment could be the culprit. Repeating the process from a fresh start (clear memory, re-enter learn mode, then retry) often resolves most pairing hiccups.
Security, Privacy, and Safety Best Practices
Program a remote only to trusted devices and never share access codes beyond your household. Use rolling-code remotes when possible and remove unused remotes from the opener memory. Maintain a clear line of sight during pairing to prevent misreads. After pairing, test the range and ensure the door responds reliably from typical positions in your driveway to validate the setup.
Maintenance and Longevity for Your Remotes
Keep remotes clean and replace batteries as they begin to lose efficiency. Periodically inspect the remote casing for cracks or water intrusion and store remotes in a dry, secure place. If you upgrade your opener, re-check compatibility with all existing remotes and re-pair any that no longer function as expected. Proper care reduces the risk of failed operation when you need the door most.
Tools & Materials
- Compatible garage door remote(Ensure it matches your opener model family; check frequency and rolling-code capability)
- Batteries (e.g., CR2032)(Fresh batteries to avoid weak signals during pairing)
- Opener owner's manual or model number(Helps locate the learn button and programming steps)
- Ladder or sturdy stool(Needed if the learn button is mounted high)
- Paper and pen or smartphone for notes(Record pairing results and remote IDs)
- Flashlight(Helpful in dim garages to read labels on the opener)
Steps
Estimated time: 15-30 minutes
- 1
Locate the learn button
Open or access the garage door opener motor housing and locate the learn button, usually near the antenna or light. This is the control that lets the opener recognize new remotes. Confirm you have located the correct button for programming.
Tip: If the button is recessed, use a small pointer or pen tip to avoid pressing other controls. - 2
Clear existing codes (optional but recommended)
If your opener has multiple remotes or you’re setting up a new system, clearing memory prevents old remotes from interfering. Follow the manual’s exact method to erase memory.
Tip: Only clear memory if you truly want to remove all existing remotes; you can re-add them after the reset. - 3
Put the opener in learn mode
Press and hold the learn button until the indicator light blinks or changes color, signaling the opener is ready to pair a new remote. This step usually takes a few seconds.
Tip: Do not release the button too early; a premature release may fail to enter programming mode. - 4
Activate the remote button
Within 30 seconds, press and hold the desired button on the remote until the opener’s light blinks or the door moves slightly, indicating a successful pairing.
Tip: If the signal doesn’t register, try again with fresh batteries and ensure you’re in the correct learning window. - 5
Test the remote
From a safe distance, press the remote to confirm the door opens and closes reliably. Check multiple positions to ensure consistent range.
Tip: Have a friend observe from the driveway if possible to verify consistent response. - 6
Document and finalize
Record the remote’s pairing date, model, and assigned button. If you have multiple remotes, repeat for each one and keep the notes in a safe place.
Tip: Label remotes physically (e.g., ‘Front Porch’ or ‘Guest’).
Got Questions?
What is the learn button, and where is it located on my opener?
The learn button is a small button on the garage door opener motor unit used to put the system into programming mode. Its location varies by model, so consult your manual or model number for exact placement. You’ll use it to pair new remotes.
The learn button is on the opener motor. Check your manual for exact location, then use it to pair remotes.
Can I use a universal remote with my garage door opener?
Universal remotes can work with some openers, but you must verify compatibility with your specific model and frequency. Not all universals support every brand or rolling-code system.
Universal remotes may work with some models; check compatibility and frequency first.
What should I do if the remote won’t pair after following steps?
First, replace the remote’s batteries and confirm you’re using the correct learn button sequence for your model. If still failing, repeat the process from memory-erasure and re-enter learn mode. Check for interference from other devices nearby.
If pairing fails, replace the batteries and retry with correct learn mode. Check for interference.
How do I remove a remote from my opener’s memory?
Enter learn mode and use the manual’s reset procedure or hold the remote button for several seconds if your model supports it. This clears the memory for that remote only.
To remove a remote, clear its memory via learn mode as described in your manual.
Is it safe to program a remote near other people or metal objects?
Yes, but keep observers clear of the door during testing and avoid metal surfaces near the receiver which can cause signal reflections. Always follow the manual’s safety notes.
Yes, stay clear of the door and follow safety notes in the manual.
Watch Video
Quick Summary
- Verify compatibility before buying a remote
- Follow the learn button procedure precisely
- Test the remote at typical distances
- Securely manage and document remote access