Remote Garage Door Opener: DIY Guide for Homeowners
A complete how-to guide for diagnosing, pairing, and troubleshooting remote garage door openers, with safety tips and practical, step-by-step instructions for homeowners.

This guide shows how to diagnose, pair, and use a remote garage door opener with your unit. You’ll learn how to test signal, replace batteries, reprogram remotes, and troubleshoot interference, all with step-by-step actions you can complete safely. It covers safety warnings, required tools, common error codes, and when to call a professional.
What a remote garage door opener does and how it communicates
A remote garage door opener provides wireless access to your garage door by sending a radio frequency (RF) signal to the opener’s receiver. Most modern systems use rolling-code security, which changes the access code every time you press a button to prevent replay attacks. The remote (transmitter) and the receiver inside the opener work as a tiny radio link. When you press the button, a unique code is transmitted and decoded by the receiver, which then triggers the motor to open or close the door. Understanding this interaction helps you diagnose issues such as weak signals, out-of-sync remotes, or a failing receiver. The basics also apply to different brands, so whether you’re using a LiftMaster, Genie, or Clopay-branded unit, the same core concepts hold.
Common causes of remote opener failure
Remote failures typically fall into a few categories: depleted batteries, outdated or incompatible remotes, mispaired remotes after installation or a move, interference from other devices (such as wireless cameras, cordless phones, or nearby routers), and a worn or misaligned receiver inside the opener. Faulty wiring at the receiver, a damaged antenna, or changes in the door’s limit switches can also affect operation. Start troubleshooting with the simplest cause: battery health, distance and obstructions, and ensure the opener’s Learn button is accessible. If multiple remotes stop working at once, the issue could be the receiver or the control board rather than a single transmitter.
How to test your remote's range and signal quality
Test the remote at several distances: 1–2 feet, 5–10 feet, and from the driveway. Observe the opener's light blinks or the indicator LED on the receiver if present. Some remotes emit a small flash; others display no visible cue. If the remote fails to trigger the door at a close range, the battery or the remote’s internal oscillator may be failing. Note any patterns—sudden range loss, intermittent signals, or complete failure. If you have a smart opener hub, verify firmware versions and ensure it isn’t blocked by metal shelving or other devices forcing signal attenuation.
Reprogramming and resetting remotes
Reprogramming is a common fix when remotes stop pairing after maintenance, a move, or a new occupant. The typical process involves putting the opener into learn mode (via the Learn/Program button) and then pressing the remote button within a short distance. If a remote won’t pair, you may need to erase all remotes from memory and restart the process. Always complete the pairing with a short test from multiple distances to ensure reliability. If your system supports multiple remotes or smart hubs, label each remote and document its pairing steps for future reference.
Security and maintenance best practices
Keep security strong by using rolling-code remotes and avoiding outdated, non-secure models. Periodically replace batteries and test each remote’s range. If you move or sell your home, reset the opener receiver and reprogram remotes for the new occupant. Regular maintenance includes checking the safety sensors, lubricating moving parts sparingly, and keeping the opener’s firmware up to date if your model supports it.
Tools & Materials
- Remote garage door opener(s)(Have spare remotes handy for testing)
- Replacement battery (type per remote, e.g., CR2032)(Always use fresh batteries)
- Flathead screwdriver or coin (if needed)(May be required to open the remote case)
- Ladder or step stool(To access the Learn button on the opener unit)
- Owner’s manual or model number reference(Helpful for locating the Learn button and programming steps)
- Smartphone or camera (optional)(To verify signal with a camera when appropriate)
- Stable work surface and good lighting(Make sure you can see inside the remote safely)
Steps
Estimated time: 25-40 minutes
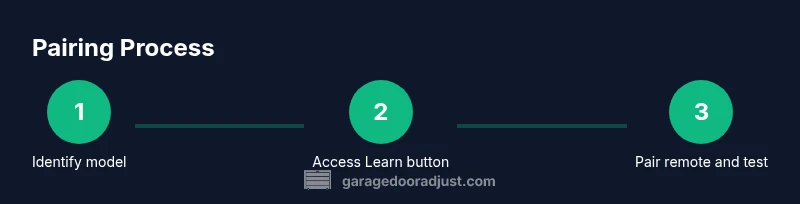
- 1
Identify your opener and remote
Locate the model number of your garage door opener and the type of remote you’re using. Check if your system relies on a Learn/Program button and note the location of the receiver. This initial step ensures you follow the correct pairing procedure for your specific model.
Tip: Having the model numbers handy speeds up lookup in the manual or online support pages. - 2
Check the remote battery
Open the remote housing and remove the old battery. Insert a fresh battery with the correct orientation, and re-close the case. A weak battery is a common cause of reduced range or failure to operate.
Tip: Always replace with the exact type specified by the manufacturer; even a slightly different size can fail to engage the contacts. - 3
Access Learn/Program button on the opener
Stand near the opener and locate the Learn/Program button on the motor housing. You may need to remove a light cover or lens to access it. Have your manual ready for the exact button location.
Tip: If there are multiple buttons, confirm you’re using the correct Learn button for the receiver you’re pairing. - 4
Enter pairing mode on the opener
Press and hold the Learn button until the indicator light starts blinking or remains steady, depending on the model. This invites the receiver to accept a new remote code.
Tip: Do not hold the button too long; release when you see the indicator pattern described in your manual. - 5
Pair the remote
While the opener is in Learn mode, press and hold the remote button you want to pair for 2–5 seconds at a close distance. Release and test the remote. If the door responds, the pairing is successful.
Tip: Keep the remote within 6 inches of the Learn button during pairing; proximity improves reliability. - 6
Test from various distances
Step away to 5–10 feet and operate the door. Then test from outside the garage if safe. Confirm consistent door movement across all tested distances.
Tip: If range is poor, check for interference sources and ensure the antenna on the opener is securely installed. - 7
Troubleshoot if pairing fails
If pairing fails, erase all remotes from memory (if supported) and repeat the Learn sequence. Inspect wiring at the receiver and verify the motor’s safety sensors are clear.
Tip: Document each remote when testing; note the date and model to assist future maintenance.
Got Questions?
What is a remote garage door opener, and how does it work?
A remote opener sends RF signals to the receiver in your garage door unit, triggering the motor to open or close. Modern systems use rolling codes for security, changing the code each time to prevent interception.
A remote opener uses radio signals to tell the garage door opener to move, with rolling codes for security. Make sure your remote and receiver are aligned and updated.
How do I replace the battery in a remote garage door opener?
Open the remote case, remove the old battery, insert a fresh one of the correct type with the proper orientation, then close the case and test the remote.
Open the remote, swap in a fresh battery the right way, and test the remote.
Why won't my remote work after a battery replacement?
Verify the battery is oriented correctly and that the remote is still paired with the opener. If not, reprogram the remote following the Learn button method.
Usually it’s the orientation or the pairing. Reprogram if needed.
How do I reprogram a universal remote for a garage door?
Follow the model-specific instructions to clear memory and reprogram. Some units require removing others from memory before adding a new one.
Follow your model’s steps to clear memory and reprogram.
Is it safe to reprogram my opener after moving or selling my home?
Yes. Reprogramming and removing old remotes helps prevent access by previous occupants and keeps your system secure.
Yes—reprogram and delete old remotes for security.
What if the keypad works but the remote does not?
This usually indicates a pairing or battery issue with the remote. Re-check the battery, re-run the pairing process, and ensure the remote is within the Learn button’s effective range.
Keypad may be separate; try re-pairing the remote and replacing its battery.
Can cold weather affect remote range?
Extreme cold can reduce battery efficiency and shorten remote range. If possible, replace batteries promptly and keep remotes warm when in use.
Yes, cold weather can reduce performance; keep batteries fresh.
Watch Video
Quick Summary
- Test batteries first to rule out power issues.
- Use the Learn button to pair remotes at close range.
- Verify range by testing from multiple distances.
- Document each remote and its pairing steps for future maintenance.