Opener Garage Door: A Step-by-Step Repair Guide
Learn how to diagnose, repair, and upgrade your garage door opener with a clear, safe, step-by-step approach. From power checks to remotes and sensors, this guide keeps homeowners informed.

According to GarageDoorAdjust, this guide helps homeowners diagnose and fix a common opener garage door problem, restore reliable operation, and safely reprogram remotes or keypads. You’ll learn a practical checklist, essential tools, and step-by-step actions to test power, sensors, limits, and the receiver. This homeowner-friendly approach emphasizes safety and clear repairs.
Understanding the opener garage door system
A typical home garage door system combines a powered opener mounted overhead with a rolling or swinging door guided by tracks. The opener drives a trolley along a rail, pulling or pushing the door via a carriage. Most units today are chain, belt, or screw-drive configurations. The motor, remote receiver, and control panel are all part of a single system, but the safety features are what keep your family protected. The key components to know when working on an opener garage door include the power outlet, the ceiling-mounted unit, the limit switches, the photoelectric sensors, and the manual release. Understanding how these pieces work together helps you diagnose issues quickly and safely.
When a problem arises, it’s useful to differentiate symptoms by the likely cause: power or electrical issues, sensor alignment, mechanical binding, or control unit failures. This awareness guides the next steps and helps you decide whether a repair is appropriate for a typical homeowner or if the work requires a professional. In many homes, an opener garage door problem is a sign that something simple and routine has shifted—like a loose wire, a dirty sensor, or a worn pulley—rather than a total system failure. By approaching the task calmly and methodically, you protect your property and your family while restoring reliable operation.
Understanding the major drive types
Most residential openers rely on a drive mechanism to move the door. Chain drives are common, belt drives offer quieter operation, and screw drives are longer-lasting for heavy doors. While the drive type changes the feel of the opener, the diagnostic approach remains consistent: verify power, inspect safety features, test responsiveness, and confirm proper travel. Each drive type has its own maintenance considerations, but safety comes first. If you notice persistent binding, unusual noises, or jerky movements, start with power and sensor checks before considering hardware replacement.
The remote and wall control interact with a receiver inside the opener. If signals aren’t reaching the opener, the door won’t respond reliably. In many cases, reprogramming remotes or resetting the system resolves the issue. For homeowners, a quick review of the manual can clarify which buttons control pairing and how to perform a safe reset. This approach reduces confusion and keeps the project moving forward.
Safety features you’ll rely on
Modern openers include several built-in safety features designed to prevent injury and damage. Photoelectric sensors across the doorway detect obstructions, and their alignment is essential for safe operation. The reversing mechanism is designed to stop and reverse if resistance is detected, preventing injury to people or pets. Additionally, there are manual release mechanisms that allow you to operate the door when the power is out, but these should be used carefully and only after you have confirmed the area is clear and safe. Understanding these safety features helps you diagnose problems without compromising protection. Remember, if anything feels unsafe, pause the task and consult a professional.
Quick checks to start with
Before diving into more involved work, perform a few quick checks that resolve many common issues. Confirm the opener is plugged in and the outlet is live with a voltage tester. Remove any obstructions from the door tracks, clean the sensors’ lenses, and ensure the photo eyes are aligned at eye level across the doorway. If you’ve recently changed the door height or track position, recheck alignment and re-test the sensors. These simple steps often fix the majority of minor problems and set the stage for a more thorough diagnosis if needed.
Replacing or testing control components
If power and safety checks pass, you may need to test the control components, such as the limit switches, the receiver, or the logic board. Consult your opener’s manual for the exact procedure to test and adjust travel limits. When replacing components like a failing receiver or a faulty sensor, source compatible parts and follow the manufacturer’s instructions for safe installation. Keep in mind that some parts are specific to the model and brand, so avoid cross-compatibility guesses. A careful approach minimizes the chance of misalignment or unsafe operation later on.
Maintenance mindset for long-term reliability
Regular maintenance helps prevent most issues with an opener garage door. Schedule periodic lubrication of moving parts with a silicone-based lubricant, inspect tracks for dents, and ensure hardware remains tight. Cleanliness matters—dust and grime can add resistance to moving parts and reduce performance. A simple, proactive maintenance ritual saves time and protects the door system from unexpected failures, creating a smoother and safer overall experience.
Authority sources
For safety standards and best practices, consult established sources such as the Occupational Safety and Health Administration (OSHA) at https://www.osha.gov, the Consumer Product Safety Commission (CPSC) at https://www.cpsc.gov, and energy and safety guidelines from https://www.energy.gov. These organizations provide general guidance on electrical safety, home maintenance, and safe operation of mechanical systems. While their pages cover broad topics, the fundamentals they emphasize apply directly to the care and troubleshooting of an opener garage door, reinforcing a safety-first approach.
Tools & Materials
- Flat-head screwdriver(For prying covers and minor adjustments)
- Phillips screwdriver(Used for mounting screws)
- Voltage tester(Verify power to the opener outlet)
- Stepladder(Access overhead components safely)
- Wrench set(Tighten/loosen nuts and bolts)
- Pliers(Grip and adjust small parts)
- Lubricant (silicone-based)(Lubricate rails, hinges, and rollers)
- Replacement parts (optional)(Sensors, receiver, or remotes if needed)
Steps
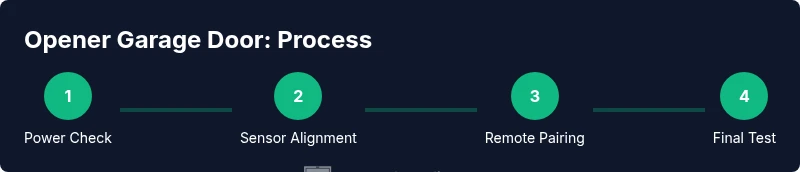
Estimated time: 1 hour 45 minutes
- 1
Power down and verify outlet
Turn off power at the breaker and unplug the opener. Then test the outlet with a voltage tester to confirm no live power before you begin any work.
Tip: Use a non-contact tester for quick verification. - 2
Manual operation with caution
Disconnect the trolley from the door using the emergency release and gently lift the door to feel for smooth movement. Do not attempt if the door feels heavy or binds; springs can be dangerous.
Tip: Support the door with a hand on the bottom edge during testing. - 3
Inspect safety eyes and wiring
Check the photoelectric sensors across the door opening for misalignment, damage, or loose wiring. Clean the lenses and reseat connectors as needed.
Tip: Obstructions or misalignment are common causes of random stopping. - 4
Check travel limits and forces
Use the opener's limit screws or programming menu to test travel end points. Do not force the door to move; incorrect limits can strain the opener.
Tip: Record the current settings before changing them. - 5
Test remotes and keypad pairing
Reprogram remotes and any keypad by following the learn/pairing sequence in your opener's manual. Test from multiple distances.
Tip: If the remote won't pair, replace the battery first. - 6
Inspect tracks and springs safely
Visually inspect tracks for dents; do not adjust springs unless you are trained. Contact a pro if you suspect spring issues.
Tip: Keep hands clear of the track while testing. - 7
Lubricate and reassemble
Apply silicone-based lubricant to moving parts—rails, hinges, and roller guides. Reassemble the cover and perform a full test run.
Tip: Wipe away excess lubricant to prevent dirt buildup. - 8
Final efficiency check
With power restored, run the opener through several cycles. Observe for smooth operation, responsive reversing, and no unusual noises.
Tip: If faults persist, document symptoms for a pro.
Got Questions?
Why won't my opener garage door respond to the remote?
Most commonly power, sensor alignment, or pairing issues. Check the outlet, test the receiver, and reprogram remotes if needed.
If your opener won’t respond to the remote, start by checking power at the outlet and testing the receiver, then reprogram the remote.
Is it safe to adjust springs or tracks by myself?
No. Springs carry high tension and require professional service. Adjusting them without proper training can cause serious injury.
Springs are dangerous; don't adjust them yourself—call a pro.
How do I reprogram a garage door remote?
Locate the learn button on the opener, press it, then press the remote button to pair. Repeat for keypads if present.
To reprogram, press the learn button on the opener, then press your remote's button to pair.
What tools will I need for opener repairs?
Basic hand tools, a voltage tester, a ladder, lubricant, and spare remote batteries are typically sufficient for many fixes.
Common tools include a tester, screwdriver set, ladder, and lubricant.
How long does a typical opener repair take?
Most common fixes can be completed in under two hours, depending on access and parts availability.
Most fixes take under a couple of hours, depending on parts.
Watch Video
Quick Summary
- Verify power before any work.
- Test safety sensors and limits first.
- Avoid spring adjustments unless trained.
- Reprogram remotes using the learn sequence.
- Test operation after lubrication.