Garage Door Open Repair: A Homeowner's Step-by-Step Guide
Learn to diagnose and safely repair your garage door opener with a practical, step-by-step guide from GarageDoorAdjust. Get tools, tips, and maintenance basics.

By following this guide, you can safely diagnose and fix a garage door open issue and restore reliable operation. You'll learn how to test the opener, verify safety sensors, inspect wiring and hardware, and perform guided steps to re-balance and re-seat components. Always unplug the unit and wear eye protection during any inspection or adjustment.
How garage door openers work
Garage door openers use a combination of a motor, a drive mechanism (belt, chain, or screw), and a control system to raise and lower a heavy door with safety features. Electric sensors, limits, and force adjustments tell the motor when to stop and how hard to pull. Understanding this basic architecture helps you pinpoint where failures happen, especially when the opener won’t respond to commands or the door stalls mid-travel.
Key components:
- Motor unit: drives the drive mechanism
- Drive mechanism: belt, chain, or screw that converts motor rotation into linear motion
- Trolley and carriage: connects the door to the opener
- Safety sensors: detect obstructions
- Limit switches: tell the motor when to stop at the fully open/closed positions
Common symptoms include: slow operation, irregular stops, a door that won’t open, or a unit that hums but won’t move. A clear diagnostic pathway focuses on power, control signals, sensor alignment, and mechanical binding rather than guessing.
Diagnosing common failure points
Start with the simplest checks and move to the more complex as needed. A non-working opener can be caused by power issues, sensor misalignment, misconfigured limits, worn drive components, or damaged wiring. Common failure points include the safety sensors, the remote or wall switch, and the drive train.
Steps to narrow the cause:
- Confirm the outlet is live and the opener receives power. If you rely on a wall switch, test with a lamp or tester to rule out a dead circuit.
- Check the safety sensors: ensure the lenses are clean, aligned, and that the red indicator light on one sensor is steady when the beam is clear.
- Inspect the track and rollers for obstructions, debris, or bent tracks that hinder smooth movement.
- Listen to the motor: a humming sound with no movement often points to motor or drive-chain issues rather than a failed power circuit.
Document every symptom to guide future steps or a professional repair if needed.
Safety considerations before you start
Garage door repair can involve heavy components and high-tension springs. Always prioritize safety to avoid crush injuries or electric shock. Begin by securing power at the source and ensuring the door cannot fall unexpectedly.
Safety steps you should follow:
- Unplug the opener and disconnect any battery backup before touching internal components.
- Keep kids and pets away; never stand under a door that is moving.
- Wear eye protection and gloves; use a sturdy ladder when you need access to mounting hardware.
- If you suspect a spring issue or a damaged track, stop and seek professional help. These parts can fail violently and cause injury.
If in doubt, contact a licensed technician before continuing.
Tools and materials you'll need
Gather the essential tools before you start so you don’t interrupt the diagnostic flow. Having a clean workspace helps you stay organized and reduces the risk of reassembling incorrectly.
Essential tools:
- Screwdrivers (Phillips and flathead), assorted sizes
- Adjustable wrench and a socket set
- Ladder or stable step stool
- Multimeter or voltage tester
- Lubricant (white lithium grease or silicone spray)
- Clean rags and contact cleaner
- Safety glasses and gloves
Optional materials (as needed): replacement sensors, limit switches, or connector housings. Only use these if you’ve confirmed a faulty part through tests.
Diagnosing the opener's electronic controls
The control board and wiring carry signals between the wall switch, remote, and motor. A misread signal or loose connector can stop the door from responding. Start by inspecting the wiring harnesses for corrosion or loose pins and testing the switches and remotes.
What to test:
- Wall switch and remote: confirm they send a signal when pressed. If the remote isn’t paired, re-pair following the manufacturer’s procedure.
- Limit and force settings: ensure the limit screws are set correctly so the door stops fully in open and closed positions.
- Diagnostics mode: if your opener has a built-in diagnostic indicator, note any error codes and refer to the manual.
If you identify a faulty connector or a corroded terminal, clean or replace it and re-test before proceeding.
Inspecting mechanical components for wear
Even with clean sensors and correct wiring, mechanical wear can prevent smooth operation. Inspect gears, belts or chains, and tracks for wear or damage. Worn rollers or misaligned tracks create binding that can stall the door or wear parts faster.
What to look for:
- Belts or chains: signs of fraying, stretching, or slipping.
- Gears: chipped teeth or cracks.
- Tracks: dents, bends, or obstructions.
- Hinges: loose or damaged mounting hardware that could cause wobble.
- Door balance: manually lifting the door should require minimal effort if the spring system is functioning; if it’s heavy or wobbly, professional balance adjustment is needed.
Document findings so you know what to replace or service.
Before you reassemble: testing and alignment
After replacing or tightening components, reassemble carefully and test each function step by step before finishing. Reconnect power, test the wall switch, and observe the door’s path. Use the test pedal or wall switch to verify the opener’s response, safety sensors, and automatic reversal feature.
What to verify:
- Door movement: smooth travel with no jerks or grinding sounds.
- Sensor alignment: the indicator lights should behave consistently when the beam is aligned.
- Reversal safety: place a small object under the door to ensure it reverses on contact.
- Reset and relink: if required, re-pair remotes and reprogram memory as directed by the manufacturer.
If anything feels unstable, stop and re-check connections and alignment.
Authority sources and safety standards
When approaching garage door open repair, it’s wise to reference trusted safety resources. The following sources provide general guidelines for safe operation and DIY maintenance:
- OSHA: Safety guidelines for electrical and mechanical repair work. https://www.osha.gov/
- CPSC: Consumer safety information on garage doors and opener safety. https://www.cpsc.gov/
- NIST: Standards and guidelines for safe handling of mechanical systems. https://www.nist.gov/
Always cross-check OEM manuals for device-specific instructions and local codes.
Next steps and maintenance plan
After completing the repair, implement a simple maintenance routine to reduce future failures. Schedule a quarterly inspection of tracks, rollers, and weather seals; lubricate moving parts; replace worn sensors or batteries in remotes; and log any issues for future reference. Keeping a short, written checklist helps you stay proactive and avoid emergency calls. If a repair seems beyond your comfort level, don’t hesitate to contact a professional; a quick assessment can prevent bigger problems later.
Tools & Materials
- Screwdrivers (Phillips and flathead)(Assorted sizes for mounting brackets and sensor screws)
- Adjustable wrench and socket set(For bolts on mounting hardware and drive components)
- Ladder or stable step stool(Safe height to reach the ceiling-mounted opener and tracks)
- Multimeter or voltage tester(To verify power and sensor circuits)
- Lubricant (white lithium grease or silicone spray)(Apply to rails, hinges, and moving parts; avoid excess)
- Clean rags and contact cleaner(Clean sensor lenses and electrical contacts)
- Safety glasses and gloves(Personal protective equipment)
- Replacement parts (sensors, limit switches, or connector housings)(Only if tests indicate faulty components)
Steps
Estimated time: 30-60 minutes
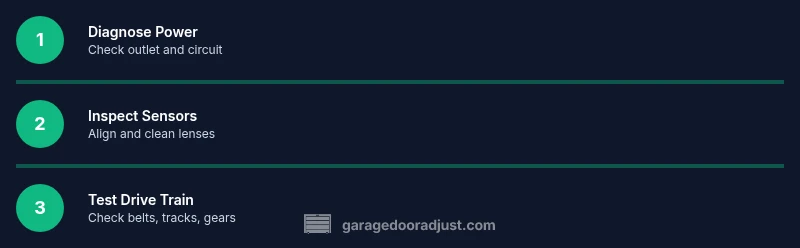
- 1
Power off and secure
Unplug the opener from the ceiling mount or wall outlet and disconnect any backup battery. Confirm the door cannot move by itself before you touch any components. This prevents unexpected movement that could cause injury.
Tip: Double-check that all power sources are disconnected before touching internal parts. - 2
Test the wall switch and remote
Operate the wall switch and the remote to see if either sends a command. If the remote doesn’t work, re-pair it according to the manufacturer’s instructions. This helps isolate whether the issue is electrical or a communication fault.
Tip: Ensure you’re testing with the door in a safe, stationary position. - 3
Inspect safety sensors
Check the sensor lenses for dirt or misalignment and verify the indicator lights behave correctly. Clean lenses gently and realign as needed. Misalignment is a common cause of doors failing to reverse or stop safely.
Tip: Avoid touching sensor lenses with oily fingers; use a clean, dry cloth. - 4
Check drive mechanism
Look for wear on belts or chains, and inspect the trolley connection for excessive play. Loose or stretched components reduce efficiency and can stop movement mid-travel.
Tip: Do not force components; replace worn parts rather than forcing a fit. - 5
Test limits and force settings
Make sure limit screws are set so the door fully opens and closes without binding. Incorrect limits can cause the door to stall or reverse unexpectedly.
Tip: If you’re unsure about limits, refer to the user manual for the correct range. - 6
Reassemble and test again
Reconnect power and perform a full cycle test: open, pause, and close. Observe for smooth operation, proper sensor response, and safe reversal if an obstacle is present.
Tip: Test with a light obstacle to confirm reversal works safely.
Got Questions?
What is the most common cause of garage door opener failure?
Sensor misalignment or remote pairing issues are frequent culprits. Start by verifying the safety sensors and re-pairing remotes if needed.
Most often, it's the safety sensors or remote pairing issues. Check alignment and re-pair remotes first.
Can I repair torsion springs myself?
Torsion springs are under high tension and can cause severe injury. Do not attempt spring repairs unless you’re a trained professional.
Springs are dangerous; leave them to a trained pro.
What safety steps should I take before starting?
Power off the opener, disconnect backup power, keep kids away, and wear eye protection. Ensure the door cannot move during inspection.
Turn off power, keep kids away, and wear safety gear.
What maintenance helps prevent future failures?
Regularly lubricate moving parts, tighten hardware, inspect tracks, and replace worn sensors or batteries in remotes.
Keep things lubricated and tight, and replace worn parts as needed.
If the opener still won’t operate, what’s next?
Review the diagnostic steps, check the OEM manual for specific codes, and consider professional service if the issue persists.
If it still won't work, follow the manual's guidance and consider a pro if needed.
Watch Video
Quick Summary
- Verify power and sensor alignment first
- Inspect mechanical wear before more complex fixes
- Test functions after every step
- Document results for future maintenance