Steps to Garage Door: A Homeowner's Step-by-Step Guide
Learn to diagnose, repair, and safely install common garage door issues with a comprehensive, step-by-step homeowner's guide, plus safety tips and pro insights from GarageDoorAdjust.

These steps to garage door guide you from safety checks to final adjustments, enabling a homeowner to diagnose common door and opener issues. According to GarageDoorAdjust, you’ll learn how to inspect tracks, balance springs, test sensors, and perform basic lubrication with minimal tools. Follow along for a safe, effective repair workflow, plus tips from GarageDoorAdjust to reduce future problems.
How Garage Doors Work and Why You Need a Step-by-Step Plan
Garage doors are heavy, multi-part systems that combine mechanical and electrical components to lift, lower, and secure your vehicle. A typical sectional door rides on metal tracks, guided by rollers, connected to torsion or extension springs that balance the door’s weight. An electric opener provides assisted movement, while safety features like photoeye sensors prevent entrapment. Understanding these basics helps you diagnose issues more effectively and reduces the risk of injury. According to GarageDoorAdjust, having a clear, step-by-step plan keeps the work organized and improves outcomes. The following overview uses plain language and practical examples so homeowners can approach common problems with confidence.
With the right plan, you can safely identify misalignments, binding components, worn rollers, or sensor faults before they escalate into expensive repairs. The balance between door weight and spring force is delicate; even small misadjustments can create dangerous forces. The overview below emphasizes safety, careful observation, and conservative fixes that avoid high-tension exposure. This guidance is meant for homeowners who want to maintain function and extend the life of their garage door system.
Safety First: Hazards, PPE, and Lockout Procedures
Safety should always come first when working on a garage door. Start by powering down the opener to prevent unexpected movement. Wear eye protection and gloves to shield against sharp edges and moving parts. Keep children and pets away from the work zone, and ensure the door is in a stable position before you touch any components. Lockout the power at the breaker if possible, and never rely on remote controls as a means of securing the door during maintenance. If you hear unusual noises, smell burning, or notice frayed cables or bent tracks, stop immediately and reassess the situation. Maintaining a tidy workspace reduces the risk of trips and accidental activation. From a practical standpoint, documenting each observation with photos helps you track issues and communicate with a pro if you need one. GarageDoorAdjust emphasizes deliberate pace and conservative testing to avoid injuries and further damage.
Tools, Workspace, and Prep for Your Garage-Door Project
A well-prepared workspace saves time and minimizes risk. Clear the area beneath and around the door to ensure you have a full range of motion. Gather essential hand tools: a set of screwdrivers (flat and Phillips), an adjustable wrench, pliers, a level, and a utility knife. Have a ladder or step stool tall enough to reach the tracks safely. Keep rags, a bucket of soapy water, and a mild degreaser handy for cleaning grime from tracks and hinges. Lubrication supplies should include a light silicone spray or white lithium grease. Finally, consider a helper for testing door movement and a camera to document before/after conditions. Preparation reduces guesswork and makes adjustments more predictable.
Diagnosing Common Symptoms and Root Causes
Common symptoms include slow movement, grinding noises, door binding, and sensors that falsely trigger. The root causes range from simple obstructions in tracks to misaligned rollers, worn hinges, or dirty sensors. Start by visually inspecting tracks for debris, dents, or bent sections. Check rollers and hinges for wear, and confirm that the door remains level when checked from the side with a straight edge. If you notice gaps or fraying cables, stop and consult a professional. Testing the safety sensor with a small object can confirm that the photoelectric beam is functioning as intended. By narrowing down symptoms to likely components, you’ll know which parts to address and which require professional service.
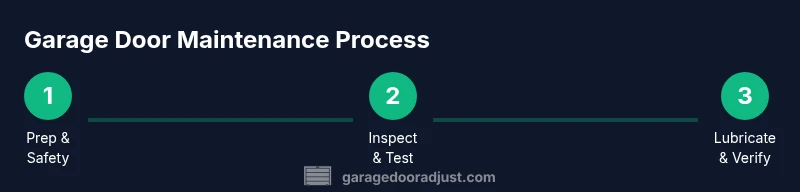
Step-by-Step Maintenance: From Tracks to Sensors
Understanding how to methodically approach a garage door maintenance cycle helps you avoid unnecessary fixes. Begin with a thorough cleaning of tracks to remove dirt and debris that hinder movement. Inspect the door’s balance by manually lifting the door a few inches and releasing it; it should stay in place. Check all fasteners for tightness, tighten as needed, and lubricate moving parts sparingly. Align safety sensors by ensuring the emitter and receiver faces are clean and unobstructed. Finally, test the door’s operation with the opener and in manual mode to confirm smooth movement and reliable stopping, repeating as needed after any adjustment. This process emphasizes safe handling of primary components and builds a baseline for future maintenance.
Common Problems and Quick Fixes
When doors stall or misbehave, the fixes are often straightforward: wipe tracks clean, re-lubricate hinges, adjust rollers for proper alignment, and replace worn weatherstripping as needed. If the door appears off-balance, do not attempt to adjust torsion springs yourself—this remains a high-risk task reserved for pros. Replace damaged cables only with proper safety gear and the right parts, as frayed cables can snap with dangerous velocity. In many cases, the issue lies in sensor misalignment or a dirty beam—cleaning the sensors and re-testing can restore proper operation without tools beyond basic maintenance.
Maintenance Schedule and Pro Tips
Create a simple maintenance calendar that you repeat every 6 to 12 months. Include a visual inspection of tracks, rollers, springs (as relevant to your door type), and weatherstripping. Clean and lubricate moving components, and verify sensor alignment and opener function. Pro tips include documenting results, keeping a small toolkit on hand, and taking photos of parts before you begin any work. For homeowners who want to maximize safety and longevity, these routine checks are more impactful than ad-hoc, sporadic maintenance. The maintenance cadence reduces the risk of unexpected failure and extends the life of your system.
Authority Sources
- https://www.cpsc.gov
- https://www.osha.gov
- https://extension.illinois.edu
Tools & Materials
- Safety goggles(Protect eyes from debris and spring tension surprises)
- Work gloves(Guard hands against sharp edges and pinch points)
- Step ladder(Reach tracks and hinges safely)
- Flathead screwdriver(Lifts small screws on hardware)
- Phillips screwdriver(Remove/adjust screws on brackets and hinges)
- Adjustable wrench(Tightens bolts on tracks and hardware)
- Pliers(Handle cables and clips with control)
- Level(Check door balance and track alignment)
- Utility knife(Trim weatherstripping or tape)
- Rags and degreaser(Clean tracks and hinges before lubrication)
- Lubricant (silicone spray)(Apply to rollers, hinges, and tracks)
- White lithium grease(For stubborn joints if silicone isn’t enough)
Steps
Estimated time: 60-90 minutes
- 1
Power down and prep workspace
Disconnect power to the opener and secure the door in the closed position. Clear the area, remove objects, and set up your ladder. This minimizes unexpected movement and provides a clear work zone.
Tip: Double-check that the opener cannot move before touching moving parts. - 2
Inspect tracks for obstructions
Look along both vertical tracks for dents, bends, or debris. Clean with a rag and degreaser if needed, and ensure the tracks are parallel and plumb.
Tip: Use a level to verify vertical alignment; small misalignments can cause binding. - 3
Check balance by manual lift
With the door closed, lift it about 3 inches and release. The door should stay put. If it moves, the balance is off, and adjust only non-spring components first.
Tip: If the door drops suddenly, stop and call a professional for spring-related adjustments. - 4
Inspect springs and cables (do not adjust)
Visually inspect torsion springs or extension springs and cables for wear, gaps, or fraying. Do not attempt adjustments here unless trained; improper handling can cause severe injury.
Tip: If you see any damage, discontinue and contact a pro immediately. - 5
Check rollers and hinges
Look for worn or cracked rollers and loose hinges. Replace or tighten as needed, using the correct fasteners and ensuring proper alignment.
Tip: Lubricate with a light spray after cleaning to reduce resistance. - 6
Lubricate moving parts
Apply a light silicone spray or white lithium grease to rollers, hinges, and track joints. Avoid over-lubricating to prevent dust buildup.
Tip: Wipe away excess to prevent dirt attraction. - 7
Test safety sensors alignment
Ensure the photoeye sensors face each other with a clear line of sight. Test by placing a small object in the beam’s path; the door should reverse on contact.
Tip: If sensor lights are dim or misaligned, adjust them before re-testing. - 8
Operate door and verify function
Reconnect power and run the door through full cycles (open, stop, close). Listen for unusual noises and observe any jerky movements. Recheck balance after any adjustment.
Tip: Document the cycle results for future reference. - 9
Final safety check and cleanup
Wipe down tools, store materials, and re-check that the door remains in a stable position when tested manually and by the opener.
Tip: Leave the work area cleaner than you found it.
Got Questions?
What are the signs that indicate a garage door needs professional service?
Rumbling, grinding, or jerky movement; door won’t stay balanced; frayed cables or bent tracks; or any inclining structural damage means professional service is required to prevent injury.
Listen for grinding noises, binding, or obvious damage; if you notice these, stop and call a pro.
Can I fix a garage door spring myself?
No. Springs are under extreme tension and can cause serious injury if mishandled. Only licensed technicians should adjust or replace torsion or extension springs.
Spring repairs are dangerous—leave them to professionals.
How often should I lubricate garage door components?
Lubricate moving parts every 6 to 12 months, or more often if you use the door heavily. Clean parts first, then apply a light lubricant to hinges, rollers, and tracks.
Lubricate about once a year, more if you use the door a lot.
Why does my garage door make noise after a repair?
Noise after maintenance can indicate misaligned tracks, insufficient lubrication, or loose hardware. Recheck alignment and tighten fasteners before retesting.
If it’s noisy after work, recheck parts and tighten mounts.
What safety checks should I perform before starting repairs?
Disconnect power, secure the door, wear PPE, and inspect for obvious hazards like frayed cables or damaged tracks before beginning any work.
Power off, secure the door, and inspect for hazards first.
How long does typical maintenance take?
A thorough, at-home maintenance session typically takes about 60 to 90 minutes, depending on door condition and setup.
Expect roughly an hour to an hour and a half for a complete maintenance check.
Quick Summary
- Safe prep beats risky tinkering.
- Identify symptoms before replacing parts.
- Don’t adjust springs—call a pro when needed.
- Regular lubrication extends life and smooths operation.
- Document steps and outcomes for future maintenance.