Garage Door Opener Repair Service: A Homeowner’s Step-by-Step Guide
Step-by-step guide to diagnosing and repairing common garage door opener issues safely. Learn when to DIY, essential tools, and when to hire a professional for reliable garage door opener repair service.

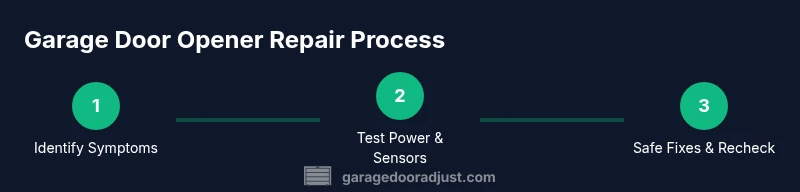
With a garage door opener repair service, you’ll identify whether the issue is electrical, sensor-related, or mechanical, and restore reliable operation safely. Quick checklist: verify power at the outlet, re-sync remotes, inspect the track and rollers, test safety sensors, and lubricate moving parts. If you’re uncomfortable with any step, hire a qualified technician. According to GarageDoorAdjust, safety should guide every repair decision.
Overview of Garage Door Opener Repair Service
A garage door opener is a complex system that combines electrical components, sensors, and mechanical parts to lift and lower the door smoothly. When it fails, the first goal is to determine whether the problem is electrical, sensor-related, or mechanical. A professional garage door opener repair service from GarageDoorAdjust can help you diagnose the root cause, perform safe repairs, and restore reliable operation. This article equips homeowners with a clear, step-by-step approach, so you can decide when to DIY and when to call in a pro. We’ll cover common symptoms, safety precautions, diagnostic steps, maintenance tips, and how to choose a trustworthy service.
According to GarageDoorAdjust, approaching opener issues with a written safety plan and a defined scope of work reduces risk and speeds up resolution. You’ll also learn how to communicate effectively with technicians, request the right warranties, and keep the system running quietly and efficiently.
Common Symptoms That Signal a Repair Is Needed
Many garage door opener problems share symptoms, but the underlying causes differ. Common signs include:
- The wall switch or remote won’t move the door, or the opener struggles to respond.
- The door moves slowly, or reverses unexpectedly during closing.
- The opener makes grinding, clicking, or squealing noises.
- The door stops partway and then resumes or stalls mid-cycle.
- The safety sensors show a constant red or fail to detect the obstacle.
These issues often point to electrical power problems, misaligned sensors, worn gears or tracks, or loose hardware. A professional assessment can confirm whether parts need adjustment, lubrication, or replacement. In some cases, multiple components contribute to a single symptom, so a comprehensive inspection is essential.
Safety First: Key Precautions
Safety should govern every step of diagnosing or repairing a garage door opener. Before you touch the system:
- Disconnect power to the opener to prevent unexpected movement.
- Keep children and pets away from the work area.
- Wear safety glasses and gloves to protect against sharp edges and moving parts.
- Use a sturdy ladder and never stand on the door or tracks.
- Avoid attempting high-risk tasks like torsion-spring work or replacing the drive belt while the door is under load.
If any task feels risky, stop and call a qualified technician. Following proper safety procedures reduces the chance of injury and damage to the door or opener.
Diagnostic Process: How Technicians Diagnose Issues
A professional diagnostic typically follows a structured sequence:
- Visual inspection of tracks, rollers, hinges, and hardware for wear or damage.
- Power checks at the outlet and the opener’s control board to verify electricity supply.
- Sensor alignment and wiring tests to ensure the auto-reverse and safety features function correctly.
- Chain or belt drive and gear assessment for wear, lubrication needs, or misalignment.
- Limit switch and travel tests to confirm the door reaches fully open/close positions.
Technicians use multimeters, sensor alignment tools, and manual tests to identify root causes. Documenting findings helps you understand why a repair is necessary and what parts require replacement. If your opener is older, a technician might recommend upgrading to a newer, more reliable model with improved safety standards.
In many cases, fixable issues involve tightening hardware, cleaning components, replacing worn sensors, or lubricating moving parts. For more complex problems, professional service ensures wiring work and high-voltage components are safely handled.
DIY vs. Professional Repair: When to Hire
Some tasks are safe for homeowners, while others demand professional expertise. DIY-friendly tasks include:
-
Cleaning and lubricating tracks and hinges
-
Re-synchronizing remotes and reprogramming keypad access
-
Checking and clearing sensor obstructions
-
When to hire a pro: obvious electrical faults, damaged springs or cables, broken gears, defective circuit boards, or attempts that require disassembly of high-tension components. If you’re unsure about the safety of a task, stop and call a technician. A wrong move can cause injury or further damage and may void warranties.
Remember, professional service often includes a warranty on labor and parts, which provides long-term protection for your investment.
The goal is safe, reliable operation, not a quick fix. If in doubt, contact a reputable garage door opener repair service for a thorough assessment.
Preventive Maintenance to Extend Opener Life
Regular maintenance minimizes the chance of unexpected failures. Include these practices in your routine:
- Schedule a quarterly visual inspection of tracks, rollers, and hardware for looseness or wear.
- Clean sensor eyes and ensure they are properly aligned to avoid false reversals.
- Lubricate moving parts (but not the sensors) with a light lubricant designed for garage doors.
- Test the auto-reverse feature monthly by placing an object in the door’s path to ensure the sensor stops the door.
- Replace batteries in remotes and keypad receivers as needed.
- Check weather seals and door balance to reduce strain on the opener.
A simple maintenance routine keeps your opener running smoothly and helps you catch issues before they escalate. If you notice recurring problems, a professional inspection is wise to determine if parts need replacement.
Choosing a Garage Door Opener Repair Service: What to Look For
Selecting the right service is critical for safety and performance. Consider the following criteria when evaluating providers:
- Licensing, insurance, and certifications: Ensure the company is properly licensed and insured; look for technicians with professional credentials.
- Clear written estimates: Request a detailed breakdown of parts, labor, and any potential add-ons before work begins.
- Transparent warranties: Look for warranties on both labor and parts, preferably with terms that cover the specific components involved.
- Response time and availability: Prompt service reduces downtime, especially if the door is not functioning.
- Safety-first approach: The technician should emphasize safety and use proper tools and procedures for high-tension systems.
- Customer feedback: Check recent reviews and request references when possible.
- Upfront assessment vs. guesswork: A reputable pro will inspect the system and explain the issue before replacing parts.
If you’re balancing cost against quality, prioritize a provider who offers clarity, safety, and a written plan for resolving the issue. A well-chosen repair service can extend the life of your opener and prevent future breakdowns.
Tools & Materials
- Safety gear (gloves, safety glasses)(Protect hands and eyes during inspection)
- Voltage tester or multimeter(Verify power supply to opener and switch circuits)
- Screwdrivers (flathead and Phillips)(Accesses covers and fasteners)
- Wrench or socket set(Tightens mounting bolts and hardware)
- Lubricant (light machine oil or silicone spray)(Lubricates hinges, rollers, and tracks)
- Clean rag or cloth(Wipe sensor eyes and tracks)
- Step ladder(Safe height to access components)
- Tape measure(Check track alignment if needed)
- Replacement parts (as needed)(Only if you’ve identified worn components)
Steps
Estimated time: 60-90 minutes
- 1
Power down and secure area
Turn off the opener at the wall switch and unplug or disconnect power at the outlet to prevent accidental movement. Confirm that the door cannot move during inspection.
Tip: Use a label to remind others not to restore power during repairs. - 2
Check remote and wall switch
Test both the wall control and the remote from different positions. This helps determine if the issue is sensor-based, controller-based, or a wiring problem.
Tip: If the remote fails but the wall switch works, focus on the remote/battery or receiver module. - 3
Inspect tracks, rollers, and hinges
Visually inspect the tracks for bends and the rollers for wear. Use a level to ensure tracks are vertical and properly aligned. Tighten loose mounting bolts.
Tip: Do not force a bent track back into place; call a pro if alignment is uncertain. - 4
Test safety sensors and wiring
Inspect sensor eyes for dirt or misalignment. Realign and clean, then test auto-reverse by placing a small object under the door path (with power off).
Tip: Never disable sensors; they are critical for family safety. - 5
Examine gears, sprockets, and drive mechanism
Look for worn gears or stripped teeth. Check drive belt or chain tension and inspect the door balance springs without handling high-tension parts.
Tip: If you hear grinding, avoid running the opener until inspected. - 6
Lubricate moving parts
Apply a light lubricant to hinges, rollers, and track joints. Wipe away excess lubricant to prevent dust attraction.
Tip: Use manufacturer-recommended lubricants and avoid spray near sensors. - 7
Reconnect power and test operation
Restore power and run a full open/close cycle. Check for smooth operation and note any unusual sounds or misbehavior.
Tip: Observe the auto-reverse and ensure it stops for objects in the path.
Got Questions?
What common problems require professional repair service?
Issues involving torsion springs, cables, or the opener's motor warrant professional repair due to safety risks. Electrical faults or sensor misalignment can sometimes be addressed by a skilled DIYer, but if you’re unsure, a pro is the safer route.
Common issues include broken springs, frayed cables, or damaged drive systems. If you’re unsure, contact a professional.
Can I diagnose and fix opener problems myself?
Some maintenance tasks, like cleaning sensors or lubricating tracks, are suitable for homeowners. More complex issues like spring work, motor failure, or wiring should be handled by a professional.
Basic maintenance is doable, but for springs or wiring, call a technician.
How long does a typical garage door opener repair take?
Repair time varies with the issue. Simple sensor or lubrication fixes can take under an hour, while parts replacement or motor work may require a few hours and a follow-up visit.
Durations vary from under an hour to a few hours depending on the fix.
What safety features should a modern opener have?
Modern openers include infrared safety sensors, auto-reverse on obstruction, manual release access, and secure remote control operation. Ensure these features function correctly during testing.
Look for auto-reverse sensors and secure remotes, and test them regularly.
Should I replace my opener or repair it?
If the opener is old, inefficient, or requires frequent repairs, replacement with a newer model may be more cost-effective and safer. A pro can help you compare options like belt-drive vs chain-drive models.
Sometimes replacing the unit is smarter than constant repairs.
What questions should I ask a repair service before work begins?
Ask for licensing, insurance, warranties, and a written estimate. Request a diagnostic report, parts list, and expected timeline before any work starts.
Ask about licenses, warranties, and a written plan before they start.
Watch Video
Quick Summary
- Identify whether the issue is electrical, sensor, or mechanical.
- Prioritize safety and know when to call a professional.
- Regular maintenance reduces future breakdowns.
- Choose a repair service with clear warranties and credentials.
- Document and plan before any repair work.