Repairing a Garage Door Opener: A Practical How-To Guide
Learn how to diagnose, repair, and safely restore your garage door opener with practical steps, common fixes, and pro tips from GarageDoorAdjust. Ideal for homeowners seeking reliable, safe repairs without expensive service calls.

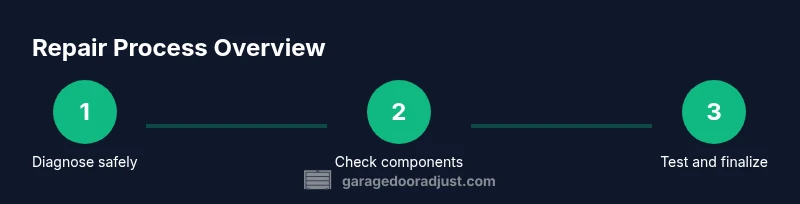
Repairing a garage door opener starts with a safe, methodical diagnostic, followed by targeted repairs and reprogramming as needed. This quick guide highlights common failure points, essential safety checks, and practical steps you can perform with everyday tools to restore reliable operation. Expect guidance on wiring, sensors, remotes, and opening limits for a smooth, safe fix today.
Safety First and Quick Diagnostics
When you begin repairing a garage door opener, safety must come first. Start by unplugging the opener from the wall outlet or switching off the nearby circuit at the breaker to eliminate any risk of moving parts or electric shock. With the power off, manually test the door by lifting it halfway; if it stays put, the balance may be good, but if it drops or rises on its own, the springs or tracks may need attention. A simple diagnostic checklist can save time and prevent unnecessary parts replacement. Look for loose or damaged mounting brackets, worn rollers, frayed cables, and visibly bent rails. Check the safety sensors near the floor; misalignment can prevent the opener from reversing properly, a common cause of opener failure. As you inspect, keep a list of symptoms: noises during operation, the door reversing unexpectedly, the remote failing to respond, or the motor running without moving the door. According to GarageDoorAdjust, a cautious diagnostic is the first step in repairing a garage door opener, reducing risk and guiding effective fixes.
This initial scan should be followed by targeted tests: verify that the emergency release handle operates smoothly, confirm that the belt or chain tension is appropriate, and check that the limit switches align with the door position. Document any irregularities with notes and photos; these details make it easier to pinpoint required replacements and communicate issues to a technician if you escalate the repair. Keep a clear workspace and a customer-safe distance from moving parts. The goal in this phase is to identify the fault accurately before you replace components or reprogram the system.
Tools and Materials You'll Need
Before you dive into repairs, assemble the tools and materials that will help you complete the job efficiently and safely. Having everything ready minimizes pauses and reduces the chance of rework. Typical tasks involve checking wiring, sensors, and limit switches, so you’ll need basic electrical testing tools, manual hand tools, and some replacement parts. A well-prepared toolbox lowers risk and keeps the work clean and organized. Gather items like a voltage tester, insulated screwdrivers, adjustable wrench, pliers, a ladder, safety glasses, work gloves, a flashlight, and lubricants such as silicone spray for moving parts. If you suspect a sensor issue, you may also need spare safety sensors or a replacement limit switch compatible with your model. Note: avoid using damaged blades or stripped screws; if a fastener is corroded, replace it rather than forcing it. A simple, well-stocked toolkit can help you complete basic repairs in a single session without costly trips to a hardware store. This is a good time to review the opener’s model-specific manual for any required parts and torque specs.
For example, if you identify a sensor misalignment, you’ll want a small ruler or straight edge to realign the sensor brackets precisely. If you hear grinding from the drive mechanism, you may need lubrication and a careful inspection of gears and wheels. Always ensure you have a safe, dry workspace to prevent slips or accidents. If you’re unsure about an electrical component, consult the manual or seek professional advice. The right tools can make the repair smoother and safer.
Step-By-Step: Replacing Worn Components
This section covers the core repair actions when the opener shows signs of wear, such as sluggish movement, grinding, or weak door lift. Each step is designed to be a single, clear action with a practical rationale, and each includes a pro tip to prevent common mistakes. The total estimated time for completing these steps is 25-45 minutes, depending on your experience and the complexity of the issue. Follow each step in order to maximize success and minimize rework.
- Disconnect power to the unit and secure the area. Why: prevents accidental activation during inspection and protects against electric shock. Pro tip: use a labeled switch or unplug the unit at the outlet and keep children away from the work area.
- Inspect the drive belt or chain for wear or slack. Why: a worn belt or loose chain reduces lifting efficiency and can cause jerky movement. Pro tip: measure tension according to the manufacturer’s guidelines and replace if sagging more than recommended.
- Check the track and rollers for binding or damage. Why: damaged rails or rollers hinder smooth movement and can strain the motor. Pro tip: lubricate the rollers after cleaning to reduce resistance, but avoid getting lubricant on the belt or chain.
- Test safety sensor alignment and wiring. Why: misaligned sensors can prevent the door from reversing on contact. Pro tip: realign by a consistent offset using the sensor housing as a reference and retest with the door closed.
- Inspect and replace worn gears or sprockets inside the opener. Why: gear wear leads to loss of torque and may cause grinding noises. Pro tip: take photos of how components fit together to guide reassembly.
- Re-tension or replace the drive mechanism. Why: proper tension ensures balanced lifting and a quiet operation. Pro tip: adjust gradually, testing door balance at several points of travel.
- Re-check limit switches and calibration. Why: incorrect limits mean the door won’t fully open or close. Pro tip: test a few open/close cycles with safe clearance before final use.
- Reconnect power and perform a full function test. Why: confirms that the repair resolves the initial symptoms. Pro tip: run the door from both wall control and remote, noting any inconsistencies and adjusting settings as needed.
Troubleshooting Common Opener Problems
Opener malfunctions can stem from a variety of issues, from electrical to mechanical. Start with the simplest explanation: power issues. Confirm the outlet is energized and the circuit breaker isn’t tripped. If the opener remains unresponsive, inspect the safety sensors for misalignment or obstruction. A blocked sensor or a dusty lens can prevent the door from closing or reversing correctly. If you observe unusual noises, identify the source: a grinding sound often points to worn gears or dry bearings, while a metallic rattle can indicate loose screws or brackets. The remote may fail due to weak batteries, interference from other devices, or pairing issues with the receiver. Replacing batteries and re-pairing remotes often resolves this problem. If the door opens but stalls mid-travel, inspect the tracks for debris and the balance of the door itself; a heavy door may indicate spring tension issues requiring closer inspection. Remember to recheck safety tests after any adjustment.。
This block expands on diagnostic patterns, offering practical steps to isolate root causes and avoid unnecessary replacements. By methodically testing each subsystem—power, sensors, drive mechanism, and door balance—you’ll map the path to a durable fix rather than a temporary bandage. The more structured your troubleshooting, the more likely you’ll complete a successful repair the first time.
Reprogramming Remotes and Safety Sensors
After repairing mechanical issues, you may need to reprogram remotes or re-sync the safety sensors to reestablish reliable operation. Start by resetting the remote control pairing according to your model’s manual. Typically, this involves pressing and releasing a learn button on the opener head while holding a remote button until the LED blinks. If you recently replaced the receiver board or keyless entry pad, ensure the programming sequence matches the exact model. For safety sensors, confirm they’re aligned and unobstructed by cleaning the lenses and adjusting the mounting brackets evenly. A small misalignment can stop the door from closing or cause it to reverse unexpectedly. If your opener includes a battery backup or smart features, verify that the firmware is up to date and that the network connection remains stable. Proper reprogramming reestablishes control and improves reliability after hardware repairs.
During testing, operate the door from multiple control methods (wall control, remote, and keypad) to confirm consistency. If you notice any anomaly—such as the door failing to respond to a certain remotes or inconsistent reversal behavior—repeat the sensor alignment and re-test. Documentation helps too: note the steps you used to reprogram and the sequence you followed so you can replicate them in the future if needed.
The reprogramming process is not only about restoration but also about preserving security; ensure you keep your remotes with trusted access and avoid sharing codes widely. If the remote pairing continues to fail after several attempts, contact a professional for a deeper inspection to avoid compromising safety.
Maintenance to Prevent Future Failures
Proactive maintenance is a key part of repairing a garage door opener and extending its life. Schedule routine checks every 6-12 months to inspect the drive mechanism, track alignment, and safety features. Clean the rails, remove dirt, and inspect for signs of wear or corrosion. Lubricate moving parts with a silicone-based or lithium-based product recommended by the manufacturer; avoid excessive lubrication, which can attract dust and impair performance. Check weather-stripping around the door to prevent moisture and debris from entering the track area. Test the door balance by disconnecting the opener’s power and lifting the door manually; it should stay in place when opened. If it drops or rises, the springs or balance system may require professional maintenance. Replace worn rollers and brackets promptly, as neglecting these components can lead to damage or injury. Finally, keep the operator’s firmware up to date if your model supports software updates, which can improve performance and security. Regular maintenance reduces the likelihood of sudden failures and keeps your system reliable for years.
A predictable maintenance routine contributes to a smoother operation, quieter performance, and better safety for your family. It also makes it easier to spot issues early, preventing expensive repairs in the future. The GarageDoorAdjust team emphasizes that consistent upkeep is the best defense against unexpected outages and costly emergency service visits.
When to Call a Pro
There are times when DIY repairs are not the safest or most cost-effective option. If you encounter a broken torsion spring, a frayed cable, substantial track damage, or electrical problems you’re not confident addressing, it’s prudent to seek professional help. Springs carry extreme tension; improper handling can cause severe injury. Similarly, if your opener is making unusual noises, sparking, or emitting a burning smell, shut off power immediately and call a licensed technician. If you’ve attempted multiple steps without success, a pro can diagnose deeper issues like motor winding faults, circuit board failures, or alignment problems beyond basic maintenance. A qualified technician can provide an accurate assessment, ensure safety compliance, and perform precision repairs to restore reliability swiftly. Remember that investing in a professional evaluation today can prevent larger, more expensive problems later and minimize downtime for your household.
Conclusion and Next Steps
This guide provides a thorough framework for repairing a garage door opener, from safety precautions to hands-on fixes and preventive maintenance. You now know how to diagnose common problems, identify wear, reprogram remotes and sensors, and perform essential maintenance that extends the life of your system. If at any point you feel unsure or the task involves high-risk components, don’t hesitate to contact a qualified technician. Safety remains the top priority while you work toward restoring reliable operation. The knowledge you’ve gained equips you to handle many routine issues and to keep your garage door opener functioning smoothly and safely for years to come.
Tools & Materials
- Voltage tester(Check circuit and wiring without touching live conductors)
- Insulated screwdriver set(Flat and Phillips, insulated handles)
- Wrench set (adjustable)(For mounting hardware and tensioners)
- Pliers (needle-nose)(Grip small components and adjust brackets)
- Torque wrench or driver with torque bit(Only if specified by model torque specs)
- Ladder or sturdy step stool(Safe access to tracks and brackets)
- Silicone spray or lithium-based lubricant(Lubricate moving parts; avoid belt contact)
- Replacement parts (as needed)(Sensors, limit switch, rollers, springs depending on model)
Steps
Estimated time: 45-60 minutes
- 1
Disconnect power and secure area
Unplug the opener at the outlet or switch off the circuit. Verify the door cannot move when you apply manual force. This prevents accidental operation during inspection and reduces shock risk.
Tip: Label the power switch so others don’t accidentally restore power while you’re working. - 2
Inspect drive belt/chain for wear
Look for cracks, fraying, or sagging in the drive belt or chain. Replace if signs of wear are evident to restore proper lifting and reduce motor strain.
Tip: Take a photo of the belt path before removing to ensure correct reassembly. - 3
Check tracks and rollers
Inspect rails for debris, bending, or misalignment; examine rollers for smooth rotation. Clean and align as needed to prevent binding and noise.
Tip: Lubricate only the rollers and rails that contact metal; avoid the belt pathway. - 4
Test safety sensor alignment
Ensure sensors are aligned at equal distance from the floor and free of obstructions. Misalignment can cause automatic reversal failure during operation.
Tip: Use a straight edge to verify alignment and adjust until the lenses point at the same height. - 5
Inspect and replace gears or sprockets
Check for worn gears or damaged sprockets inside the opener housing. Replace as needed to restore torque and quiet operation.
Tip: If you replace gears, ensure the new ones match the original model’s tooth count. - 6
Re-tension drive mechanism
Adjust belt/chain tension to manufacturer specs. Proper tension reduces motor load and improves lifting efficiency.
Tip: Make small adjustments and test the door movement after each change. - 7
Recalibrate limit switches
Set the top and bottom limits so the door fully opens and closes without stopping mid-travel. Improper limits can cause door stalling.
Tip: Test at least 3 cycles in various positions to confirm accuracy. - 8
Reconnect power and test
Restore power and run a full sequence using remote and wall control. Observe smooth operation, proper reversal, and correct stopping.
Tip: Document any abnormal behavior for future reference.
Got Questions?
Is it safe to repair a garage door opener myself?
DIY fixes can be safe for basic issues when you follow safety precautions and use proper tools. Avoid high-tension components and electrical faults beyond your training. When in doubt, consult a professional.
Yes, for basic issues you can DIY safely if you follow safety precautions and use the right tools. For any high-tension parts or electrical faults, contact a professional.
Why won't my opener respond to the remote?
Common causes include weak batteries, mispaired remotes, or interference. Replace batteries first, then re-pair the remote to the opener following the model's instructions.
Most often it’s batteries or remotes needing re-pairing. Replace batteries and re-sync according to your model’s steps.
The door opens but stalls partway; what now?
Stalling can indicate track binding, worn rollers, or insufficient balance. Inspect tracks, lubricate moving parts, and test door balance manually. If unresolved, seek professional help.
If it stalls, check the tracks and balance, lubricate, and retest. If it still stalls, a pro should assess imbalance or spring issues.
Can I realign safety sensors myself?
Yes, realignment is often straightforward: clean lenses, ensure equal height, and adjust brackets until both sensors face each other clearly. Re-test the close/open cycle.
Sensor realignment is doable. Clean lenses, align brackets evenly, and test with a close/open cycle.
How often should I lubricate the opener?
Lubricate moving parts every 6-12 months or after heavy use, using a silicone or light lithium-based lubricant. Wipe away excess to avoid dust buildup.
Lubricate every 6 to 12 months, or after heavy use, and wipe away excess lubricant.
When should I replace the opener?
If emissions, persistent grinding, or unreliable operation persist after repairs, it may be time to consider a replacement with modern safety features and improved efficiency.
If repairs keep failing, consider replacing with a newer model that offers better safety features.
Are there safety issues with do-it-yourself repairs?
Yes. Working around high-tension springs and live electrical components can cause serious injuries. Always unplug power, use insulated tools, and consult a professional for hazardous tasks.
There are safety risks, especially with springs and wiring. Unplug power and use insulated tools; call a pro for risky steps.
Watch Video
Quick Summary
- Identify safety risks before touching any components
- Follow a step-by-step diagnostic to avoid unnecessary parts replacement
- Test remotes and sensors after repairs to confirm reliability
- Keep up a regular maintenance routine to prevent future failures