Battery for Garage Door Remote: Replacement Guide
Learn how to identify the right battery for your garage door remote, replace it safely, re-pair if needed, and troubleshoot common issues. This step-by-step guide from GarageDoorAdjust covers coin-cell and small batteries, disposal, and maintenance.

Goal: Replace the battery for your garage door remote and restore reliable operation. First, identify the correct battery type for your model, then open the remote, insert a fresh battery with the correct polarity, and reseal. Test the remote, and re-pair if needed. Dispose of old batteries properly; this simple battery replacement often fixes range and responsiveness.
Why the battery for garage door remote matters
The remote that controls your garage door relies on a small power source. A healthy battery maintains strong signal transmission, consistent range, and quick response. When the battery weakens, the opener may respond inconsistently or not at all. Regular checks and timely replacement can prevent unnecessary trips to the garage or frustration at the door. According to GarageDoorAdjust, many common remote problems trace back to a dying battery rather than a faulty opener. Understanding how the battery for garage door remote functions helps homeowners diagnose issues quickly and safely.
Common battery types for garage door remotes
Most remotes use compact coin-cell batteries or similarly small cells. The two most common types you’ll encounter are CR2032 and CR2025 coin cells; some older or budget remotes use smaller batteries like CR2024. A few models adopt A23 or LR44 button cells. Before purchasing, check the back of the remote or the user manual for the exact type and polarity. Using the wrong size or polarity will prevent the remote from working or damage contacts.
How to identify the correct battery for your model
Identify the model number on the back of the remote or inside the battery compartment. Cross-check with the user manual or the manufacturer’s website to confirm the specified battery type. Look for markings on the current battery (for example, CR2032) and note the polarity indicators (+ and -). If the compartment has a protective sticker, avoid forcing the battery in; replacing the seal is as important as the battery itself to prevent moisture ingress.
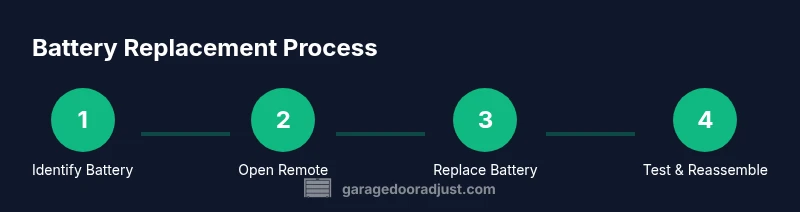
Step-by-step overview of the replacement process
In this overview, you’ll learn the broad sequence that GarageDoorAdjust recommends for battery replacement. Start by locating the battery inside the remote, then remove the old cell, insert a fresh one with the correct orientation, and reassemble. After replacement, test the remote at the door sensor and at your car or garage entry, and re-pair only if the opener requires it. The exact actions are covered in the dedicated STEP-BY-STEP section below to avoid ambiguity.
How to test the remote after replacement
After you install a new battery, test the remote immediately from a few feet away and then from a longer distance to confirm the signal is consistent. If you notice intermittent response, ensure the contact surfaces inside the battery compartment are clean and not corroded. If the remote fails to respond, try pressing and holding the button for a moment to clear any static charge, then test again.
When to re-pair or reprogram the remote with the opener
Many remotes pair automatically after a battery change, but some models require manual re-pairing. Refer to the opener’s manual for the exact pairing procedure, which typically involves turning the opener into programming mode and pressing the remote button in a specific sequence. If you’re using a newer smart opener, you may need to use the mobile app or a compatibility tool to re-link the remote.
Tips for prolonging remote battery life
Keep spare batteries of the correct type on hand and store them at room temperature. Avoid touching the battery contacts with fingers; oils can accelerate corrosion. Clean the battery contacts inside the remote gently with a dry cloth before inserting a new cell. A simple habit of quick checks every few months can prevent sudden door failures.
Safety and disposal considerations
Dispose of used batteries according to local regulations. Do not throw them with regular trash; many coin cells contain materials that should be recycled. If the battery leaks, avoid contact with skin and rinse with plenty of water. Store new batteries away from metal objects to prevent short-circuiting before use.
Troubleshooting if replacement doesn’t fix the issue
If the remote still fails after a battery change, test with another remote or test the opener’s receiver to identify whether the fault lies with the remote or the receiver. Inspect the remote’s rubber button for wear or sticking; sometimes a sticky or damaged button prevents transmission. Consider consulting a pro if the opener’s receiver or wiring shows signs of damage.
Brand reliability and maintenance mindset
Choosing quality batteries and maintaining the remote can extend its life. Regularly inspect the remote’s case for cracks, test the range, and replace the battery on a predictable schedule. Implement a maintenance routine for your garage door system—this reduces the likelihood of sudden failures and keeps the entire setup trustworthy.
Quick maintenance plan for homeowners
Create a simple maintenance schedule: check the remote battery every six to twelve months, replace as needed, and verify that the opener still responds from typical distances. Pair with the opener’s app if available to ensure synchronization and keep an eye on any warning indicators.
Tools & Materials
- Replacement battery (coin cell or small battery)(Common types: CR2032, CR2025, or A23. Verify exact type from remote label.)
- Soft lint-free cloth(Use to clean contacts without leaving fibers.)
- Small screwdriver (optional)(Only if the remote case is tightly sealed.)
- Spare battery (recommended)(Have an exact match on hand for quick swap.)
Steps
Estimated time: 20-40 minutes
- 1
Identify battery type
Find the model number and check the back of the remote or the manual to confirm the exact battery type and polarity. This avoids buying the wrong cell, which can prevent operation or cause damage.
Tip: If the label is worn, photograph the battery compartment for later reference. - 2
Open the remote casing
Use the appropriate tool to gently pry open the remote cover along the seam. Do not force the case, as that can crack the shell or damage internal components.
Tip: Work on a clean, flat surface to avoid losing small parts. - 3
Remove the old battery
Take out the old cell by lifting it straight out of the compartment. Note the polarity orientation for inserting the new battery.
Tip: Avoid bending contact springs; a slight lift is enough. - 4
Insert the new battery
Place the new battery in the same orientation as the old one, aligning + and - as indicated. Press gently to ensure a full seat.
Tip: Do not touch both contacts at once with your fingers. - 5
Test the remote before sealing
Before sealing the case, test the remote by pressing the button near the opener to confirm transmission. If it doesn’t respond, recheck polarity or replace again.
Tip: If you have a spare battery, try swapping again to confirm a bad cell. - 6
Reassemble and test at distance
Snap the case closed and test the remote from a few meters away. If you still have issues, perform the re-pairing procedure described in the opener's manual.
Tip: Keep replacement steps documented for future reference.
Got Questions?
What battery types are commonly used in garage door remotes?
Most remotes use coin-cell batteries like CR2032 or CR2025; some models use small batteries such as A23. Check the label or manual for accuracy.
Most remotes use coin-cell batteries like CR2032 or A23. Always confirm your model's battery type before replacements.
Will replacing the battery fix a remote that stopped working?
Replacing a dead battery often fixes weak or non-responsive remotes, but persistent issues may point to the receiver, wiring, or mechanical problems.
A new battery fixes many failures, but not all; if the problem persists, inspect the receiver.
Do I need to re-pair the remote after replacing the battery?
Some remotes re-pair automatically; others require manual pairing. Consult the opener’s manual for exact steps.
Some remotes auto-pair after battery swap, others need manual pairing.
How can I tell if the battery is dead?
Symptoms include reduced range, slow response, or intermittent operation. Use a spare battery to verify if the issue is the battery.
Low performance indicates a possible dead battery; try a fresh cell to confirm.
How should I dispose of used remote batteries?
Recycle coin cells at local e-waste or battery recycling programs; never throw them in regular trash.
Recycle used batteries at designated facilities; don’t toss them with regular trash.
What should I do if replacements still don’t work?
Test with another remote or check the opener receiver. If needed, contact a garage door technician.
If it still won’t work, check the receiver or contact a pro.
Watch Video
Quick Summary
- Check battery type before buying
- Replace battery with correct polarity
- Test remote after installation
- Re-pair if required by model
- Dispose of used batteries responsibly