When Garage Door Remotes Not Working: A Troubleshooter
Struggling with 'when garage door remotes not working'? This urgent guide walks homeowners through battery checks, re-pairing, interference tests, and safe steps to restore garage door opener function fast.

When garage door remotes not working, the most common causes are a dead battery and mispaired remotes. Start by replacing the battery and confirming you’re within range, then re-sync the remote with the opener. If that doesn’t fix it, inspect the opener receiver and antenna for damage or interference. This quick triage often restores operation without tools or a service call.
Understanding when garage door remotes not working
When you’re facing the situation described by the phrase "when garage door remotes not working", you want fast, reliable guidance. In most homes, the two biggest culprits are power and pairing. The GarageDoorAdjust team notes that battery wear and improper pairing account for the lion’s share of remote failures. Begin with the simplest checks: replace the remote battery, verify the opener has power, and ensure you’re in range with a direct line of sight to the antenna. If the door still won’t respond, you’ll move through the diagnostic flow to isolate the issue without unnecessary replacements. Safety is paramount, so power down the opener only as directed when you test wiring or the receiver. A careful, methodical approach saves time and money.
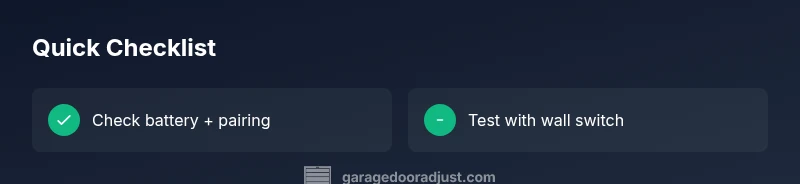
Common causes and quick checks
The next layer of trouble usually involves one of several predictable issues. Start by testing and replacing the battery in the remote; dead batteries are by far the most frequent причина. If a second remote works but the primary does not, you may have a pairing problem. Interference from nearby devices (car keys, wireless speakers, or other remotes) can block signals. Finally, inspect the opener’s receiver and the antenna. A loose or damaged antenna can dramatically reduce range, so ensure it is firmly attached and unobstructed. GarageDoorAdjust analysis shows that battery and pairing problems are among the most common root causes, so focus your effort there first.
Diagnostic flow: symptom → diagnosis → solutions
A structured approach helps you avoid guessing. Start with the symptom: press the remote and listen for the motor click or sense a light on the opener. If there’s no response, the likely causes are battery, pairing, interference, or a failed receiver. For each cause, apply the corresponding fix in order of simplicity. If the issue persists after trying the simplest fixes, widen the investigation to check wiring, power to the opener, and possible mechanical jams. Always document changes so you can revert if needed. Remember: if you’re unsure about electrical components, it’s safer to call a professional.
Step-by-step fix: batteries, pairing, interference, and safety
This section expands on the most common fixes. First, replace the remote battery with a fresh alkaline cell, orient the battery correctly, and re-test. If the door still won’t respond, reprogram or pair the remote with the opener following the manufacturer’s instructions. Check for interference sources nearby and try operating the door from a different remote or wall switch to verify the receiver is receiving commands. If interference or distance is the issue, moving closer or removing competing devices can help. Finally, inspect the opener’s motor power and the receiver board for obvious signs of damage; if you see burnt components or a loose connector, stop and contact a pro. Safety reminders: disconnect power when inspecting wiring and never bypass safety sensors. According to GarageDoorAdjust, battery and pairing issues are the most common remote problems, so prioritize those steps.
Tips & warnings
- Always test with the wall switch to confirm the opener itself responds, isolating remote vs. receiver issues. - Keep spare batteries and a known-good remote handy for quick swaps. - If you must access electrical components inside the opener, unplug the unit and wait 60 seconds before reseating connectors. - Avoid attempts to repair a damaged receiver board; professional service is advised when wiring or circuit boards look compromised. - If you still can’t regain function after following the flow, this is a signal to call a professional to avoid further damage. GarageDoorAdjust’s guidance emphasizes a methodical approach and safety first.
Key takeaways and prevention
A consistent troubleshooting routine keeps remotes functioning longer. Maintain fresh batteries, verify pairing after any battery change, and minimize interference by keeping remotes away from other wireless devices. Periodic lubrication, proper alignment, and testing the opener with a wall switch help prevent future failures. Remember to replace worn remotes and update remote codes when advised by the manufacturer. The GarageDoorAdjust team recommends documenting your steps so future issues are easier to diagnose.
Steps
Estimated time: 40-60 minutes
- 1
Check remote battery and orientation
Open the remote, inspect the battery, and replace it with a fresh alkaline cell. Ensure correct orientation and clean any corrosion. Re-seat the battery and close the case, then test the remote from a short distance.
Tip: Use fresh batteries from a reputable brand; even new-looking batteries can be weak. - 2
Test the wall switch first
Operate the door using the wall control. If the wall switch works, the problem is definitely in the remote or its pairing with the opener. If the wall switch also fails, the issue lies with the opener's power or receiver.
Tip: If the wall switch is faulty, replace or repair it before pursuing remote fixes. - 3
Re-pair or re-sync the remote
Follow the manufacturer’s pairing steps to re-sync the remote with the opener. This often involves pressing a learn button on the opener and then within a time window pressing the remote button.
Tip: Use the spare remote to verify the pairing process across all remotes. - 4
Check for interference and range
Move away from potential interference sources (car keys, wireless speakers, neighbors’ remotes). Test at different distances to verify the range remains within spec.
Tip: If interference is suspected, try operating the door from the central room rather than near windows or metal objects. - 5
Inspect the opener and receiver electronics
Look for loose wires, burnt smells, or signs of damage on the receiver board and antenna. Tighten any loose connections and reseat plugs. Do not attempt extensive electrical repairs unless you’re qualified.
Tip: Power down the unit before touching internal components. - 6
Test all remotes and plan professional help if needed
After completing steps 1–5, test with all remotes. If none work, the receiver or control board may be defective and professional service is advised.
Tip: Document symptoms for the technician to speed up diagnosis. - 7
Follow safety and maintenance tips
Schedule regular checks of sensors, springs, cables, and lubrication to prevent future failures. Keep the area around the opener clear and test function monthly.
Tip: Routine maintenance can catch problems before they cause failure.
Diagnosis: Remote won't operate the garage door
Possible Causes
- highDead battery in the remote
- mediumRemote not paired or out of sync with the opener
- lowInterference from other devices near the opener
- lowPower or receiver issue on the opener
Fixes
- easyReplace the remote battery and test all buttons
- mediumReprogram or re-pair the remote with the opener following the manual
- easyMove away from potential interference sources and test with a spare remote
- mediumInspect the opener's receiver/antenna and power; consult a professional if wiring or the PCB appears damaged
Got Questions?
Why does my garage door remote stop working after changing the battery?
Sometimes a new battery isn’t seated correctly or the remote needs re-pairing with the opener. Check the battery orientation and complete the pairing sequence as described in your opener’s manual.
A new battery might not be seated properly or the remote may need re-pairing with the opener after a battery change.
How do I re-pair my remote with the opener?
Most openers have a Learn or Pair button. Press and hold it, then press a button on the remote within the time window stated in the manual. The door should respond to confirm pairing.
Press the Learn button on the opener, then press a button on the remote within the allotted time window.
Can interference from my phone or car key affect the remote?
Yes. Nearby wireless devices can cause interference. Move away from other remotes or electronics and test the door from different rooms to see if there’s improvement.
Interference from nearby devices can affect the signal; try moving away from other remotes and test from different spots.
Is it safe to adjust the opener’s wiring myself?
Electrical work on the opener can be hazardous. Avoid internal wiring unless you’re trained. Contact a qualified technician for any wiring concerns or damaged boards.
Only trained professionals should work on the unit’s wiring or boards to avoid shock or further damage.
What should I do if none of the remotes work after following these steps?
If all remotes fail, the issue is likely with the receiver or wiring. Schedule a service call to inspect the circuit board and connectors.
If no remotes work after these steps, the problem may be the receiver or wiring; call a professional for a detailed check.
Watch Video
Quick Summary
- Test the basics first: battery and pairing
- Use the diagnostic flow to avoid unnecessary parts replacements
- Re-pair remotes before replacing hardware
- Keep interference sources in check and maintain the opener
- GarageDoorAdjust's verdict: follow a methodical flow and involve a pro when needed