Garage Door Yellow Sensor Light Troubleshooting Guide
Urgent, step-by-step guide to diagnose and fix a yellow sensor light on a garage door safety system. Learn quick checks, a diagnostic flow, DIY fixes, and when to hire a pro.

A steady or flashing yellow garage door safety sensor light usually means the infrared eyes aren’t aligned or blocked. First, clear debris and ensure nothing is in the beam path, then recheck the alignment and test with the door opener. If misalignment persists, inspect the wiring and replace the sensor unit if needed.
Why the yellow sensor light matters
The yellow garage door yellow sensor light on a safety system is a warning signal, not just a nuisance. It indicates the safety beam between the two eyes isn’t reading correctly, which can lead to the door failing to reverse when obstructed or, in some cases, uncontrolled movement. According to GarageDoorAdjust, most homeowners encounter this light after a minor bump to the sensor mounting, seasonal dust, or glare from sunlight that briefly confuses the beam. Treat this as a safety check, not a cosmetic issue. Addressing it promptly reduces the risk of injury or property damage and keeps daily use reliable. By understanding what triggers the yellow sensor light, you gain confidence in diagnosing common faults without rushing to replace parts. The goal is a safe, smooth operation and a solid baseline for routine maintenance.
Throughout this guide you’ll see practical steps that prioritize safety and use common-sense checks you can perform before calling a professional. The aim is to restore the sensor’s role in preventing doors from closing on people or objects. If you ever feel unsure, remember that working around moving garage components carries risk—stop, reassess, and seek professional help when needed.
Common causes of a yellow sensor light
A yellow sensor light is usually a symptom, not a final verdict. The most frequent culprits are misalignment of the sensor eyes, an obstruction in the beam path, or loose/worn wiring. Other less common causes include a dirty sensor lens, a bent mounting bracket, or sun glare that temporarily disrupts signal. Based on GarageDoorAdjust analysis, the majority of yellow light alerts originate from misalignment or debris rather than a failed sensor. Understanding these causes helps you triage quickly: start with the simplest fix, then escalate only as needed. If the light returns after basic fixes, consider wiring issues or a hardware fault that requires a closer look.
- Misalignment: The two safety eyes should face each other directly. A slight tilt can drop the signal.
- Obstruction: Dust, spider webs, or insects in the beam path can cast a shadow and fool the sensor.
- Lens dirt: A dirty lens reduces signal quality, even if alignment is correct.
- Wiring/connectors: Loose connectors or corroded pins can interrupt the circuit.
- Weather/ glare: Direct sun on one eye can trigger a warning; repositioning or shielding may be needed.
Accurate diagnosis hinges on methodical checks. Start with the simplest explanation (obstruction or misalignment) and only move to more involved fixes if the light persists. Safety comes first, so avoid bypassing sensors and always re-test after each step.
Quick checks you can perform safely
These checks are designed for homeowners to perform without special tools. Always power down when handling wiring and never place hands between moving parts. The yellow sensor light usually reappears if the beam is blocked or misaligned, so verify both eyes are clearly facing each other and the beam path is uninterrupted. Use a clean, dry cloth to wipe the sensor lenses gently. Inspect the mounting brackets for any looseness and tighten only what is needed to restore alignment. If you notice any damaged brackets or exposed wires, stop and call a pro. After each adjustment, use a simple door test: a slow, controlled close and reverse to confirm the safety system works as intended. If the door hesitates, stalls, or reverses unexpectedly, pause and re-check before continuing, since improper testing can create new hazards. Finally, document your observations so you can compare future performance and avoid repeating the same missteps.
Diagnostic flow overview
A clear diagnostic path helps you resolve a yellow sensor light quickly and safely. Start with observable symptoms (is the light steady or blinking?), then examine beam path for obstruction. If path is clear, check alignment and mounting. If alignment is correct, inspect wiring and connectors for looseness or corrosion. If wiring checks out but the light remains, consider sensor replacement as a last resort. This flow keeps you focused on safety and reduces downtime by targeting the most common fixes first.
Key decision points:
- Is the beam path clear? If yes, proceed to alignment checks.
- Is the alignment correct? If yes, inspect wiring; if not, adjust mounts.
- Do wiring/pins look compromised? If yes, repair or replace connectors.
- Does the light stay after all steps? If yes, plan part replacement and professional help.
Step-by-step repair for the most common cause
This section walks you through the most common fix: realigning and cleaning the safety sensor eyes. Start by powering off the garage door opener to avoid accidental movement. Loosen the mounting screws just enough to allow slight adjustment, then gently tilt the sensors until the LED indicators (if present) show proper alignment—often a straight line between the eyes. Clean both lenses with a soft cloth, removing dust or fingerprints that can distort signals. Re-tighten the brackets and ensure they stay aligned during a test cycle. Reconnect any loose connectors if you found them during inspection. Finally, run a full test: a normal open and close cycle, then a test with a minor obstruction to verify the opposite edge safety reversal works. If the issue persists after these steps, the sensor or wiring may be faulty and require replacement. Always re-test after any adjustment and document changes.
Prevention and maintenance to avoid future issues
Preventive maintenance reduces the chance of a recurring yellow sensor light. Schedule a monthly check of sensor alignment and beam visibility, especially after strong winds or nearby tool usage that could jostle mounts. Keep the sensor lenses clean and free from dust, spider webs, and moisture. Consider trimming nearby plants or ensuring there’s no direct sun glare on one eye. Use weatherproofing or shielding if your garage faces harsh conditions. Finally, establish a simple testing habit: after any adjustment, test the door with an object at mid-beam height to confirm proper safety reversal.
Key notes on safety and when to call a pro
Always prioritize safety when working around moving parts. If any step feels uncertain or if you notice frayed wires, burnt smells, or cracked housings, stop and contact a qualified technician. A persistent yellow sensor light after all homeowner steps likely indicates a sensor replacement or wiring repair that requires professional skills and tools. Keep a log of the steps you’ve taken and retain your receipt or service notes for future maintenance.
Final checklist before you call for help
- The beam path is unobstructed and lenses are clean.
- Sensors are aligned and brackets are secure.
- All connectors are clean and firmly seated.
- A full door test shows proper reversal when obstructed.
- If the light returns, arrange for a professional inspection promptly.
Steps
Estimated time: 45-60 minutes
- 1
Power down and secure area
Disconnect power to the garage door opener to ensure no movement occurs during inspection. Clear pets and keep bystanders away. This protects you from unexpected door movement while you work.
Tip: Double-check the power source and ensure the opener is not inadvertently re-engaged during testing. - 2
Inspect alignment and beam path
Visually verify both safety eyes face each other directly and that nothing blocks the beam. If misaligned, slightly adjust the eye brackets while watching the LEDs (or door movement) to confirm improvement.
Tip: Make tiny adjustments and test frequently to avoid overcorrecting. - 3
Clean lenses and secure mounting
Wipe both lenses with a soft, dry microfiber cloth. Check mounting screws and tighten only enough to hold position without forcing a misalignment.
Tip: Avoid abrasive cleaners; moisture can damage electronic sensors. - 4
Check wiring and connectors
Examine wires for kinks, wear, and secure connections at both sensor eyes. Reseat any loose pins and look for corrosion or damaged insulation.
Tip: If any wiring looks damaged, stop and call a pro—electric work around a garage door is hazardous. - 5
Test door operation
Reconnect power and run the door through a normal cycle, then test with a small obstacle in the beam to confirm the safety reversal works as intended.
Tip: Document the LED status and door response for future reference.
Diagnosis: Yellow sensor light on garage door safety sensor
Possible Causes
- highSensor misalignment
- highBeam obstruction by dust/spiders/webs
- mediumLoose or damaged wiring/connectors
- lowDamaged sensor unit or bracket
Fixes
- easyClean beam path and lens; re-seat sensors
- easyRealign brackets and tighten mounting screws
- mediumCheck wiring and connectors for corrosion or loose pins; reseat
- hardReplace the sensor unit or bracket and re-test
Got Questions?
What does a yellow sensor light mean on a garage door?
A yellow sensor light usually signals misalignment or an obstruction in the safety beam. Clean and realign the sensors, then test the door. If the light remains, inspect wiring or consider part replacement.
A yellow sensor light means the safety beam isn’t reading correctly. Clean and realign, then test; if it stays, check wiring or plan for a replacement.
Can I fix a yellow sensor light myself?
Yes, most fixes involve simple alignment, cleaning, and wiring checks. Start with the beam path and mounting, then proceed to wiring only if you’re comfortable with electrical work. If you’re unsure, hire a pro.
You can often fix it yourself with alignment, cleaning, and wiring checks. If in doubt, call a pro.
Is a blinking yellow light worse than a steady one?
Blinking typically indicates an active fault or warning state that requires immediate attention, while a steady light points to a static issue like misalignment. Both should be addressed, with blinking treated as higher priority.
Blinking usually means a more urgent fault than a steady light, but both should be addressed promptly.
When should I replace the safety sensor instead of cleaning and realigning?
If cleaning, realignment, and wiring checks don’t clear the warning, the sensor or bracket may be faulty and need replacement. A professional can verify sensor health and safety compliance.
If basic fixes don’t help, replacing the sensor may be necessary and a pro can confirm.
Will the yellow light affect door operation?
Yes, it can affect automatic reversal and safe operation. Even if the door opens, the safety system may prevent full automatic use until the issue is resolved.
The yellow light can affect automatic safety and operation; fix it to restore full function.
Watch Video
Quick Summary
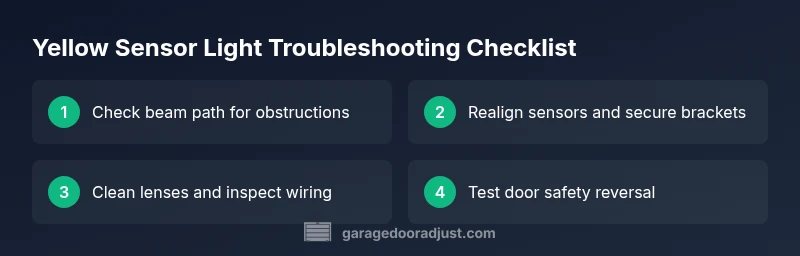
- Check beam path for obstructions.
- Realign and reseat sensors to restore operation.
- Test door function after each adjustment.
- Call a pro if the light persists after basic fixes.