How to Tell If a Garage Door Sensor Is Bad: Urgent Troubleshooting Guide
Urgent, step-by-step guide to diagnose a faulty garage door safety sensor and restore safe automatic operation. Learn quick checks, tests, and when to call a pro from GarageDoorAdjust.

According to GarageDoorAdjust, the quickest way to tell if a garage door sensor is bad is to observe the beam and LED indicators, then test with a controlled obstruction. If the beam is misaligned, dirty, or blinking, reseat and clean the lenses, then reclose. If issues persist, do not bypass safety features—contact a pro for precise testing and repair.
How to tell if garage door sensor is bad
Your garage door safety sensor is the final line of defense preventing the door from closing on people or objects. When it’s working, you should notice a clear, steady beam and predictable close behavior. If the door hesitates, reverses, or ignores the opener’s close command even when there’s no obvious obstacle, the sensor is most likely compromised. According to GarageDoorAdjust, the fastest way to confirm a fault is to observe the beam, check the LED indicators, and perform a controlled obstruction test. Start by locating the two sensors on either side of the door tracks, at about eye level. Inspect the lenses for dust, spider webs, or condensation. Clean gently with a soft microfiber cloth. Misalignment is common after a bump, wind, or door movement and can render the beam ineffective. In many cases, a simple reseat and realignment can restore functionality without tools. If the indicators show a fault after these steps, proceed to more thorough diagnostics to determine whether the problem lies with alignment, wiring, or the receiver.
Quick physical checks you can do safely
Before you dive deep, perform the simplest checks first. Power off the opener at the wall switch or unplug the unit to avoid any risk while you inspect. Look for obvious misalignment—the sensors should be directly opposite each other with a clear line of sight. Wipe the lenses with a microfiber cloth, and remove webs, dust, or condensation. Verify the mounts are tight; a loose bracket can tilt the sensor and disrupt the beam. If you notice condensation or moisture on the lens, dry the area and wait a few minutes before testing. Keep children and pets away from the door during checks, and never operate the door when you suspect a sensor fault. GarageDoorAdjust emphasizes documenting what you observe to speed up professional diagnosis if needed.
How to test with a controlled obstruction
To test the safety beam, place a lightweight object (like a folded towel) about 6 inches in front of the active sensor while the door is closing. If the door hesitates, stops, and reverses, the sensor is functioning at least in part but may be miscalibrated. Then remove the obstruction and repeat with the opposite sensor to verify both beams work. If the door ignores a test obstruction or continues to close without reversing, there is a stronger likelihood of a bad sensor or wiring issue. Record the results and compare LED indicators to the sensor’s manual.
Common causes and how to fix them (non-invasive fixes first)
A large share of sensor problems come from simple issues: misalignment, dirty lenses, or loose wiring. Re-seat the sensor brackets carefully so the beams are perfectly opposite each other. Clean both lenses with a soft cloth and inspect the wiring for fraying or loose connections at both ends. If the LED indicators blink or stay off, this points to a communication problem between transmitter and receiver. In many homes, cleaning and realigning resolve the issue without specialized tools. If the problem persists after these steps, the fault may be deeper in the control board or the sensor unit itself, which often requires a replacement.
When to test with the opener's diagnostics and reset
Modern garage door openers include built-in diagnostics that can help pinpoint sensor faults. Access the opener’s diagnostic mode via the wall switch or the remote according to the manufacturer’s manual, then run the sensor test. If the test indicates a misalignment or a communication error, perform a full reset of the opener after ensuring the sensors are clean and aligned. Re-test the door’s closing function with a simple obstruction to confirm the issue is resolved. If the diagnostic results show a persistent fault, the sensor module or wiring may need professional evaluation.
Safety considerations and what not to bypass
Never bypass safety features to force the door to operate. If the sensors appear faulty, disable the opener only temporarily and seek professional help. Wear eye protection when handling wiring, and avoid working near moving parts. If you smell burning insulation or see damaged wires, stop immediately and disconnect power. Regular maintenance can prevent many sensor issues—cleaning lenses and checking alignment every 3–6 months reduces the chance of a sudden failure.
How to verify the sensor is working after repair
After completing fixes or replacing sensors, re-run both obstruction tests with the door fully closed and halfway open. Confirm both LEDs on the sensors illuminate as expected and stay consistent during operation. Observe a few cycles of opening and closing to ensure consistent beam behavior. If any doubt remains, perform a professional diagnostic to verify the system’s safety performance and avoid liability or property damage.
Prevention tips to avoid future sensor failures
Implement a simple maintenance routine: clean sensor lenses quarterly, verify alignment after any door incident, and inspect mounting hardware for looseness. Keep sensors free of dust, moisture, and obstructions like leaves or spider webs. Consider labeling the sensor test steps so family members can perform quick checks. A proactive approach saves time and improves safety, aligning with GarageDoorAdjust’s best practices for ongoing garage door maintenance.
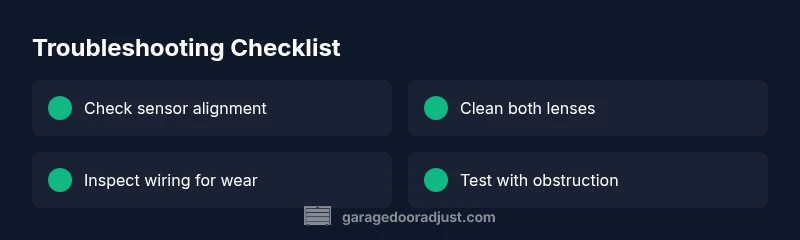
Steps
Estimated time: 15-30 minutes
- 1
Power down safety systems
Turn off the opener at the wall switch and unplug the unit if possible to reduce risk while you inspect. This keeps you safe from sudden movements while handling sensors.
Tip: Always unplug before touching wiring. - 2
Locate sensors
Identify the two safety sensors mounted near the door tracks on each side. They should be roughly eye level and facing each other across the doorway.
Tip: Take a quick photo to document original positions. - 3
Check alignment
Visually confirm the beams meet squarely in the middle. If the LEDs look dim or off, gently adjust the brackets to correct the direction of the beams.
Tip: Small twists can make a big difference; avoid bending the brackets. - 4
Clean lenses
Wipe both lenses with a soft microfiber cloth. Remove dust, cobwebs, or condensation that can scatter or block the beam.
Tip: Never use solvents that could fog plastic lenses. - 5
Test with obstruction
With the door closing, place a light object about 6 inches in front of one sensor to test the safety trigger. Observe whether the door reverses as intended.
Tip: Do not stand in the beam path while testing. - 6
Reconnect and test
Reassemble any removed components and re-engage power. Run multiple cycles to confirm consistent sensor response and no false closes.
Tip: If the door hesitates, re-check wiring and consult a pro.
Diagnosis: Door behaves oddly around the safety sensors (won’t close, reverses, or ignores the beam)
Possible Causes
- highMisaligned sensor brackets
- highDirty or obstructed sensor lenses
- mediumLoose or damaged wiring at sensor or opener
- lowSensor failure or compatibility issue with the opener
Fixes
- easyRealign sensors so beams face each other directly, then tighten mounting screws.
- easyClean both lenses with a microfiber cloth and remove any debris or condensation.
- mediumInspect wires for wear or loose connections; reseat connectors firmly.
- mediumIf LEDs blink or stay off after fixes, replace the sensor module or consult a pro.
Got Questions?
What are common signs my garage door sensor is failing?
Common signs include the door not closing, reversing mid-closure, blinking LEDs, or an unsteady beam. Start by cleaning and realigning the sensors, then test with a controlled obstruction.
Look for a door that won’t close or reverses unexpectedly, and be sure to check the LED indicators and lens cleanliness.
Can I bypass the sensor to close the door?
No. Bypassing sensors is dangerous and often illegal in many regions. Use the safety tests to confirm faults and contact a professional for safe repair.
Do not bypass the safety sensor; get a professional to repair it safely.
How do I reset the sensor after repairs?
After correcting alignment or cleaning, power cycle the opener, retrigger the sensor test, and observe LED indicators to confirm proper communication.
Power cycle, then test the sensor to ensure proper operation.
What if the door still won’t close after sensor replacement?
If replacement doesn’t resolve the issue, check the opener's wiring, motherboard, and safety relay. Consider a professional diagnostic to verify system safety.
Replacement may not fix all faults; a full diagnostic might be necessary.
Is sensor replacement a DIY-friendly job?
Sensor replacement is doable for handy homeowners, but ensure correct model compatibility and follow safety steps. If uncertain, hire a pro to avoid improper installation.
It can be a DIY task, but ensure compatibility and safety; otherwise call a pro.
How often should I inspect garage door sensors?
Inspect sensors every 3-6 months and after any impact to the track or door. Regular checks reduce unexpected failures.
Check them every few months and after any impact.
Watch Video
Quick Summary
- Test safety beams before suspecting a fault.
- Start with alignment and cleaning—these fix most issues.
- Never bypass safety features; replace components when needed.
- Use diagnostics and documented tests to guide repairs.