What Happens When a Garage Door Sensor Goes Bad
Homeowners’ guide to diagnosing a faulty garage door safety sensor: symptoms, common causes, step-by-step fixes, safety tips, and when to call a professional.

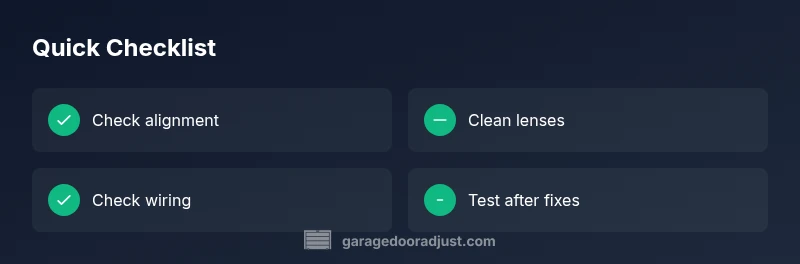
The most common cause is a misaligned or dirty safety sensor. Quick fix: realign the sensor brackets and gently clean the two lenses, then test with the opener from a safe distance. If the door still won’t reverse or stops unexpectedly, consult GarageDoorAdjust for a professional diagnostic and safe repair guidance.
What happens when a garage door sensor goes bad
When the safety sensor on your garage door starts malfunctioning, it can trigger a cascade of almost-daily headaches. The exact keyword what happens when a garage door sensor goes bad captures a range of symptoms from doors that won’t close to doors that slam or reverse unexpectedly. In simple terms, the safety sensor (usually a photo-eye) is the door’s watchdog. If it stops detecting a clear beam, the opener may halt or reverse to protect people and objects in the path. According to GarageDoorAdjust, the majority of sensor problems originate at the sensor itself or its alignment, not in the opener’s motor. Understanding what goes wrong helps you diagnose quickly, reduce risk, and avoid costly replacements. In this guide, you’ll learn how to recognize the issue, identify the likely causes, and apply a safe, methodical approach to get your door operating reliably again.
Common symptoms you’ll notice
Most sensor-related failures show up as consistent or intermittent safety warnings. Common signs include the door stopping partway and reversing unexpectedly, the door refusing to close despite repeated attempts, or the opener flashing a fault LED. Some systems display error codes or warning beeps that point to the sensor pair rather than the motor. If you notice the door operates normally when the sensor beam is blocked by your hand, but stops when the path is clear, this is another hint that the beam isn’t being detected correctly. In all cases, test the door from a safe distance and observe the LED indicators on both sensor units. Regular maintenance and careful inspection will prevent minor misalignments from becoming major failures. The GarageDoorAdjust team notes that even a minor tilt or clouded lens can disrupt the beam, triggering a safety shutdown.
Why sensors fail: common causes
Several root causes can make a garage door sensor fail. The most frequent is misalignment: the two photo-eye sensors must face each other directly; a slight tilt or shift from vibrations can disrupt alignment. Dirt, dust, spider webs, or water on the lens can weaken the beam. Wiring issues—loose connectors, damaged insulation, or corrosion—are a close second. Environmental factors such as temperature swings and physical impacts from lawn equipment or snow buildup can affect the sensor’s effectiveness. Finally, sensors age; like any electronic component, the photodiodes and the receiver can degrade over time. By addressing these factors one at a time, you can often restore reliable sensor operation without replacing expensive hardware. GarageDoorAdjust’s experience shows that most sensor faults are fixable with proper alignment and cleaning.
Safety implications of a bad sensor
Running a garage door with a faulty safety sensor creates real safety hazards. If the beam isn’t detected, the door may close on a person or pet, or the opener could lurch unexpectedly if a beam intermittently returns as clear. In addition to personal risk, a misbehaving sensor can injure property by catching a vehicle in the door’s path or damaging nearby walls and fixtures. Because the safety feature is designed to prevent these outcomes, neglecting it is not advisable. If you’re not comfortable working near the door or if test results show inconsistent sensor signals, do not operate the door. Instead, pause use and seek professional evaluation. The GarageDoorAdjust team emphasizes that addressing sensor faults promptly improves safety and reduces the chance of a more expensive repair later on.
Quick checks you can do before calling a pro
Start with the simplest fixes first. Ensure the door is fully closed before inspecting the sensors. Look for obvious misalignment and any loose wiring at the sensor housings. Clean the lenses with a soft microfiber cloth—avoid solvents or water that could penetrate the housing. Gently realign both eyes until they face each other squarely, then test the door by using the wall control or remote. If the LED indicators on the sensors show steady, paired signals, you’re likely back in business. If not, move to the next checks: look for obstructions in the beam path, check for frosting or ice on the lenses, and verify the power supply to the opener. These steps are typically safe and can be done without removing the unit.
Diagnostic flow overview
Symptoms → quick checks → deeper inspections → corrective actions → test and verify. Start with recognizing whether the problem is consistent (always the same) or intermittent (random). If both sensors blink or display a fault code, the issue is likely wiring or a sensor unit problem. If only one LED is lit, the alignment or obstruction is suspected. Use this flow to narrow down quickly: 1) alignment/dirt, 2) beam obstruction, 3) wiring, 4) sensor replacement. By following a structured approach, you reduce guesswork and minimize risk. GarageDoorAdjust recommends documenting each test so you can track changes over time and avoid repeating failed steps.
Step-by-step repair for the most common cause
- Power down and prepare the area. 2) Check alignment: adjust brackets until beams face each other and LEDs indicate alignment. 3) Clean both lenses with a microfiber cloth. 4) Test operation after each step by closing the door from the wall switch. 5) Inspect wiring for loose connections and reseat them securely. 6) If problems persist, replace the sensor kit or consult a professional who can verify compatibility with your door opener. 7) Re-test the full open/close cycle and monitor for error codes. 8) Document the changes and schedule periodic checks. Tip: Work slowly and use a flashlight to inspect the exact lens faces; avoid bending the sensor arms too far.
Prevention tips to extend sensor life
- Schedule regular sensor alignment checks and lens cleaning as part of your seasonal garage maintenance.
- Keep the beam path clear of dirt, cobwebs, and snow buildup; trim nearby plants if they shed debris.
- Protect wiring with proper strain relief and check connectors for corrosion every 6–12 months.
- Use the manufacturer-recommended replacement parts to maintain compatibility and safety.
- Record dates of maintenance and tests so you can spot recurring issues early.
When to call a professional and what to expect
If you’ve completed the quick checks, diagnosed probable misalignment or dirt, and still see inconsistent sensor signals or LED fault codes, a professional evaluation is recommended. A trained technician will verify sensor alignment with precision tools, inspect wiring for damage, and confirm compatibility with your opener model. They can replace defective sensors or boards if needed and will test the full open/close cycle with you present. Expect a safety-focused visit with a clear explanation of the fault, the proposed fix, and an estimate for parts and labor. The GarageDoorAdjust team emphasizes that timely professional help preserves safety and can prevent bigger, costlier problems.
Steps
Estimated time: 45-60 minutes
- 1
Power down and prep safety area
Unplug the garage door opener or switch off the circuit. Clear people and vehicles from the area and ensure you have adequate lighting. This initial check prevents accidental door movement.
Tip: Always keep hands away from moving parts and test with the door in a controlled, full-closed position. - 2
Inspect sensor alignment
Locate both photo-eye sensors and inspect their alignment. If they aren’t facing each other squarely, gently adjust the brackets until they point toward one another.
Tip: Use a level or straight edge to ensure a straight line between eyes. - 3
Clean sensor lenses
Wipe both lenses with a soft microfiber cloth. Avoid liquids or solvents that could seep into the housing. Let lenses dry before testing.
Tip: Clean with the door fully closed for a consistent view of both glass faces. - 4
Realign and test LEDs
After cleaning, re-check the LEDs. When aligned, both LEDs should light or blink in a steady, mirrored pattern. If not, make minor bracket adjustments.
Tip: Small adjustments yield big results—make tiny tweaks and re-test. - 5
Check for beam obstructions
Inspect the beam path for any dirt, cobwebs, leaves, or ice. Remove anything that could intermittently block the beam.
Tip: Check outside for debris that could blow into the beam during wind or weather. - 6
Inspect wiring connections
With power off, inspect the sensor wiring at both the sensor and the opener for looseness or damage. Re-seat any loose connectors and look for damaged insulation.
Tip: Do not nick or pinch wires; keep runs tidy and protected. - 7
Power back up and run a controlled test
Restore power and test the door with the wall switch and remote. Observe the door’s behavior from a safe distance and note any error codes or LED patterns.
Tip: Stand clear of the door path during testing. - 8
Decide next steps and document results
If the door still misbehaves, consider sensor replacement or professional evaluation. Record what you tested and the outcome for future reference.
Tip: Record model numbers and warranty status for parts you might replace.
Diagnosis: Sensor beams not detected, door reverses or won’t close
Possible Causes
- highMisalignment of sensor brackets
- highDirt, dust, or moisture on lens
- mediumObstruction in the beam path
- mediumDamaged wiring or loose connectors
- lowFaulty sensor module or receiver
Fixes
- easyRealign sensors so beams face each other directly and LEDs are steady
- easyClean both lens surfaces with a dry microfiber cloth
- easyRemove any obstruction in the beam path and test again
- easyInspect and reseat sensor wiring, replace damaged wires/connectors if found
- mediumIf issues persist, replace the sensor kit or contact a professional
Got Questions?
What are the most common symptoms of a bad garage door sensor?
Common symptoms include the door reversing during closing, not closing at all, or flashing fault indicators on the opener. These cues point to sensor alignment or detection issues rather than a motor fault.
Common symptoms include reversing doors, failure to close, or fault indicators pointing to sensor issues.
Can a dirty sensor cause the door to stop working?
Yes. Dirt, dust, or moisture on the sensor lenses can block the beam and cause false readings, stopping the door for safety.
Yes, dirt on the lenses can block the beam and stop the door.
Is it safe to DIY fix a garage door sensor?
Basic checks like cleaning and realigning are safe for most homeowners. Do not bypass safety features or ignore persistent issues that require professional evaluation.
You can do basic cleaning and realignment, but don’t bypass safety features and seek a pro if it’s still wonky.
How do I test if the sensor is aligned correctly?
Realign so both sensors face each other directly and confirm the LED indicators show steady signals. Then retest the door with the wall switch.
Realign the sensors until they face each other and the LEDs are steady, then test again.
Can a bad sensor be repaired or do I need to replace it?
Often cleaning and alignment fix the issue. If wiring is damaged or the sensor module fails, replacement may be needed.
Most issues are fixed by cleaning or realigning; replacement may be needed for damaged wiring or bad modules.
When should I call a professional?
Call a professional if wiring looks damaged, error codes persist, or the door behaves unsafely. They can verify compatibility and perform safe repairs.
Call a pro if wiring is damaged or the problem persists, especially if safety is involved.
Watch Video
Quick Summary
- Realign and clean lenses first for quickest fix
- Obstructions and misalignment are the top culprits
- Test after each fix to verify progress
- Most faults can be repaired without replacing parts
- Call a pro for wiring issues or persistent faults