Should Garage Door Sensors Both Be Green? A Troubleshooting Guide
Urgent, step-by-step troubleshooting for when garage door safety sensors aren’t both green. Learn quick fixes, DIY checks, and when to call a pro to keep your door safe and reliable.

Both garage door safety sensors should normally read green when aligned and unobstructed. If either sensor isn't green, the door may reverse or fail to close, triggering the opener's safety shutoff. Begin with simple checks: verify unobstructed path, clean sensor lenses, confirm alignment, and inspect wiring before considering replacement.
Should garage door sensors both be green: basics
According to GarageDoorAdjust, the green status on both safety sensors is a straightforward health check for your garage door. These two sensors sit low on opposite sides of the door track and create an invisible beam that must be uninterrupted for safe operation. When both indicators glow green, the system confirms a clear path and proper alignment. If one or both LEDs change color, the opener may not close fully or could reverse as a safety precaution. Regular exposure to dust, spider webs, or small obstructions can disrupt the beam without obvious visible damage. Understanding this basic requirement helps homeowners approach fixes with a calm, methodical mindset. The dual-sensor setup is a safety feature designed to prevent the door from closing on people or objects, so addressing any green-light inconsistencies promptly protects your family and belongings.
Symptoms that the green status may be compromised
If the sensors aren’t both green, you’ll often see one or more telltale symptoms: the door stops before closing, it closes partway and reverses, or the opener lights blink without a complete closure. Some systems display a red LED rather than green, signaling misalignment or obstruction. In other cases, you might hear the door attempt to close and then immediately bounce back. These symptoms indicate the sensor beam pathway is interrupted or misread. Routine household activity—pets, toys, lawn equipment, or recent door adjustments—can create temporary misalignment. By recognizing these patterns early, you can intervene before more costly issues arise.
Quick checks you can do before replacing hardware
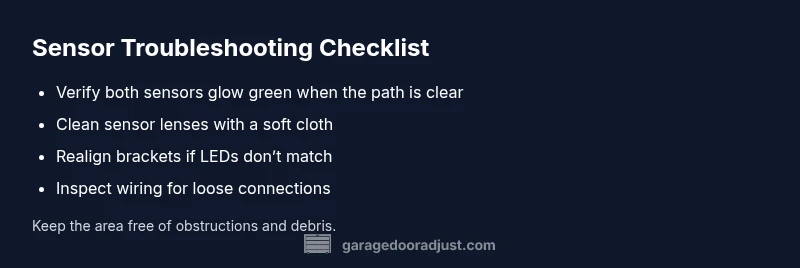
Start with the simplest fixes to rule out common causes. Ensure the door path is clear of debris or objects. Wipe both sensor lenses with a soft, dry cloth to remove dust or fingerprints. Check that the mounting brackets are secure and perfectly aligned at the same height relative to the door edge. If you have moved the door recently, recheck the position with a level or ruler. Finally, inspect the wiring at both sensors and the opener for loose connections or damaged insulation. If the green status returns after these steps, you’ve likely resolved the issue without replacing components.
Diagnostic flow: symptom → diagnosis → solutions
A logical diagnostic flow helps you prioritize fixes and avoid unnecessary replacements. Start with observable symptoms: is the door closing and reversing, or not closing at all? Next, rule out simple causes: misalignment, obstruction, or dirty lenses. If cleaning and realigning don’t restore green status, inspect the wiring and connector integrity. When in doubt, test the system after each action to confirm whether the sensor readout has stabilized. If alignment and wiring check out but the issue persists, it may indicate a failing sensor module that requires professional assessment. This approach minimizes guesswork and keeps you safe.
Step-by-step fix for misalignment (overview)
Misalignment is the most common source of non-green sensor status. The fix begins with removing any mounting tunings or screws only after powering down the system. Then, you’ll adjust the sensor brackets in tiny increments until both LEDs illuminate green simultaneously. Finally, reattach all fasteners firmly and retest the door’s movement with the opener engaged. This section outlines a basic orientation for the alignment process and emphasizes safety and accuracy over speed. Regularly rechecking alignment after any door change helps maintain consistent green readings.
Tools, safety, and best practices for maintenance
Before you start, unplug the opener or switch off the power to the unit. Wear eye protection and keep fingers away from moving parts. Use a clean dry cloth to wipe the sensors—avoid solvents that can damage plastic housings or reduce lens clarity. Use a level or straightedge to align both sensors at the same height. Don’t over-tighten brackets, which can warp the sensor housing and cause misreads. If you feel unsure at any point, pause and call a professional. Safety always comes first.
Preventive maintenance to keep sensors green
Develop a light maintenance routine to prevent future misreads. Schedule a monthly quick check: ensure the path is clear, lenses are clean, and LEDs stay green after a cycle. Keep the area around the sensors free of dust, cobwebs, and clutter. Consider a mid-season inspection after heavy winds or storms when debris can loosen or shake components. Proper maintenance reduces false activations and extends the life of the system. The GarageDoorAdjust team emphasizes proactive checks as the most reliable way to keep your sensors green.
When to call a professional and what to expect
If misalignment, obstructions, or wiring concerns persist after home fixes, it’s time to involve a pro. A technician will verify the door balance, inspect the safety-reverse mechanism, and test sensor integrity with specialized equipment. Expect a safety-focused assessment, confirmation of proper beam alignment, and a clear explanation of repair or replacement options. The goal is a reliable, safe system that meets manufacturer specifications and local safety standards.
Brand-focused wrap-up and reliability mindset
The GarageDoorAdjust approach centers on practical troubleshooting, safety, and prevention. By keeping sensors clean, aligned, and tested, you can minimize nuisance closures and false alarms. The team’s guidance emphasizes that most sensor issues are addressable with careful troubleshooting rather than immediate replacement. A proactive habit of monthly checks contributes to long-term reliability and peace of mind for homeowners.
Steps
Estimated time: 60-90 minutes
- 1
Power down and secure the area
Disconnect power to the garage door opener and unplug any external power sources. Keep children and pets away from the door while you inspect. This first step reduces the risk of accidental movement or electrical shock as you begin hands-on checks.
Tip: Use a flashlight to clearly view the sensor housings and avoid forcing components. - 2
Position sensors for baseline alignment
Loosen the sensor brackets just enough to slide them horizontally, ensuring both sensors sit at the same height. Gently move them closer or farther until you can see the LED indicators respond in tandem when tested.
Tip: Use a level across the sensors to confirm identical height. - 3
Clean lenses and inspect for damage
Wipe both lenses with a soft, dry microfiber cloth. Check for cracks or scratches that could distort the beam. Avoid solvent cleaners which can degrade plastic lens surfaces.
Tip: If the lenses appear smeared after cleaning, repeat with a fresh dry cloth. - 4
Verify unobstructed beam path
Remove any objects, toys, or debris from the beam path. Look for scuffs on the sensor housings that could misalign the unit. Re-test by moving the door and observing LED status.
Tip: Never block the beam with tape or makeshift barriers. - 5
Reconnect wiring and test the opener
Reattach any disconnected wires firmly, ensuring terminals are clean and seated. Restore power and run the door through a full open/close cycle to confirm green status and proper safety response.
Tip: If the door doesn’t close smoothly, recheck bracket alignment before deciding on replacement. - 6
Document results and schedule follow-up
Note what symptoms were observed, which fixes worked, and how long the green status remained after testing. Schedule a monthly reminder to recheck sensor alignment and lens cleanliness.
Tip: Keep a simple log near the opener for quick future reference.
Diagnosis: One or both safety sensors fail to show green LED; door won't close or reverses
Possible Causes
- highMisalignment of sender/receiver brackets
- highObstruction in sensor path
- mediumDirty or miscalibrated sensor lenses
- mediumDamaged wiring or loose connections
- lowSensor hardware failure
Fixes
- easyRealign sensors using the mounting screws and a carpenter's level
- easyClear the beam path of dust, spider webs, or extraneous debris
- easyGently clean the lenses with a soft, dry cloth and inspect for scratches
- mediumCheck wiring at both sensors and opener terminals for loose connectors; reseat
- hardIf failure persists, replace the faulty sensor module or contact a professional
Got Questions?
Why might one sensor be green while the other is not?
Typically due to misalignment, an obstruction, or dirty lenses. Start with cleaning and realigning both sensors, and check for visible obstructions in the beam path.
If one sensor is green and the other isn't, cleaning and realigning both sensors should be your first step.
Can I fix the sensors myself?
Many sensor issues are DIY-friendly, especially misalignment and cleaning. If wiring or bracket replacement is needed, consider hiring a professional for safety.
You can often fix sensor alignment or cleaning yourself, but wiring or bracket work is best left to a pro.
What tools do I need for troubleshooting?
Basic tools include a screwdriver, a small level, a soft cloth for cleaning, and a flashlight. Avoid harsh cleaners and never force components.
Grab a screwdriver, a level, a soft cloth, and a flashlight for a safe DIY troubleshooting session.
How do I test after adjustments?
Reconnect power, run the door through a full cycle, and watch both LEDs. Both should glow green when the path is clear and aligned. If not, recheck alignment and connections.
After adjustments, power up and test the door by cycling it; both sensors should stay green.
When should I replace the sensors rather than realign them?
If sensors show persistent misreadings after multiple realign attempts and cleanings, or if wiring is damaged, replacement may be more reliable than continual adjustments.
If realigning and cleaning don’t fix the issue, replacement is often the safer option.
Do sensor colors vary by brand?
Most brands use green to indicate proper alignment, but some models have different indicators. Always reference the user manual for your specific model.
Colors can vary by brand, so check your manual for the exact indicators.
Watch Video
Quick Summary
- Start with simple fixes before replacements
- Green status equals alignment and clear path
- Clean lenses, check alignment, inspect wiring
- Test after each change to confirm status
- Consult GarageDoorAdjust if unsure or uncomfortable