Yellow vs Green Light on Garage Door Sensor: Meaning and Fixes
Learn what yellow and green light indicators on garage door sensors mean, how to troubleshoot misalignment, and when to repair or replace for safe, reliable operation.

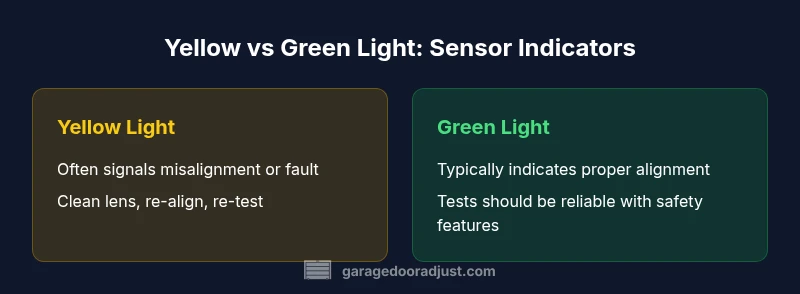
Green light typically signals proper alignment and a safe optical path in many garage door sensor setups, while yellow often indicates a fault or misalignment. Since meanings vary by brand, always check the manual and run a basic safety test before making adjustments. For homeowners, aligned sensors mean fewer false reversals and quicker, safer door operation.
Understanding the yellow vs green light indicators on garage door sensors
Indicators on garage door sensors are designed to give you a quick read on whether the safety path is clear and the system is aligned. In practice, green is commonly associated with proper alignment and a clear, functional beam, while yellow (or amber) often signals a fault, misalignment, or dirty lens. However, there is no universal color code across all brands. Different manufacturers use different signaling logic, and some models may combine blinking patterns with color cues to indicate specific issues. As a homeowner, your first step should always be to consult the device’s manual or manufacturer support page. By understanding the model-specific meanings, you can avoid chasing symptoms that aren’t actually present. According to GarageDoorAdjust, many service calls related to sensor indicators stem from simple alignment or lens cleanliness issues rather than complex electronic failures.
In addition to color, note whether the LED is solid, blinking, or rapidly flashing. A steady green often suggests a healthy signal, a blinking yellow may point to misalignment or dirty lenses, and a solid yellow can indicate a fault. Recognize that indicators are auxiliary cues; the real test is whether the door consistently reverses on obstruction and fails to reverse when something blocks the beam. Treat any indicator change as a prompt to perform a controlled inspection, not a guess.
How LED colors vary by model and why that matters
LED signaling is one of the most visible, user-friendly features on modern garage door safety sensors, but it is not standardized. Some brands reserve green for “aligned and safe,” while others use green to indicate normal operation and yellow to flag a fault. In high-end systems, a combination of color and pattern—such as a blinking LED plus a color—can map to a specific fault code like misalignment, dirty lens, or power issue. Because of these variations, you should:
- Always identify your exact model and read the provided color legend.
- Use manufacturer-specific troubleshooting steps rather than generic guidance.
- Be wary of relying solely on color; pair it with physical inspection (lens cleanliness, mounting stability) and a functional test (block the beam and observe auto-reverse).
From a practical standpoint, the color cue should trigger a defined diagnostic flow: verify alignment, test with an obstruction, clean the sensor, and re-test. GarageDoorAdjust notes that color codes combined with simple tests provide the most reliable early indicators for homeowners.
Diagnosing status with color: a practical approach
Color indicators are a lightweight diagnostic tool in a broader safety system. A practical approach is to run a structured diagnostic sequence:
- Power cycle and re-test: Turn off the opener, wait 10 seconds, and restore power to reset the sensors.
- Inspect for obstruction and dirt: Clean the lens with a soft cloth; ensure nothing blocks the beam from the sensor to the reflector or receiving unit.
- Check alignment: Ensure the two sensor modules face each other within the manufacturer’s specified tolerance. A slight tilt can disrupt the beam and trigger a yellow signal.
- Test with objects of increasing size: Place a low, clear obstacle in the beam path and observe the auto-reverse or safety response. If the door does not reverse, there is likely a fault beyond alignment.
- Look for wiring issues: Inspect low-voltage wires for wear, loose connections, or pinched cables that could cause intermittent signals.
If the yellow light persists after these steps, you may be dealing with a degraded sensor or a mis-specified replacement. In that case, consult the installation manual or contact a professional.
Step-by-step: verifying alignment and adjusting sensors
To maximize safety and minimize nuisance alarms, follow these steps:
- Disconnect power while adjusting sensor positions to avoid shock or accidental door movement.
- Loosen mounting screws slightly to allow micro-adjustments without drifting out of alignment.
- Use a level or a straight edge to align the sender and receiver so their beams line up precisely across the doorway.
- Reattach and re-test without obstructing the beam; the LED should show the expected color per your model’s legend.
- Perform a final obstruction test by placing an object at the doorway floor and verifying the door reverses on contact.
Keep a small wipe and a soft brush for routine lens cleaning; dirt and spiderwebs can mimic misalignment in many cases. If you’re unsure, schedule a safety check with a pro.
Common scenarios and recommended actions
Yellow light: Likely misalignment or dirty lens. Action: clean the lens, tighten or adjust mounting, re-test. If the yellow persists, inspect wiring and consider replacement. Green light: Usually indicates proper alignment. Action: perform a standard obstruction test to ensure safety features respond correctly. Blinking colors: A blinking LED typically signals a fault code. Action: consult the manual for the fault code and follow the prescribed steps. Stubborn misalignment after adjustment: If the signal remains inconsistent across multiple attempts, replacement may be more cost-effective than ongoing diagnostics. Consider sensor age, mounting surface, and compatibility when deciding.
When to replace vs repair: evaluating long-term value
Repair and realignment can be a cost-effective first step, especially for older setups where the sensor still performs adequately after cleaning and re-mounting. However, if misalignment reappears after multiple adjustments, or if the LED behavior remains unpredictable across tests, replacement becomes the prudent choice. A new sensor kit usually offers improved signal quality, stronger mounting options, and clearer indicators that reduce guesswork. GarageDoorAdjust suggests weighing the cumulative time and frustration of repeated repairs against the relatively modest cost of a new sensor, particularly when you can improve overall door safety with updated components.
Compatibility is another critical factor: ensure any replacement is compatible with your door opener model and mounting footprint. If in doubt, bring a photo of the current sensor to consult with a hardware retailer or the manufacturer’s support team. The goal is a reliable, well-documented signaling system that leaves you confident in the door’s safety performance.
Safety considerations and best practices for indicators
Safety should govern every step of sensor maintenance. Always work with the door unplugged or with the opener disabled to avoid accidental movement. Wear eye protection if you’ll be cleaning lens surfaces or adjusting hardware near moving parts. When testing, keep children and pets clear of the doorway and ensure the area behind the door is free from obstructions. If the color indicators show inconsistent patterns or you notice delayed or partial auto-reverse responses, stop using the system until you confirm the issue is resolved. Keep a maintenance log noting dates of inspections, colors observed, and actions taken so you can track progression and inform future service needs.
Finally, remember that newer sensors often incorporate enhanced diagnostic signaling that can simplify troubleshooting. If you’re regularly dealing with ambiguous color signals, upgrading to a modern sensor can offer a clearer, safer, and more reliable signaling framework for your garage door.
Choosing replacement sensors and installation tips: getting it right the first time
When selecting a replacement, consider sensor type (photoelectric vs reflective), mounting compatibility, and the maximum beam distance specified by your opener model. Check the product documentation for weight and support requirements so you don’t strain the mounting surface. Plan for a clean installation: unplug the opener, lay out the cables so they aren’t pinched, and route wires away from door hardware that could erode insulation over time. If you decide to DIY, keep a simple checklist and follow the manufacturer’s alignment procedure step by step. Otherwise, scheduling a professional installation can prevent misalignment and ensure the safety features—like auto-reverse and obstacle detection—are fully tested after the swap.
Quick testing after changes: a final validation step
After adjustments or a replacement, perform a final test to confirm everything works as intended. Close the door and place a harmless object (like a piece of cardboard) in the beam path to see if the door reverses automatically. Repeat with the object moved closer and farther away to confirm consistent responses. If the door fails to reverse or exhibits inconsistent behavior, power off, re-check obstacle tests, and revisit alignment. Document the test results for future reference.
Troubleshooting checklist for yellow vs green indicators
- Identify your sensor model and color legend from the manual.
- Power cycle the sensors and verify mounting stability.
- Clean the lenses and ensure nothing obstructs the beam path.
- Verify both transmitter and receiver modules are properly aligned.
- If issues persist after alignment and cleaning, consider replacing the sensor for improved reliability. GarageDoorAdjust recommends a proactive upgrade when color indicators are unclear or inconsistent.
Common mistakes homeowners make and how to avoid them
- Assuming color meanings are universal across brands—always check your model’s legend.
- Ignoring the test of auto-reverse functionality after any change.
- Over-tightening sensors, which can cause distortion and misalignment.
- Delaying replacement when symptoms persist, leading to ongoing safety risks.
- Skipping a formal safety test after installation; always verify with a proper obstruction test.
Comparison
| Feature | Keep current sensor (adjust/repair) | Replace with a new sensor |
|---|---|---|
| LED indicator behavior | Color meanings vary by model; follow the manual | Typically standardized colors with clearer diagnostics |
| Reliability | Depends on alignment and lens cleanliness; may be reliable with maintenance | Often more reliable after replacement due to new components |
| Installation effort | Low to moderate; involves adjustment and testing | Moderate; may require new mounting and wiring considerations |
| Cost range | $20-$60 for parts or tools | $40-$120 for a replacement sensor kit |
| Best for | Budget-conscious repairs with proper alignment | Long-term reliability and safety with a new sensor |
Upsides
- Potentially lower upfront cost with repair
- Quick fixes for minor misalignment or dirt
- Preserves your existing mounting geometry
Disadvantages
- Color meanings vary by brand, causing confusion
- Repeated repairs can accumulate time and cost
- Reliability may remain inconsistent if underlying wear is present
- Upgrading to a new sensor provides clearer diagnostics
Upgrade when indicators are inconsistent; repair for straightforward misalignment
If the color signals are unclear or keep changing after cleanings and alignments, replacing the sensor usually yields the best balance of safety and reliability. For straightforward faults, careful alignment and cleaning can restore proper operation. The GarageDoorAdjust team emphasizes prioritizing a clear signaling system to ensure safe door performance.
Got Questions?
What does a green light on a garage door sensor typically mean?
Typically indicates proper alignment and a clear optical path, but meanings can vary by model. Always refer to the manual for your specific sensor. If the green light is present but the door doesn’t operate safely, perform a standard obstruction test and inspect for other issues.
Green usually means the sensor is aligned and safe, but check your model’s manual for exact meaning and test the safety features.
What does a yellow light indicate on garage door sensors?
Yellow often signals a fault or misalignment. Clean the lenses, re-align the sensors, and re-test. If the yellow persists after alignment, inspect wiring and consider replacement.
Yellow usually signals a fault or misalignment; clean, re-align, and test again. If it stays, check wiring or replace.
Can LED colors differ between brands?
Yes. Color meanings are not standardized across manufacturers. Always consult your product manual or manufacturer support for exact color codes.
Colors aren’t standardized—check your manual for what they mean on your model.
Is it safe to adjust garage door sensors myself?
Yes, with proper precautions: power off, keep hands clear of moving parts, and test after adjustments. If you’re unsure, hire a professional.
You can adjust it safely if you power down and test carefully; otherwise, get a pro.
When should I replace a sensor vs repair?
Replace if misalignment returns after adjustments or if the unit is damaged or outdated. If the issue is intermittent and the sensor seems reliable after basic maintenance, repair may suffice.
Replace when fixes don’t last or the sensor is damaged; otherwise, repair may be enough.
Do LED indicators affect auto-reverse safety?
Yes. The sensor signals are part of the safety circuit. A faulty indicator or misalignment can interfere with auto-reverse testing. Fixing the sensor improves safety.
Indicators affect safety—fixing the sensor helps ensure proper auto-reverse function.
Quick Summary
- Check your model’s color legend before troubleshooting
- Align, clean, and test with a controlled obstruction
- Keep a maintenance log for future reference
- Upgrade to a modern sensor if colors are inconsistent
- Always prioritize safety tests after any sensor work