Yellow Light on Garage Door Sensor: Quick Troubleshooting Guide
Urgent guide to diagnose and fix a yellow light on your garage door sensor. Learn common causes, safe checks, diagnostic flow, and step-by-step fixes to restore safe operation fast.

Yellow light on a garage door sensor usually signals the safety beam is blocked, misaligned, or malfunctioning rather than a door fault. According to GarageDoorAdjust, start with quick checks: remove obstructions, re-align the sensor, then clean the lenses and re-test. If the light remains, replace the sensor or inspect wiring. Safety first: unplug power before handling sensors.
Understanding the yellow light on the sensor
The yellow light on a garage door safety sensor is a diagnostic indicator, not a signal that the door mechanism itself is failing. In most residential systems, the photoelectric eyes use a red/green status and a separate amber/yellow alert to notify you of a problem with alignment, obstructions, or wiring. When the yellow light comes on, homeowners should treat it as a safety warning and proceed with careful, methodical checks. According to GarageDoorAdjust, this light often points to issues in the sensor alignment or path, rather than the door motor or track. Understanding this distinction helps you focus on the right components and avoid unnecessary repairs. Keep in mind that safety sensors are designed to prevent the door from closing if an obstruction is detected, which protects people and pets. If you feel unsure at any point, pause and seek professional help to prevent injury or damage.
Common causes of a yellow light
A yellow light generally stems from a handful of recurring issues. Misalignment is by far the most common cause; even a fraction of an inch can throw off the beam. Obstructions in the sensor path—dust, spider webs, or a temporary object—can trigger the amber indicator. Dirty or smudged lenses reduce signal strength, and loose mounting hardware can allow slow shifts in alignment over time. Damaged wiring or corroded connectors may intermittently disrupt the circuit, while a failing power supply can also emit a warning light. GarageDoorAdjust Analysis, 2026 notes that misalignment and obstruction are frequent culprits. If you reside in a dusty or windy area, routine cleaning is particularly important to prevent recurring alerts.
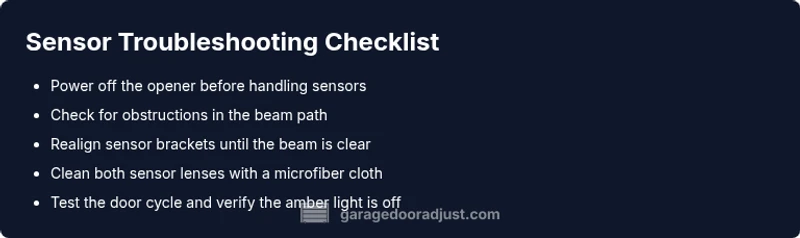
Quick checks you can perform safely
Before touching any wiring, unplug the power to the opener and sensors from the outlet or circuit. Start with the simplest fixes: clear the sensor path of any obstruction and wipe the lenses with a clean microfiber cloth. Check that both sensor brackets sit squarely and point directly at each other. If the sensors are loose or moved by a bump, gently tighten the mounting screws. Finally, re-engage power and test the door using the wall switch or remote; observe whether the yellow light reappears during the cycle.
How to test sensor visibility and alignment
With power restored, stand directly in front of the sensors and move slightly left and right to see if the amber light behaves consistently. Look for a clear line of sight between the sender and receiver; even a small misalignment can trigger warnings. If the light flickers or stays on, try realigning both devices using the built-in mounting holes and a level. After each adjustment, perform a door cycle to confirm the beam is uninterrupted and the door responds correctly. If the amber light remains despite alignment, the issue may be internal or electrical and may require replacement.
Step-by-step: alignment and reset (most common fix)
- Power off the opener and unplug the unit. 2. Loosen the sensor screws just enough to lightly shift the photobeam. 3. Re-align the sensors until you see a solid, uninterrupted line of sight with no gaps in the beam when tested from the doorway. 4. Tighten screws firmly and re-test. 5. If the door closes and reopens without interruption, the problem is resolved. If not, proceed to the next steps or consider replacement.
Safety tips and common mistakes to avoid
Never bypass the safety sensors or cover them to force a close. Keep hands and tools away from moving parts during testing. Do not over-tighten mounting screws, which can warp the sensor housing. Avoid using abrasive cleaners on the lenses; acids can scratch or dull the surface and worsen signals. If you smell burning insulation or hear crackling from the opener, shut down power at the breaker and consult a pro.
Prevention and maintenance to keep sensors reliable
Schedule a quarterly check of sensor alignment and lens cleanliness, especially after strong winds or nearby door activity. Keep the sensor path clear of debris, and replace worn mounting hardware promptly. Periodic testing of the safety beam helps catch misalignment before the amber light turns on. A proactive approach reduces the risk of unexpected openings or closings, preserving safety and convenience.
Final verdict and next steps
If the amber light persists after realignment, replace the sensor or swap out the receiver unit to restore a reliable signal. A persistent yellow light may indicate a failed circuit or aging components that require professional replacement. The GarageDoorAdjust team recommends starting with trusted compatibility parts from your opener’s brand and consulting a technician if you’re unsure about wiring or electrical safety.
Steps
Estimated time: 30-45 minutes
- 1
Power off and prepare
Unplug the opener from its outlet or switch off the circuit breaker to ensure all components are de-energized. This protects you while you inspect the sensors and wiring. Use a flashlight to clearly view the sensor housings without touching moving parts.
Tip: Take a photo of the sensor setup before you adjust anything. - 2
Check alignment
Loosen the sensor mounting screws just enough to shift the beam slightly. Realign so both units face each other with no visible gap and ensure a clear line of sight. Tighten screws once the beam is steady.
Tip: Small, incremental adjustments yield the best results. - 3
Clean the lenses
Wipe both sensor lenses with a clean microfiber cloth. Avoid sprays directly on the lenses; if needed, lightly dampen cloth with water. Ensure no smudges remain that could scatter the beam.
Tip: Never use solvents that could haze or scratch the lenses. - 4
Test the system
Reconnect power and run a door cycle. Watch the beam as the door moves; the amber light should deactivate when the beam is clear. If the light returns, repeat alignment and cleaning steps.
Tip: Test with objects at varying distances to confirm reliability. - 5
Assess after testing
If misalignment or obstruction was the cause, the yellow light should stay off. If the light reappears, inspect wiring or consider sensor replacement. When in doubt, contact a professional.
Tip: Document the results for reference during future maintenance.
Diagnosis: Yellow light on garage door sensor
Possible Causes
- highSensor misalignment
- highObstruction in the sensor path
- mediumDirty or smudged lens
- lowLoose mounting hardware
- lowDamaged wiring or connectors
Fixes
- easyRealign both sensor brackets until beam is uninterrupted
- easyRemove any obstruction and clean lenses with microfiber cloth
- easyTighten mounting screws and re-test
- mediumInspect wiring and connectors, replace damaged components
Got Questions?
What does a yellow light mean on my garage door sensor?
A yellow light usually signals the safety beam is blocked, misaligned, or experiencing a fault. It’s a warning to check alignment, obstructions, and wiring before proceeding with door operation.
A yellow light means the safety beam has a potential issue—check alignment, remove obstructions, and inspect wiring before using the door.
Can I still operate the door when the yellow light is on?
Do not override safety features. If the amber light is on, use manual opening only and repair the sensor before using the door remotely. Pushing the door with the sensor active can be dangerous.
Do not operate the door remotely while the yellow light is on; repair the sensor first and use manual opening with caution.
How often should I inspect my sensor alignment?
Inspect alignment during seasonal maintenance or after any impact to the garage door area. Regular checks help prevent unexpected amber warnings and improve safety.
Check alignment during seasonal maintenance or after any impact. Regular checks prevent surprises.
What’s the difference between misalignment and a dirty lens?
Misalignment means the beams don’t face each other squarely, causing a fault. A dirty lens scatters the beam and can create a false alert even if alignment is correct.
Misalignment is a beam-facing issue; a dirty lens causes misreadings even if the beams are aligned.
When should I replace the sensor?
If cleaning and realignment don’t resolve the amber light, or if you detect damaged wiring or a lasting fault, replacement is typically the safest option. Consult a professional if unsure.
If fixes don’t work, consider replacing the sensor and consult a professional for safe installation.
Watch Video
Quick Summary
- Check alignment before replacing hardware
- Clear obstructions from the sensor path
- Test after each fix to confirm yellow light is resolved
- If in doubt, contact a pro