Garage Door Sensor Yellow Instead of Green: Troubleshooting Guide
Urgent guide to diagnose and fix a garage door safety sensor showing yellow instead of green. Step-by-step troubleshooting, safety tips, and when to call a pro from GarageDoorAdjust.

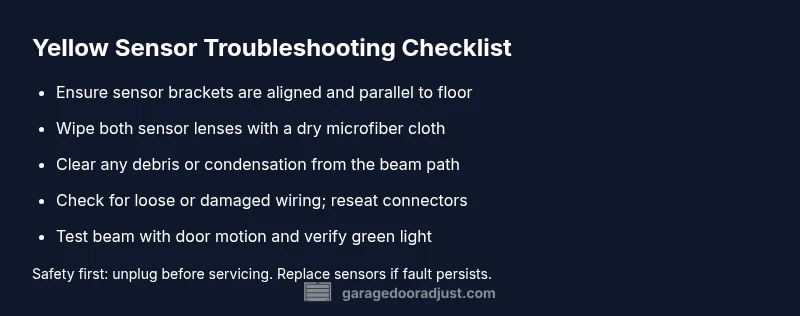
Yellow sensor indicators typically signal a fault or misalignment in the safety beam. Start with a quick check: realign the sensor brackets, clean the lens, remove any obstructions, and verify all wiring connections are snug. If the color persists, follow the diagnostic flow and step-by-step repairs below for a safe, reliable fix.
Why the garage door sensor yellow instead of green matters
When you see the color change from green to yellow on your garage door safety sensor, it’s a clear sign that the beam path isn’t reading a safe, clear path for automatic operation. The color cue is meant to warn of misalignment, obstruction, or a fault in the wiring. According to GarageDoorAdjust, the majority of yellow-indicator issues stem from relatively simple problems like misaligned brackets or dirty lenses, which homeowners can often fix with basic tools and careful testing. The distinction between green and yellow isn’t just cosmetic; it affects how the opener responds to the sensor and whether it will reverse or stop for safety reasons. Recognizing the meaning behind this color is the first step to preventing accidental door movement and potential injury. A proactive approach, paired with the right checks, can restore a reliable safety circuit and keep your family safe.
Common Causes of a Yellow Sensor (Green Expected)
There are several frequent culprits behind a yellow sensor reading when the green light should be present. Each cause has a practical fix you can perform in under an hour with common household tools:
- Misalignment of the sensor or brackets: Brackets can loosen from door movement or wind, shifting the beam out of alignment.
- Dirty or foggy lenses: Dust, spider webs, or condensation can obscure the beam, triggering a fault signal.
- Obstructions in the beam path: Leaves, cobwebs, or small debris between the emitter and receiver can interrupt the signal.
- Damaged or loose wiring: Worn insulation, loose connectors, or corrosion at terminals can create a fault condition.
- Damaged sensor housing: Cracked housings let moisture in or misfocus the beam.
- Weather-related changes: Rapid temperature shifts can cause lens fogging or bracket movement, resulting in a yellow indicator.
If you notice a yellow light, start with the easiest fixes first (realign and clean) before inspecting wiring. This sequence reduces unnecessary disassembly and keeps you safer.
Safety First: When to Call a Pro
Safety systems are designed to protect you, not to become a DIY challenge. If you encounter any of the following, stop and call a professional repair technician:
- You observe melted wiring, exposed conductors, or burning smells near the opener or sensors.
- The door behaves unpredictably after attempting the basic fixes listed in this guide.
- You’re uncomfortable with electrical work or lack the necessary tools and PPE (gloves, eye protection).
- The sensor remains yellow after all quick fixes and a full diagnostic flow.
The GarageDoorAdjust team emphasizes erring on the side of caution: a persistent yellow indicator often means the safety system isn’t functioning correctly, so professional diagnosis is warranted to prevent injury or property damage.
Diagnostic Flow Overview
A structured diagnostic flow helps you move from symptom to a reliable solution without guesswork. Start with the simplest explanations and escalate only as needed. This approach minimizes risk and reduces downtime.
Symptoms to observe:
- Yellow indicator on the sensor instead of green
- Intermittent sensor readings when the door moves
- Door reverses unexpectedly or refuses to move when safety beams are active
Diagnosis paths typically include misalignment, lens obstruction, and wiring faults. By following a logical progression, you’ll cover the most likely causes first and only move to more complex issues if the basics don’t resolve the problem.
Prevention & Maintenance to Keep It Green
Prevention is always better than repair. Schedule a quick monthly check to ensure the safety beam remains aligned and clean:
- Wipe the sensor lenses with a dry microfiber cloth to remove dust and moisture
- Check mounting brackets for looseness and re-tighten as needed
- Clear any debris around the beam path and ensure the area stays dry during rain or snow
- Test the sensor pair by closing the door and verifying the beam remains uninterrupted for several cycles
Regular maintenance reduces the chances of a yellow indicator and keeps your garage door operating safely.
Common Pitfalls and How to Avoid Them
- Skipping safety steps: Always unplug the opener before inspecting wiring or mounting hardware.
- Over-tightening screws: It can bend the brackets and misalign the beam.
- Ignoring condensation: In humid environments, lenses can fog; dry them and allow a few minutes for the beam to settle.
- Forgetting to re-test after maintenance: Always re-test the system after any adjustment to confirm the green light returns.
Final Checks and Next Steps
After performing alignment, cleaning, and basic wiring checks, re-test the system thoroughly. Close the door from a safe distance or using a wall switch, observing the sensor’s color and the door’s reaction. If the yellow indicator reappears, proceed with the STEP-BY-STEP guide for a more thorough repair or contact a professional. Remember, the goal is a solid, safe beam that reliably stops the door if the path is blocked.
Steps
Estimated time: 25-40 minutes
- 1
Power down and prep for safety
Unplug the opener or switch off the circuit breaker. Confirm the area around the door is clear, and wear eye protection. This prevents accidental activation while you work.
Tip: Use lockout/tagout if available to prevent re-energizing during the repair. - 2
Inspect alignment
Visually check both the emitter and receiver. They should face each other directly with no tilt. Use a level if available to ensure they are perfectly aligned parallel to the floor.
Tip: Small adjustments can make a big difference; make minor tweaks and test frequently. - 3
Clean the lenses
Gently wipe both lenses with a dry microfiber cloth. Avoid cleaners that could leave residues. Moisture or grime can mimic obstruction and trigger a yellow status.
Tip: Do not spray liquid directly on the sensors. - 4
Check for obstructions
Inspect the beam path for debris, spider webs, or condensation. Remove anything that could interrupt the signal and ensure a clear line of sight.
Tip: Keep the sensor area free of leaves or snow with a protective shroud if outdoors. - 5
Inspect wiring and connectors
Power off again and inspect the wires at the sensors and the opener. Look for loose connections, damaged insulation, or bent pins. Re-seat connectors firmly.
Tip: If you see damaged insulation, replace the cable to prevent future faults. - 6
Power on and test
Reconnect power and run a door test (live operation from a safe distance). Observe whether the sensor light stabilizes on green and the door stops when the beam is interrupted.
Tip: Test from multiple angles to verify the beam is consistent. - 7
Reset as needed
If the light remains yellow after fixes, reset the opener according to manufacturer instructions and re-test. Some models require a specific sequence to reinitialize the sensor circuit.
Tip: Document the model and any codes in case you need professional support. - 8
Evaluate replacement
If misalignment or lens damage persists despite fixes, consider replacing the sensor pair. This ensures a reliable safety signal and compliance with current standards.
Tip: Keep an eye on warranty terms before purchasing replacements.
Diagnosis: Sensor shows yellow instead of green
Possible Causes
- highMisalignment of sensor brackets or mounting
- mediumDirt, condensation, or obstruction on sensor lenses
- lowDamaged or loose wiring/connectors
Fixes
- easyRealign sensor and bracket to restore proper beam path
- easyClean sensor lenses with a dry microfiber cloth and recheck beam alignment
- mediumInspect wiring, tighten connections, and replace damaged cables or terminals as needed
Got Questions?
Why is my garage door sensor yellow instead of green?
A yellow signal usually means the safety beam has a fault or misalignment. Start with alignment, cleaning, and checking wiring. If unresolved, proceed with the full diagnostic flow to confirm the issue.
A yellow signal means the safety beam isn’t reading a clear path. Begin with realignment and cleaning, then test again, and escalate to professional help if needed.
Can I fix a yellow sensor myself?
Yes, many fixes are DIY-friendly: realign, clean lenses, and check wiring. Always unplug first and test after each step. If the problem persists, consult a pro.
You can usually fix it yourself by realigning and cleaning, but unplug first and test after each step.
Is a yellow indicator dangerous?
Not inherently dangerous, but it means the safety system isn’t functioning properly. Do not operate the door until you fix the issue and confirm the green light returns.
It isn’t dangerous by itself, but the safety system isn’t reliable until you fix it.
How do I reset the sensor after fixes?
Power down the opener, reassemble, and follow the model-specific reset sequence. Then run a test cycle to ensure the light returns to green and the door reacts correctly.
Turn off power, reassemble, reset per your model, and test the door to confirm green light returns.
When should I call a pro?
If you notice damaged wiring, persistent misalignment, or you’re uncomfortable with electrical work, it’s safer to hire a pro for diagnostics and replacement.
Call a pro if wiring looks damaged or the issue doesn’t resolve after basic fixes.
Watch Video
Quick Summary
- Identify yellow as a safety fault indicator and start with alignment.
- Clean lenses and clear path before inspecting wiring.
- Follow a step-by-step diagnostic flow to avoid steps twice.
- Call a pro if misalignment or wiring damage persists after fixes.