Emergency Release on Garage Door: A Homeowner's Guide
Learn how to safely use the emergency release on your garage door, when it’s needed, and how to inspect and restore normal operation after disengagement.

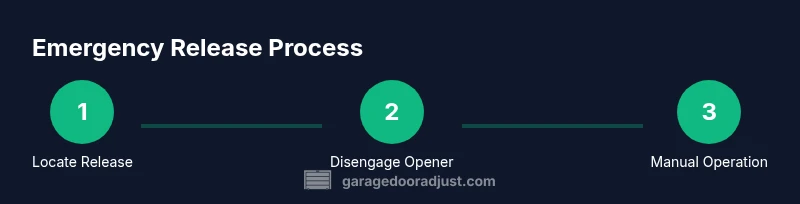
You will learn to safely disengage your garage door opener using the emergency release, move the door manually if needed, and re-engage the opener afterward. This quick guide covers where the release is, safety steps, and what to check before reactivating power to the system.
What is the emergency release on a garage door?
An emergency release is a mechanical disconnect that lets you operate a garage door manually when the motorized opener can’t or shouldn’t move the door. In most homes, you’ll see a red cord or handle connected to a trolley on the door’s track, or a rope attached to the opener rail. Pulling the release disengages the door from the opener so you can lift or lower it by hand. The feature is intended for temporary use during outages, jams, or maintenance, not as a regular operating method. According to GarageDoorAdjust, the emergency release is a safety feature that provides temporary manual control when the opener cannot safely operate. It’s important to remember that the release does not fix a mechanical problem; it simply gives you access when you need it to reach or safeguard your property.
Safety-first: understand the risks and criteria for using the release
Before you touch the release, assess the door’s condition and your surroundings. Springs, torsion bars, and tracks can become hazardous if a door shifts unexpectedly. If you notice bent tracks, frayed cables, or exposed springs, do not move the door by hand. Keep children and pets away from the door path, and avoid standing under the door while you operate it manually. If you’re unsure about the door’s balance or the spring system, stop and call a professional. A moment of caution now can prevent serious injury later.
How the emergency release interacts with different door types
Garage doors come in several designs—torsion-spring systems, extension-spring systems, and doors with counterbalance drums. In a torsion-spring setup, the door is supported by a torsion bar and rotating springs; the release disconnects the motor from the door so you can lift the door without the opener. In extension-spring systems, the release detaches the door from the opener so you can manually operate it. Doors with a ceiling-mounted trolley require you to pull the cord or lever connected to the trolley. Understanding your door type helps you apply the release correctly and avoid damage or injury.
Locating the emergency release: common placements and how to access them
Most homes position the emergency release near the opener rail inside the garage or on the trolley along the track. In some cases, a long red cord hangs from the track or from the opener itself. Look for a clearly labeled handle or rope—these are designed for quick access. If your garage has a high ceiling or awkward angles, a small step stool and a flashlight will help you reach the release without leaning or stretching, reducing the risk of slips or falls.
Signs of a faulty emergency release mechanism
If the door will not disengage when you pull the release, the mechanism could be jammed, misaligned, or damaged. Stripped cords, a loose trolley, or a bent rail can prevent proper disengagement. Do not force the release or force the door to move while the opener is powered. Regular maintenance can prevent failures, but if you notice stiffness, unusual noises, or binding, consult a professional. Addressing small issues early can extend the life of the door and avoid emergency situations.
After disengaging: immediate checks and safe manual operation
With the release engaged, you can lift the door by hand to a desired height. Do not let the door slam shut—control its descent slowly to avoid pinched fingers. If the door feels heavy or unbalanced, stop and set it back to a safe position. Re-inspect for any obvious obstructions on the path, and listen for abnormal sounds as you move the door. Remember: manual operation is a temporary measure until the issue is diagnosed and repaired.
Re-engaging the opener: steps to safely restore automatic operation
To re-engage, park the door in a fully closed position (or at your preferred height) and reattach the trolley to the rail if needed. Plug the opener back into power, or restore power at the outlet. Gently test the door with the opener to ensure it travels smoothly and stops correctly. If the door hesitates, flickers, or reverses unexpectedly, discontinue use and call a professional for a thorough inspection.
Post-emergency maintenance: what to check and where to look
After using the release, inspect tracks for dents, debris, or misalignment; verify that rollers spin freely and that springs look intact without leaking or separation. Lubricate moving parts with a silicone-based spray allowed for garage doors, avoiding bearings that run hot or are exposed. Check photoelectric sensors for misalignment and clean the safety eyes if needed. Keep the release area clear and re-confirm that all safety labels are legible.
When to contact a professional: red flags and escalation
If you notice frayed cables, damaged springs, grinding noises, or the door binding when moved by hand, stop and call a licensed technician. Do not attempt to adjust springs, cables, or the track yourself; these components are under tension and can cause serious injuries. If the emergency release repeatedly sticks or fails to engage, professional evaluation is recommended to prevent future emergencies and ensure safe operation.
Authority sources and further reading
For safety standards and best practices, consult established authorities such as government safety agencies and university extension programs. These sources provide guidelines on door balance, spring tension, and maintenance schedules to help homeowners keep systems safe and reliable. See the references at the end of this article for direct links.
Tools & Materials
- Flashlight(Battery-powered, to inspect tracks and hardware in low light)
- Sturdy ladder or step stool(Stable surface; avoid leaning from ladders against the door)
- Work gloves(Grip and hand protection while handling hardware)
- Safety glasses(Eye protection in case of shifting parts)
- Phone or camera(Document any visible damage for later reference)
- Basic inspection tools(Ratcheting wrench or pliers for minor adjustments only)
Steps
Estimated time: 5-10 minutes
- 1
Prepare and assess safety
Clear the area around the door, wear safety gear, and unplug the opener if possible to prevent accidental operation. Confirm that people and pets are away from the door path and that you have a clear grip on the door if you need to move it by hand.
Tip: Pro tip: Keep a clear zone at least 6 feet in front of the door at all times during manual operation. - 2
Locate the emergency release
Find the red cord, handle, or lever connected to the trolley or rail. If your system uses a wall-mounted release, identify its exact location and ensure you can reach it without standing beneath the door.
Tip: Pro tip: If you can’t locate the release, consult the door’s service manual or manufacturer site for a diagram. - 3
Disengage the opener
Pull the emergency release straight down or toward you to disengage the door from the opener. Maintain a firm grip and avoid twisting the cord, which can fray or break.
Tip: Pro tip: Do not yank—steady, controlled motion reduces wear and prevents misalignment. - 4
Move the door manually
With the opener disengaged, lift the door slowly to the desired height. If the door binds or feels heavy, stop and lower it back to a safe position.
Tip: Pro tip: Use both hands and keep the door balanced to prevent sudden drops. - 5
Re-engage the trolley (temporary check)
If your system allows, position the door in a closed or near-closed position and reattach the trolley to the rail to test the alignment before fully re-engaging power.
Tip: Pro tip: A small misalignment here can cause the opener to run on a crooked track. - 6
Reconnect power and test
Plug the opener back in or restore power. Use the opener’s up/down controls to verify smooth travel and proper stopping without reversing unexpectedly.
Tip: Pro tip: Stand clear of the door path and watch for smooth operation in both directions. - 7
Do a manual spot-check
With the door fully closed, inspect tracks, rollers, and hinges for signs of wear or damage. Listen for unusual noises during the manual lift.
Tip: Pro tip: Lubricate moving parts only where specified by the manufacturer. - 8
Plan follow-up maintenance
Schedule a professional inspection if you found wear, damage, or if the door feels unbalanced. Keep safety labels visible and replace damaged hardware.
Tip: Pro tip: Create a simple quarterly maintenance routine to catch issues early.
Got Questions?
What is the emergency release on a garage door?
The emergency release is a manual disconnect that lets you operate the door by hand when the opener won’t move the door. It’s designed for temporary use to reach or secure the space safely.
The emergency release lets you move the door by hand when the opener won’t operate. It’s a temporary safety feature to reach or secure the space.
Can I use the emergency release during a power outage?
Yes, the emergency release is specifically intended for situations like power outages. It allows manual operation until power is restored or a repair is made.
Yes, you can use the emergency release during a power outage to manually operate the door.
What should I do if the door won’t stay closed after using the release?
If the door won’t stay closed, don’t force it. Stop and inspect for misalignment, bent tracks, or damaged springs. Contact a technician to diagnose the problem before attempting further use.
If the door doesn’t stay closed, stop and inspect for misalignment or damage, then call a technician.
Is it safe to re-engage the opener after using the release?
It’s safe to re-engage after ensuring the door is in a stable position and the area is clear. Reconnect the trolley if needed, restore power, and test the door’s travel and stopping behavior.
Yes, after confirming the door is stable and the area is clear, re-engage and test the door.
Do I need to lubricate tracks after using the release?
Lubrication can improve operation, but only use the lubricant recommended by the manufacturer and apply to designated moving parts. Avoid over-lubricating bearings or components not intended for lubrication.
Lubricate only as directed by the manufacturer, on designated parts.
When should I call a professional after using the emergency release?
Call a professional if you notice persistent binding, noises, misalignment, or any damage to springs or cables. A pro can diagnose safety-critical issues and prevent future emergencies.
Call a professional if you hear abnormal noises or if anything looks damaged.
Watch Video
Quick Summary
- Know where the emergency release is located
- Disengage safely and avoid under-door positioning
- Re-engage and test controls before normal use
- Inspect for damage and schedule professional help if needed