How to Safely Auto-Close a Garage Door: Step-by-Step Guide
Learn to safely automatically close a garage door with sensors, timers, and proper testing. This guide covers compatibility, setup, maintenance, and safety to prevent injuries and energy waste.

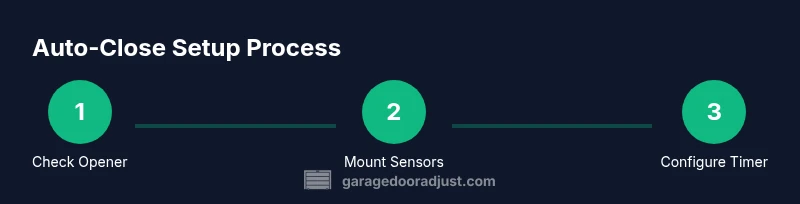
By safely enabling an auto-close feature, you can have your garage door close automatically after a short dwell time or when the area is verified clear. Begin by confirming opener compatibility, installing safety sensors, and configuring the timer so the door closes only after a full travel cycle and with no obstructions.
Why automatic closure matters and safety basics
According to GarageDoorAdjust, automatically closing a garage door can improve daily convenience and prevent energy loss, but it must be done with strict safety controls. A properly configured auto-close system helps keep the garage secure when you’re not near the door, reduces drafts and pest intrusion, and can prevent weather-related damage to stored items. However, auto-close is not a one-size-fits-all feature; it should be bounded by reliable sensors, precise travel limits, and an easy override for manual operation. The core safety principle is simple: the door must verify the path is clear and be able to reverse safely if a person, pet, or object interrupts closure. In our experience, the safest installations pair certified safety sensors with a timer or hub that only triggers closure after a deliberate dwell period. Regular testing—at least monthly—helps ensure that the system responds correctly to obstructions and that the door travels fully to the closed position.
Compatibility and safety standards
Auto-close functionality is only as safe as the equipment and standards that govern it. Look for openers that meet recognized safety standards such as UL 325 and the manufacturer’s installation guidelines. If you have an older opener, confirm whether it supports a retrofit timer or requires a new module. Safety sensors should be mounted at the door’s base, aligned correctly, and tested for proper beam interruption. Local codes may require backup power or a visible indicator when the auto-close is active. Always consult the manual and avoid hacks that bypass safety features. GarageDoorAdjust emphasizes using certified components and following manufacturer instructions to maintain warranty and reliability.
Essential components and upgrade options
To implement a reliable auto-close system, you’ll need a compatible garage door opener with an auto-close control, safety sensors (photoelectric eyes), a timer or smart hub for automation, and a manual override option. Optional upgrades include a mobile app for monitoring, remote override via secure credentials, and a backup power supply to retain function during outages. Ensure you have mounting hardware, proper wiring, and a way to test the door’s travel limits after installation. The goal is a seamless closure that only triggers when sensors confirm the path is clear and the door can complete the cycle without obstruction.
Planning and site prep
Begin with a quick site assessment: confirm the door travels smoothly to the fully closed position, test the safety reversal feature, and locate the best mounting points for sensors and the timer. Measure the door’s travel length and ensure the track is free of debris or misalignment. A clean, level mounting surface reduces false triggers and sensor misreads. Mark the sensor positions at equal heights on both sides of the door. Prepare a safe work area and turn off power to avoid accidental shocks during wiring or installation. This planning stage reduces rework and speeds up the actual setup.
Testing routines and maintenance
After installation, perform a structured testing routine. Run several closed cycles with a clear path, observing the door’s travel, sensor response, and reversal on obstruction. Verify the timer triggers only after a deliberate dwell period, and confirm the door remains closed after a successful cycle. Check for misalignment, loose screws, or frayed wiring, and address promptly. Schedule monthly checks for sensor alignment, travel limits, and battery status if the system includes backup power. Regular maintenance prevents stray triggers and keeps the mechanism safe for family members and pets.
Security, privacy, and best practices
Auto-close systems can be a security asset, but they introduce potential exposure if the networked components are not secured. Use strong, unique credentials for any smartphone app or hub, enable two-factor authentication if available, and disable remote access when not needed. Keep firmware up to date and avoid exposing the system to open public networks. If you have a smart home setup, review automation rules to ensure no conflicting commands could cause unexpected closure. Finally, maintain a visible indicator when auto-close is active and provide a manual override method for emergencies.
Tools & Materials
- Automatic garage door opener with auto-close capability(Ensure it supports a configurable auto-close timer and safety sensor integration)
- Safety sensors (photoelectric eyes)(Mount on each side of the door, aligned and tested for beam interruption)
- Timer or smart hub for automation(Wi-Fi or Zigbee/Z-Wave hub recommended; check compatibility with your opener)
- Tools: screwdriver set, drill, level, wire stripper(For mounting sensors and actuator modules)
- Backup power option (optional but recommended)(Keeps auto-close function during outages)
- Smartphone or computer with internet access(To configure app/hub and monitor status)
- Safety equipment (gloves, eye protection)(Personal protection during installation)
Steps
Estimated time: 60-90 minutes
- 1
Verify opener compatibility
Check the model number and user manual to confirm auto-close support. If needed, update firmware or install a compatible add-on module. Ensure safety sensors are present or plan for installation before proceeding.
Tip: Document the model and firmware version for future maintenance. - 2
Gather tools and materials
Collect the required tools and components listed in the plan. Prepare the workspace by clearing clutter and ensuring the door is in a known open position before starting wiring.
Tip: Use a magnetic pad to keep small screws from bouncing away. - 3
Install or connect the auto-close timer
Mount the timer or hub in a dry, accessible location. Wire it according to the manufacturer’s diagram, connecting to the opener’s close input and sensor circuit if required.
Tip: Double-check connections with the power off to avoid shocks. - 4
Set up safety sensors
Install photoelectric sensors at the door’s bottom corners and align beams until the indicator shows solid alignment. Test by crossing the beam with an object to verify the door reverses.
Tip: Verify both sensors trigger reliably from each side of the door. - 5
Calibrate travel limits and timer dwell
Adjust the door’s travel to ensure it closes completely and reverses on obstruction. Program the auto-close timer to wait a deliberate dwell period before closing.
Tip: Test several dwell durations to find a safe, reliable setting for your routine. - 6
Enable manual override and safety checks
Restore a manual close option and confirm a quick override works. Run multiple cycles, including a mock obstruction, to verify safety features.
Tip: Keep the override control accessible to all household members. - 7
Test in real-world conditions
Operate the door in typical daily scenarios—arrival, departure, and weather changes. Confirm auto-close behavior remains consistent and safe.
Tip: Document test results and any adjustments for future reference.
Got Questions?
Do I need a new opener to use auto-close?
Some older openers don’t support auto-close. Check the manual or contact the manufacturer to see if a retrofit kit or firmware update is available. If not, you may need a compatible newer model that includes auto-close functionality.
Some old openers won’t support auto-close; check your manual or contact the manufacturer to see if an update or kit is available.
Is auto-close safe around pets and kids?
Yes, when sensors are correctly installed and tested, auto-close can be safe around pets and children. Always keep the manual override accessible and teach household members how to use it.
Yes, with proper sensors and testing, auto-close can be safe, but keep overrides accessible and educate everyone in the home.
Can I temporarily disable auto-close?
Yes. Most systems allow a temporary deactivation via the timer settings or an app. Re-enable after the planned period to maintain safety and convenience.
Yes, you can temporarily disable it through the timer or app, then re-enable when needed.
What should I do if the door won’t fully close?
Check for obstructions, ensure sensors are aligned, and confirm travel limits are correctly set. If the door still won’t close, consult the manual or contact a technician.
If it won’t close, inspect for obstructions, realign sensors, and check limits; if needed, get professional help.
Can auto-close be hacked or exploited?
Any networked device can face security risks. Use strong passwords, enable two-factor authentication where available, and disable external access when not needed.
Networked devices can have risks—use strong passwords, enable extra security, and limit external access.
How often should I test the auto-close feature?
Test monthly to ensure sensors, timer, and travel limits operate safely. Adjust the schedule if you notice changes in how the door closes.
Test monthly and adjust as needed to keep everything safe and reliable.
Watch Video
Quick Summary
- Confirm opener compatibility before enabling auto-close
- Place and test safety sensors for reliable operation
- Calibrate travel limits and dwell timer safely
- Maintain ongoing testing and updates for security
- Use strong security practices for networked hubs