Problems with Garage Door Closing: Troubleshooting Guide
A step-by-step troubleshooting guide for problems with garage door closing. Learn common causes, safety sensor testing, track checks, opener settings, and when to call a pro. Practical, safe guidance from GarageDoorAdjust.

Most likely causes when a garage door won't close fully are misaligned safety sensors, an obstacle on the track, or a faulty limit switch in the opener. Quick fix: unplug the unit, realign the photoelectric sensors so both LEDs are steady, clear debris from the tracks, and reset the opener. If it still won't close, continue with the diagnostic flow below.
Understanding the problem: what problems with garage door closing look like
Problems with garage door closing can show up in several ways: the door stops before the floor, reverses as soon as it senses resistance, or fails to descend fully. These symptoms are not just annoying—they can indicate safety and mechanical issues that, if left untreated, may worsen. This is why a structured approach matters. According to GarageDoorAdjust, homeowners who document the behavior and test components systematically are more likely to find the root cause quickly and safely. In this guide, you’ll learn how to observe the closing action, distinguish between sensors, tracks, and opener problems, and implement fixes that restore reliable operation. By following these steps, you reduce the risk of entrapments, property damage, and repeated malfunctions.
As you work through the steps, keep notes on what you observe at each stage. The goal is a safe, complete closure every time, with the safety system functioning correctly to prevent injuries. If the door remains inconsistent after you complete the checks, you’ll know exactly what to report to a technician and what part to order for replacement.
Quick checks you can do safely today
Before diving into parts, perform simple checks that require no tools. Make sure the area under the door is clear and nothing is blocking the path. Unplug the opener or switch off the circuit, and use a wall switch to operate the door manually to confirm it responds. Check the remote battery and try operating from a car or another switch to rule out a remote issue. If the door closes partway and then stalls, note the exact stage of the descent and any sounds. These observations guide the next steps and help you avoid unnecessary disassembly. The most effective troubleshooting starts with the simplest checks and builds toward the more detailed testing.
Safety sensors: testing and realignment
Photoelectric safety sensors are a common source of problems with garage door closing. Look for two sensors across the door opening; the LED indicators should stay steady when the beam is intact. To test, place a soft object (a cardboard sheet works well) in the beam path while the door is closing. If the door stops and reverses, the sensor alignment or wiring is suspect. Realign the sensors so both LEDs glow steadily in the same color, or follow the manufacturer instructions to re-aim them. After adjustment, re-test by repeating the beam test and ensuring the door closes fully without reversing. GarageDoorAdjust analysis shows sensor misalignment and obstructions as frequent culprits.
Tracks, rollers, and mechanical binding
Even with perfectly aligned sensors, the door can fail to close due to track or roller issues. Inspect the tracks for kinks or debris; wipe them clean and ensure they sit plumb in the jambs. Lubricate the rollers and hinges with a light silicone-based lubricant if recommended by manufacturer; avoid heavy greases that attract dust. Check for loose brackets and ensure there is no binding when the door moves by hand along the track. If the door sticks or stalls, measure track gaps and look for bent sections that require professional adjustment. Keeping tracks clean and aligned is a simple, ongoing way to prevent problems with garage door closing.
Opener settings and wiring checks
Modern openers use limit switches and force settings to govern how far and how fast the door travels. Locate the close limit and adjust until the door seats against the floor without pressing it too hard. If you can reach the sensor and wiring, inspect connections to the wall unit and the ceiling motor; look for frayed wires or loose screws. Reprogram remotes and perform a basic reset to isolate the issue, then re-enable safety features. If the door still does not close, note any error codes from the opener's light display and consult the manual for diagnostic codes. Poor wiring or misconfigured settings are common culprits in problems with garage door closing.
Diagnostic flow in practice
Use a symptom-to-diagnosis approach: if the door stops short, check for obstructions then sensor misalignment; if it reverses early in the descent, test the photoeye path and track clearance. For each potential cause, perform the recommended fix in the simplest order: start with power and sensor alignment, then track cleanup, then opener reset. If one step fixes the issue, test the full cycle several times. If not, move to the next cause and repeat. This structured approach reduces guesswork and helps you decide when to call a pro.
Prevention and professional help
After restoring proper closing, establish a maintenance routine to prevent problems with garage door closing. Clean and inspect monthly, lubricate moving parts every 3-6 months, and test safety sensors quarterly. Keep the door balanced by checking that it stays in place when opened halfway by hand; an unbalanced door is a sign of spring or track issues that require professional service. If you encounter unfamiliar wiring, unusual noises, or repeated reversals, do not attempt risky repairs; contact a licensed technician. The GarageDoorAdjust team recommends documenting every test and keeping a log so you know when to escalate to a pro.
Quick maintenance plan for the next 90 days
- Inspect sensors and beams monthly; realign if LEDs flicker
- Clean tracks and inspect brackets quarterly
- Test the auto-reverse and limit settings after any weather change
- Schedule professional inspection if you hear grinding, grinding noises, or hard resistance during operation
- Archive your findings for future troubleshooting and tailgate signoffs
Steps
Estimated time: 30-60 minutes
- 1
Power down and secure the area
Unplug the opener from the outlet or switch off the circuit. Confirm the door cannot move unexpectedly while you inspect. This step prevents injury during testing and keeps you in control of the procedure.
Tip: Use a flashlight to inspect the track and hinges up close before touching any moving parts. - 2
Test safety sensors and alignment
Check that both sensors face each other with a clear line of sight. If the LEDs are not steady, adjust the alignment until they glow evenly. Perform a beam test with a light object in the path and watch for the door to stop correctly.
Tip: Don’t bypass the safety sensors even for testing—this is a critical safety feature. - 3
Clear the door path and inspect tracks
Remove any visible obstructions from the door path. Inspect tracks for dents, debris, or misalignment; wipe clean and straighten as needed. Manually run the door a few inches to feel for binding.
Tip: Move slowly and never force the door; listen for unusual sounds that indicate binding. - 4
Check and adjust opener limits and force
Locate the close limit and adjust per the manual so the door sits on the floor without pressing. Verify force settings to make sure the door fully descends but reverses if contact is detected.
Tip: Make only small adjustments at a time and test after each change. - 5
Test the full cycle and reset if needed
Reconnect power and run the door through a full close. If issues persist, perform a factory reset or re-learn remotes and keypads, then test again.
Tip: Note any error codes on the opener’s display for future reference. - 6
Evaluate and decide on next steps
If the door closes reliably for several cycles, you’re likely done. If problems return, document when they occur and consider professional service for components like springs or cables.
Tip: Record symptoms, timing, and responses to fixes for easy communication with a technician.
Diagnosis: Garage door won't close fully
Possible Causes
- highMisaligned safety sensors
- mediumObstruction on door path
- lowWiring or sensor fault
Fixes
- easyRealign safety sensors so the LEDs are steady
- easyClear debris from tracks and inspect for obstruction
- mediumReset opener and reprogram remotes; check wiring if persists
Got Questions?
Why won't my garage door close all the way or stays halfway down?
This usually points to safety sensors, track obstructions, or incorrect limit settings. Start by testing the safety beam, clearing the path, and adjusting the close limit. If the issue persists, proceed through the diagnostic flow to identify the exact cause.
If your door stops half way, check the safety beam and the track. Clear obstructions and adjust the close limit, then retest.
How do I test the safety sensors myself?
Place a temporary obstacle in the beam path while the door is closing and observe whether it stops. If the door doesn’t stop, realign the sensors until the LEDs are steady and facing each other.
Put a light object in the beam and watch if the door reverses. Realign the sensors until the LEDs stay steady.
What if the door reverses before contacting the floor?
Reversal can indicate a misadjusted close limit, a sensor issue, or a binding track. Verify the close limit and test the sensor alignment, then clear tracks and lubrication as needed.
If it reverses before the floor, check the close limit and sensors, then inspect the track.
Can weather impact closing performance?
Yes. Extreme cold can stiffen springs and rails; heat can affect lubrication. Seasonal adjustments may be necessary, and regular checks help keep everything aligned.
Weather can affect closing performance, so inspect and tune after big temperature changes.
When should I call a professional?
If you hear unusual noises, see damaged springs or cables, notice electrical burning smells, or cannot safely diagnose the issue, a licensed technician should evaluate the system.
Call a pro if you hear grinding or smell burning, or if the job involves springs or electrical components.
Watch Video
Quick Summary
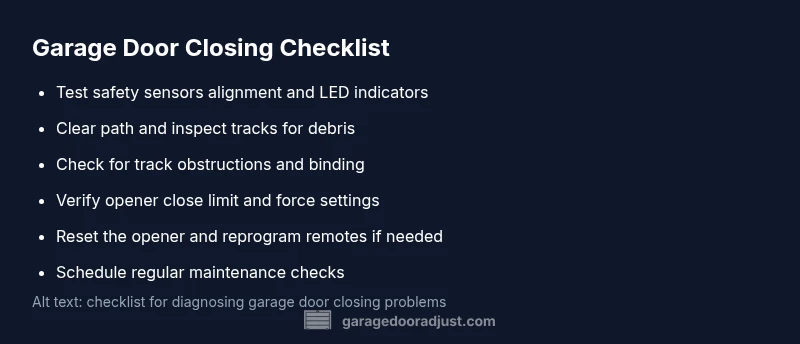
- Test sensors first and fix alignment
- Clear path and inspect tracks regularly
- Reset opener and re-test full cycle
- Document symptoms to guide diagnosis
- Call a pro for springs or wiring issues