Why Your Garage Door Won't Close: A Practical Troubleshooting Guide
Urgent guide to diagnose and fix why your garage door won’t close, with a clear diagnostic flow, safety steps, and prevention tips from GarageDoorAdjust.

Most often, a safety sensor misalignment or obstruction triggers the auto-reverse, stopping the door from closing. Start by clearing the path, then check and straighten the photoeye sensors, wipe away dirt, and realign them until they face each other directly. If the door still won’t close, review the opener’s travel limits and perform a reset before testing again.
Understanding the symptom and why garage door won t close
If your door won t close and stops mid-journey, the issue often roots in safety features or a simple misalignment. In this guide, we address the most common causes of why garage door won t close and walk you through a safe, methodical diagnostic approach. You’ll learn how to identify obstructions, test sensors, and adjust travel limits without risking injury or equipment damage. The keyword here is system safety: never bypass safety features, as they protect you, pets, and property. According to GarageDoorAdjust, the most frequent failures come from sensor misalignment, dirt on the photoeyes, or subtle track issues that prevent the door from completing its cycle.
In many homes, a simple misalignment or dirty sensor is enough to trigger the safety system and stop a closing cycle. By understanding how the sensors and limits work, you can quickly determine whether the fault is user-serviceable or requires professional attention. Throughout the article, we’ll use practical examples and a clear diagnostic flow to help you fix the problem safely.
Quick checks you can do safely
Before you dive into parts or tools, perform a few safe, quick checks. These steps help you verify if the problem is a simple obstruction or a sensor fault:
- Clear the doorway of any objects, vehicles, or debris that could trigger the safety sensor.
- Check for light or physical obstructions on the sensor lenses (photoeyes) near the floor on both sides of the door.
- Ensure the door is completely lifted off the ground when testing; a misbalanced door can misreport the closure status.
- If you use a manual bypass or unplug the opener, remember to reconnect and test only with the opener unplugged for safety.
If these checks resolve the issue, you’ve likely fixed an easy problem. If not, proceed to sensor testing and limit checks. Remember: safety features exist for your protection; do not bypass them to force the door closed.
Inspect safety sensors and photoeyes
The photoeye sensors are the most common culprits when a door won t close. Dirty lenses, misalignment, or objects interrupting the line of sight can cause the opener to reverse.
- Look at the indicator LEDs on each sensor. A steady light usually means proper alignment; a blinking light often signals misalignment or obstruction.
- Clean the sensor lenses with a soft, dry cloth. Avoid glass cleaners that can leave a residue.
- Realign the sensors so they face each other directly; the alignment gap should be small and symmetrical.
- After adjustments, test the door by closing from the wall switch and from a remote, ensuring the path remains clear.
If the sensors show a fault despite cleaning and realignment, you may need to replace the sensors or inspect the wiring to the safety eyes.
Check the opener's travel limits and force settings
Travel limits tell the opener how far the door should travel to fully close. If these are off, the door might reverse prematurely or stall just before closing. The force setting controls how much pressure the opener uses to lower the door.
- Locate the limit and force adjustment screws on your opener (refer to the manual). Make small adjustments—turn in small increments and retest after each change.
- After adjusting, test using both the wall control and remote to confirm consistent closing.
- If you see the door closing too hard or coughing at the bottom, reduce the force slightly and test again. If the door still won t close, there might be a mechanical misalignment elsewhere in the system.
Be cautious with adjustments: small changes can make a big difference. If you observe unusual noises or binding, stop and seek professional help.
Track, rollers, and alignment
A misaligned track or worn rollers can cause the door to bind or stop before closing. Visual inspection often reveals misalignment or loosened hardware.
- Check the tracks for dents, kinks, or foreign objects. Gently coax the track back in line if you see a bend.
- Inspect rollers and hinges for wear. Lubricate metal-on-metal contact areas with a silicone-based lubricant if recommended by the manufacturer.
- Ensure mounting bolts are tight and that the track is parallel to the ground. A single out-of-square wheel can derail the closing cycle.
- After adjustments, run the door through several cycles to confirm smooth operation. If you hear grinding or see the door binding, stop and consult a pro.
Proper alignment reduces wear and improves sensor performance, helping prevent future closing issues.
Wiring, power, and resets
Electrical faults or stale memory in the opener can cause closing issues. A systematic check of power, wiring, and resets can resolve many problems.
- Verify the outlet is live and the cord is undamaged. Plug a different device into the same outlet to confirm power.
- Inspect wiring to the opener for loose connections, frayed insulation, or pinched cables near the mounting brackets.
- Perform a full reset of the garage door opener following the manufacturer’s instructions. This can restore default safety and travel limits.
- If the problem persists after a reset, you may be dealing with a control board or sensor wiring fault that requires a technician.
Electrical issues can be dangerous; if you smell burning, see melted insulation, or suspect a short, cut power immediately and call a professional.
When to call a professional and prevention tips
If you’ve completed the above checks and the door still won t close, or you encounter persistent sensor failures, track damage, or spring issues, it’s time to contact a professional. A qualified technician can safely handle spring repairs, frame alignment, or sensor replacements that require specialized tools.
- Regular maintenance reduces failures: clean sensors every 3–6 months, lubricate moving parts per the manufacturer’s schedule, and inspect tracks for alignment annually.
- Keep children and pets away from the door during testing and adjustments.
- Document any changes you make and the door’s response to improve future troubleshooting.
Following these steps will help you avoid repeated problems and ensure safe operation. If you are uncertain at any point, call GarageDoorAdjust for expert guidance and service.
Notable safety reminders
Always disconnect power before working on the door mechanics or sensors. If you notice frayed wires, damaged springs, or a door that is heavy to lift, pause work and call a professional. Safety first.
Enduring prevention tips
- Schedule annual inspections of tracks, springs, and rollers.
- Keep photoeye sensors clean and aligned.
- Use a chalk line or level to verify track parallelism.
- Avoid using the door as a pedestrian ramp or applying excessive force to the door assembly.
1-2 quick tests you can do after maintenance
- Close-test: From the wall control, close the door and watch the movement to ensure it reaches the floor smoothly without reversing.
- Sensor-test: Introduce a temporary obstruction at the sensor level to ensure the door reverses appropriately, then remove the obstruction and retest.
If these tests pass, you have a strong indication the issue is resolved. If not, you should escalate to professional help.
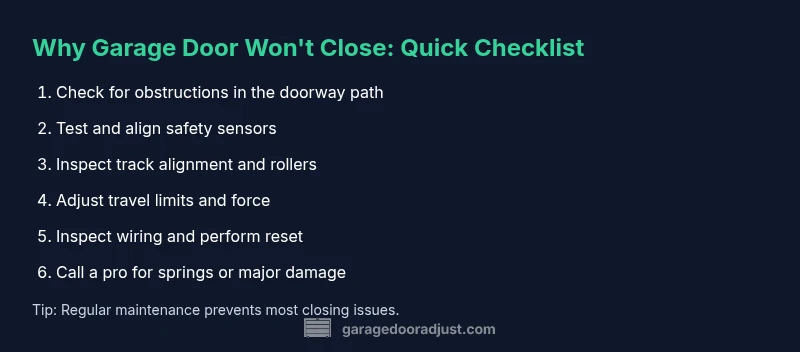
Steps
Estimated time: 45-60 minutes
- 1
Clear the doorway and check for obvious obstructions
Power off the opener and inspect the entire door path. Remove any objects that could trigger the safety beam or physically block the door. Attempt a controlled close with the wall switch to observe how the door behaves.
Tip: Keep children and pets away during the test; use a flashlight to inspect dark corners of the track. - 2
Test and align safety sensors
Check the indicator lights on both photo-eyes. If one beacon is blinking, adjust until both are steady. Clean the lenses with a soft cloth and re-test closures.
Tip: Use a string or shoelace to keep cameras and eyes aligned temporarily during testing. - 3
Inspect track alignment and rollers
Visually inspect tracks for dents and ensure they’re parallel to the ground. Tighten mounting bolts and lubricate rollers if your model allows. Look for any binding at corners or bends.
Tip: Do not force bent tracks back into place; consult a pro for realignment if you notice significant damage. - 4
Check and adjust travel limits and force
Locate the travel limit screws and adjust in small increments. After each adjustment, run the door through multiple cycles to see if it closes fully without reversing.
Tip: Record each adjustment and result to avoid repeating ineffective changes. - 5
Assess wiring and perform reset
Inspect power cords and connections at the opener and wall switch. If no faults are found, perform a full reset according to the manufacturer’s instructions, then re-test all functions.
Tip: Resetting can restore default safety settings; avoid multiple resets in short succession. - 6
Evaluate springs and call a pro if needed
If the door remains heavy, sags, or makes loud noises during closing, there may be a spring issue requiring professional service. Do not attempt spring repairs yourself.
Tip: Spring work is hazardous; a licensed technician should handle this.
Diagnosis: Garage door won't close completely or reverses before fully closing
Possible Causes
- highSafety sensor misalignment or obstruction
- highDirty or misread photo-eyes
- mediumIncorrect travel limit or force settings
- lowWiring faults or power issues
- lowTrack misalignment or binding rollers
Fixes
- easyRealign photo-eyes and remove obstructions; ensure both sensors face each other
- easyClean sensor lenses and re-test
- mediumAdjust travel limits and force settings per manufacturer instructions
- mediumInspect and secure wiring; replace damaged cables if needed
- easyInspect tracks/rollers; lubricate or replace as necessary and re-test
Got Questions?
What is the most common cause of a garage door not closing?
Sensor misalignment or an obstruction in the door path is the most frequent reason. Start by inspecting the photo-eyes and clearing the path before testing more complex components.
The most common cause is dirty or misaligned safety sensors. Start by checking the photo-eyes and clearing the door path.
How do I test the safety sensors?
Look for sensor LEDs; steady lights indicate alignment. Clean the lenses, then adjust until the LEDs are solid on both sides. Retest the door closing.
Check that both safety sensors show solid lights, clean the lenses, align them, and retest the door.
Can a misadjusted limit switch cause closing issues?
Yes. An incorrect limit or force setting can cause the door to reverse before closing. Adjust the limits per the manual and retest.
Yes, the limit switch controls when the door stops. Adjust it according to your manual and test again.
Is it safe to DIY fix a garage door that won t close?
Some fixes, like sensor cleaning or limit adjustments, are DIY-safe. Avoid working on springs or cables unless you’re trained and equipped for it.
DIY fixes are fine for sensor cleaning and limit tweaks, but avoid springs or cables unless you’re trained.
When should I call a professional?
If you hear grinding, notice damaged springs, or the door remains heavy or unbalanced, contact a licensed technician promptly to prevent injury.
Call a professional if you hear grinding or see damaged springs; it’s not safe to DIY those parts.
How can I prevent closing problems in the future?
Schedule annual inspections, clean sensors regularly, and perform basic testing after major weather events or long periods of non-use.
Do regular sensor cleaning and periodic tests to prevent future closing problems.
Watch Video
Quick Summary
- Identify whether the issue is sensor-related or mechanical first
- Always follow safety steps and unplug power when inspecting hardware
- Small sensor misalignment or dirt is a common cause of closing failures
- Reserve spring and structural repairs for licensed technicians