Garage Door Can Not Close: Quick Troubleshooting & Fixes
Urgent, step-by-step guidance to diagnose and fix a garage door that can not close. Sensor realignment, obstructions, and safe DIY fixes with professional help when needed.

Most often, a garage door can not close because of a safety sensor misalignment, a small object in the doorway, or a misadjusted close limit. Start with quick checks: clear the tracks, ensure the photo-eye beams face each other, and retry closing. If it still won’t close, stop and call a professional.
Symptom overview and why it matters
When a garage door can not close, homeowners worry about security, weather exposure, and energy loss. The behavior usually signals an underlying safety mechanism or a basic fault rather than a failing motor. The most common trigger is a misaligned safety sensor, but a minor obstruction or a misadjusted limit switch can also stop the door mid‑cycle. For safety, treat this as an actionable troubleshooting scenario rather than a mystery. According to GarageDoorAdjust, the first step is to verify that the doorway is clear and that the opener is responding to the close command. If you notice the door rearing up or reversing before touching the floor, this is a clear sign that the system detected a hazard. The phrase 'garage door can not close' shows up in many homeowner reports when a sensor eye beams a fault code or when curves in the track create binding. This article walks you through a safe, logical path to identify the cause and apply fixes without risking injury or further damage.
Common causes at a glance
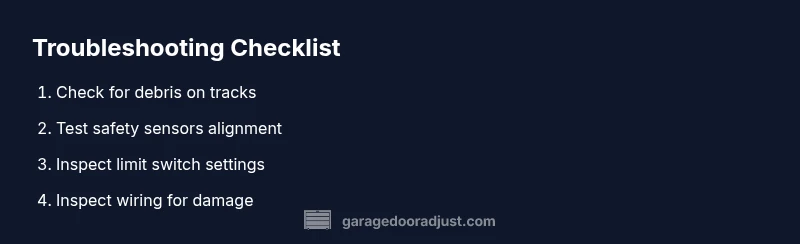
The problem often has a short list of culprits that you can inspect in minutes. The leading causes are: safety sensor misalignment, an object or debris blocking the door path or sensor beam, dirty or misdirected photo eyes, off‑track runners or bent tracks, a misadjusted close limit switch or an incompatible remote, and a power issue or loose connection in the opener wiring. Many homeowners report that the door will close partially then stop, or that a light on the opener blinks in a diagnostic code. By prioritizing simple checks first, you reduce the risk of injury and avoid unnecessary replacements. Remember: most fixes are quick and reversible, and the goal is to restore a safe, smooth closing action.
Safety sensors explained
Modern garage door openers rely on infrared safety sensors (photo eyes) near the floor on each side of the door. If the beam is blocked, misaligned, dirty, or damaged, the system will halt closing for safety. A minor tilt or dirt smear can cause a false fault, so cleaning and realigning the sensors often resolves the issue. The sensors should face each other within a small tolerance and the indicator LEDs should be solid or flashing in a known pattern according to the manufacturer. If one eye is out of alignment, the door may close a few inches and then reverse. This section explains how to interpret the typical LED codes and what a correct alignment looks like, plus what not to do (don’t force the door when a sensor fault is indicated).
Quick checks you can perform safely
Begin with the simplest actions you can do without tools. Clear the doorway of toys, cords, and boxes. Vacuum dust from the tracks and inspect for obvious damage. Check the photo eyes: wipe the lenses, wipe away spider webs, and ensure there is a clear line of sight. Test by crossing the beams with a hand or item while the door attempts to close. If the door continues to stop, gently untwist any loose cables near the opener, and verify that the opener power is steady. Avoid attempting to bypass safety features or forcing the door to close, which can cause injury or damage.
Electrical and control checks
Check the remote and wall switch for proper operation. If the opener responds differently to the wall switch versus the remote, the issue may be mis-programming or a faulty transmitter. Inspect the limit switch settings in the opener’s control panel; a too-late or too-early close limit can cause the door to stop before it reaches the floor. Listen for the motor’s hum when closing and observe any unusual stalls or pauses. If you see a blinking LED diagnostic code, consult the manufacturer guide or GarageDoorAdjust’s troubleshooting notes to translate the code into a fix. Loose or frayed wires near the motor, sensors, or control panel can also interrupt the closing cycle.
Diagnostic flow: symptom to diagnosis
Using the symptom 'garage door can not close' as your starting point, follow a structured flow: First rule out simple obstacles on the floor and sensor misalignment; then assess the photo eye LEDs and alignment; next test the safety reversal by briefly blocking and releasing the beam while the door is closing. If the door still won’t close, test the limit switch setting and the opener’s programming. Each step narrows the possible causes and informs the next fix. If you identify a broken sensor or physical damage to tracks or cables, replace or repair as appropriate. In all cases, unplug the opener before inspecting wiring to avoid shock.
Step-by-step: Fix for the most common cause (sensor realignment)
- Power down and unplug the opener to avoid accidental closure. 2) Clean both photo eyes with a soft cloth and inspect for visible damage. 3) Adjust the sensor alignment so the beams face each other directly; you should see solid LEDs on both eyes. 4) After aligning, plug the unit back in and run a closing test from the wall control. 5) If the problem persists, test with the door manual using a lock bar to help guide it to a secure closed position and verify the sensor alignment again. 6) Re‑test several times to confirm stability. 7) If the door still won’t cooperate, proceed to Step 2 of the professional path.
When to call a professional
Not all problems are safe to solve on your own. If you notice frayed wires, a burning smell, repeated electrical shocks, or inconsistent safety sensor codes after attempts to realign, contact a licensed technician. A pro can safely diagnose the electrical system, inspect the tracks for hidden damage, and verify that the spring balance is correct. Also seek professional help if the door refuses to engage after your tests or if you lack the tools or confidence to work near the high-tension springs. Prompt professional attention prevents injuries and future liability.
Prevention and maintenance to reduce recurrence
Regular maintenance lowers risk. Schedule a seasonal inspection: check tracks for dents, lubricate moving joints with the correct garage-door lubricant, tighten mounting screws, and verify sensor alignment after any door adjustment. Clean and adjust weather stripping to maintain seal and efficiency. Test the auto-reverse and force settings periodically to ensure safe operation. Keep the opener’s firmware up to date if your unit supports it. By logging small maintenance tasks, you can prevent the most common issues that cause a garage door can not close condition in the future.
Steps
Estimated time: 60-90 minutes
- 1
Power down and safety prep
Unplug the opener and remove any jewelry. Confirm children and pets are clear of the area. This first step prevents accidental movement and reduces shock risk while you inspect components.
Tip: Use a flashlight to identify hidden wiring or damage. - 2
Clear the doorway and tracks
Remove toys and debris from the path. Inspect tracks for dents or bends and tighten loose mounting screws. A smooth track lets the door close without binding.
Tip: Wipe tracks with a dry cloth to remove dust before testing. - 3
Inspect and align safety sensors
Check both photo eyes for dirt, misalignment, or damage. Wipe lenses clean and adjust their position so the LEDs indicate proper alignment.
Tip: Stand back 3–6 feet and observe the beam indicators as you realign. - 4
Test the close limit switch
Find the limit screws on the opener and adjust in small increments. Test closing after each adjustment until the door reaches the floor without reversing.
Tip: Make only tiny adjustments at a time to avoid overcorrection. - 5
Check wiring and remote programming
Inspect opener wiring for loose connections. Re-pair or reprogram the remote if needed and ensure the wall switch behaves the same as the remote.
Tip: Power off before disconnecting any wires; document how you reconnect them. - 6
Manual test and safety check
Disconnect power again and test the door manually with a helper holding the bottom edge to feel for binding. Reconnect and run a full close cycle from the wall control.
Tip: Never stand under a moving door during manual testing. - 7
Document the result
Record which steps fixed or did not fix the issue. This will guide any professional who may need to intervene and track recurring problems.
Tip: Take photos of LED codes and alignments for reference. - 8
Professional path if unresolved
If the door still won’t close after these steps, proceed to Step 2 of the professional path and contact a technician for a comprehensive diagnostic.
Tip: Use a licensed pro for high-tension spring, cable, and electric work.
Diagnosis: Door won’t close
Possible Causes
- highSafety sensor misalignment
- highObject blocking door path
- mediumOpen/close limit switch misadjustment
- mediumDirty or damaged photo eyes
- lowTrack binding or bent track
- lowElectrical issue or loose wiring
Fixes
- easyRealign safety sensors and clear the path; ensure both LEDs indicate proper alignment
- easyRemove debris and test close function; place a temporary obstacle only for testing
- mediumReset or readjust the close limit switch and reprogram remote if needed
- hardInspect and repair tracks or cables if misaligned or damaged; replace parts as necessary
Got Questions?
What is the most common reason a garage door won’t close?
The most common causes are sensor misalignment or an object blocking the door path. Electrical issues or a misadjusted limit switch can also play a role. A systematic inspection helps you identify the exact culprit.
Most often, sensor misalignment or a blockage in the doorway causes the door not to close.
How can I test the safety sensors quickly?
Clean the photo eyes, check that they face each other, and watch the LEDs. If one eye’s LED is dim or blinking differently, adjust or replace that eye. Then run a test close from the wall switch.
Clean and align the safety sensors and test with the wall switch.
Is it safe to adjust the limit switch myself?
Yes, you can adjust the limit switch in small increments while the door is unpowered. Test after each adjustment and stop if you notice binding or unusual noises. If unsure, consult a professional.
You can adjust the limit switch in small steps, but stop if anything seems off.
When should I call a professional?
If you detect damaged wiring, bent tracks, persistent sensor codes, or high‑tension spring issues, call a licensed technician. Electrical hazards and spring systems require professional handling.
Call a pro if you see damaged wiring or high‑risk components.
Can lubrication help a closing issue?
Lubrication can help moving parts operate smoothly, but it won’t fix sensor or limit switch problems. Use the correct garage-door lubricant on hinges and rollers only.
Lubrication helps movement but won’t fix sensor issues.
Watch Video
Quick Summary
- Identify root cause before replacing parts
- Prioritize safety with sensor and wiring checks
- Test thoroughly after each adjustment
- Call a professional for high‑risk components