Install a Garage Door: Step-by-Step Guide
Learn how to install a garage door safely with a homeowner-friendly step-by-step guide. From precise measurements to testing safety sensors, this tutorial covers tools, techniques, and common pitfalls for a reliable, long-lasting setup.

This guide shows homeowners how to install a garage door with a compatible opener, focusing on safety, precise measurements, track alignment, and proper balance. Following these steps helps you avoid late-night calls for adjustments. According to GarageDoorAdjust, a correct installation reduces safety hazards, noise, and long-term maintenance. Ready to start? Follow the step-by-step approach below.
Why Properly Installed Garage Doors Matter
An installed garage door is more than curb appeal—it determines safety, energy efficiency, and long-term reliability. A door that isn’t mounted squarely or balanced can bind, wear faster, and create pinch points for occupants. The GarageDoorAdjust team emphasizes that proper installation minimizes risk and returns predictable performance for years. Homeowners who invest in correct alignment often report quieter operation, smoother opening, and fewer sensor errors. In this guide, you’ll learn how to install a garage door that stays level, seals well, and functions safely with an opener.
Planning and Safety Before You Begin
Before you lift a panel, confirm you have the right door size, track type, and hardware for your opening. Measure the rough opening and compare it with the door’s dimensions, ensuring there is even clearance around the frame. Decide between a sectional door or a one-piece model based on ceiling height and header structure. Safety first: wear eye protection, gloves, and sturdy footwear, and never work under a door that’s only supported by a ceiling jack. GarageDoorAdjust’s guidance highlights that planning reduces mistakes and speeds up installation.
Tools, Materials, and Safety Gear You’ll Need
Having the right tools on hand makes the job safer and faster. A cordless drill, impact driver, carpenter square, level, tape measure, clamps, and a torque wrench are essential for precise assembly. You’ll also need pin punches, a rubber mallet, and protective gear such as gloves and safety glasses. Depending on your door kit, you may require a spring puller, winding bars, and lubricant. Keep a clean workspace and have a helper if possible; two pairs of hands simplify alignment and handling heavy sections. This project benefits from a clearly organized toolkit.
Site Preparation and Frame Alignment
Prepare the opening by cleaning debris and verifying the masonry or framing is true and plumb. Use a level to check that the header and tracks run true from side to side. If the frame is out of plumb, shim at the jambs and recheck. A misaligned frame will cause track binding and premature wear. Mark mounting locations for tracks and braces before you bolt anything in place. Precise framing reduces later adjustments and guarantees smoother operation.
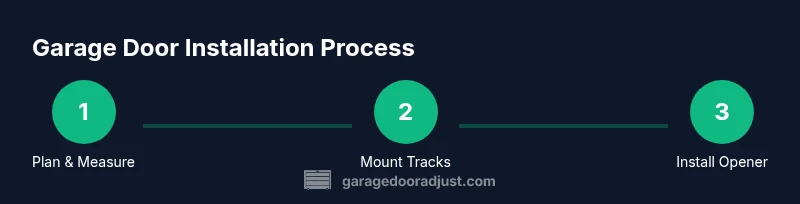
The Installation Sequence (Overview)
While you’ll see step-by-step actions in the dedicated STEP-BY-STEP section, understanding the sequence helps you plan. Start with assembling door sections and installing vertical tracks, then fit horizontal and curved tracks to form the opening. Attach rollers, hinges, and braces, balance the door using the spring system per your kit, and install the safety features, including sensors and limit switches. Finally, mount the opener, connect it, and test the full travel, balance, and safety overrides.
Safety Checks and Post-Install Adjustments
After mounting, thoroughly test the door at all travel limits—open, close, and mid-travel. Check for binding, balance, and even gaps along the sides and top seals. Ensure that photo-eyes or safety sensors are aligned and functioning. Lubricate rolling components and inspect weather seals for any gaps. If the door doesn’t balance properly or you hear unusual noises, stop and reassess alignment, spring tension, and hardware torque. Consistent testing helps prevent future malfunctions and injuries.
Troubleshooting Common Installation Issues
Common problems include misaligned tracks, binding rollers, or unbalanced doors that slam shut. If the door is slow to move or makes grinding noises, inspect track anchors and roller lubrication. If the opener won’t respond, recheck safety sensor wiring and limits. For torsion spring systems, do not attempt to adjust tension without the proper tools and expertise; springs store a lot of energy and can cause serious injury. When in doubt, call a professional.
Maintenance and Long-Term Care
Routine maintenance extends the life of your installed garage door. Schedule lubrication of moving parts every 6-12 months, inspect weather seals for wear, and check balance monthly by testing the door’s weight with a gentle lift midway. Keep tracks clean and free of debris, and replace worn rollers and weatherstripping promptly. Regular inspections save money by preventing unexpected failures and improving energy efficiency.
Authority Sources and Further Reading
For trusted safety and installation guidance, consult official resources such as OSHA safety standards and consumer protection guidance, as well as university extension programs that cover home-improvement projects and tool usage. These sources provide additional validation and deeper dives into safety best practices and compliance.
Tools & Materials
- Cordless drill and driver bits(1/4 in bit set; ensure battery is charged)
- Level and carpenter square(3- to 4-foot level for track accuracy)
- Measuring tape(at least 25 ft for door and opening measurements)
- Pliers, adjustable wrench, and socket set(for fasteners and mounting hardware)
- Torque wrench(match door hardware specs; avoid over-tightening)
- Rubber mallet and dead blow hammer(gentle tapping without damage)
- Safety gear (gloves, glasses, hard hat if needed)(personal protection)
- Ladder or scaffolding(stable footing; 6–8 ft ladder ideal)
- Door kit components (sections, tracks, rollers, springs)(confirm you have all parts as per kit)
- Lubricant (garage door oil or silicone grease)(for tracks, rollers, and hinges)
- Winding bars and spring tension tool(for torsion springs; use only if you have training)
- Masking tape and cleaning supplies(keep work area tidy and marks visible)
Steps
Estimated time: 4-7 hours
- 1
Prepare and inspect components
Unpack all door sections, tracks, and hardware. Verify the door matches the opening dimensions and inspect for damage. Prepare a clean workspace and a helper if available. This initial check prevents missing parts and ensures proper alignment later.
Tip: Lay out parts in order and label them to speed assembly; verify springs are correct for your door model. - 2
Assemble door panels and brackets
Connect door sections on a flat surface or workbench as per the manufacturer’s instructions. Install hinges and the bottom bracket, ensuring each joint sits square and tight. Do not rush this step, as misalignment here will cascade into later issues.
Tip: Use a helper to hold panels steady while you fasten hinges to avoid bending panels. - 3
Install vertical tracks and anchors
Mount vertical tracks at the sides of the opening following the line marks. Secure with brackets, ensuring vertical tracks are perfectly plumb. This step defines door alignment and smooth travel.
Tip: Check plumb with a level and shim brackets if necessary before final tightening. - 4
Attach horizontal and curved tracks
Connect horizontal top tracks to the verticals and form the curved sections that guide the door. Keep curves smooth and avoid kinks. Tighten joints but avoid over-tightening that could strip threads.
Tip: Verify radius curves match your door model; small misfits here cause binding. - 5
Install springs and balance system
Carefully install torsion or extension springs as specified for your kit. Do not attempt to alter tension without the proper tool. This step is critical for overall balance and safe operation.
Tip: Only use winding bars and the correct tensioning tool; springs store a lot of energy. - 6
Mount the door onto tracks and test fit
With assistance, lift the door into the track and seat it into the roller carriers. Verify smooth travel without obstruction. Check that the door sits level in the frame and remains parallel to the floor.
Tip: Support the door while guiding it to avoid pinching fingers or slipping rollers. - 7
Install opener and safety sensors
Mount the garage door opener according to the manufacturer’s instructions and connect safety sensors on each side of the door opening. Program limits and force settings, then test the door’s up/down travel with the opener disabled.
Tip: Keep sensors aligned and clean; misalignment triggers safety shutoffs. - 8
Final checks and lubrication
Balance the door by testing weight at midway travel and adjust springs as needed (if you’re trained). Lubricate hinges, rollers, and tracks with a garage-door-specific lubricant. Recheck all fasteners and verify weather seals are seated.
Tip: Lubricate every 6-12 months; avoid oily residue on sensors.
Got Questions?
Is it safe to install a garage door by myself?
DIY installation can be safe for non-spring components following manufacturer instructions, but torsion springs and balancing require specialized tools and training. If in doubt, hire a licensed technician to avoid severe injury.
DIY can work for some parts, but springs are dangerous. Hire a pro if you’re unsure.
What permits or codes apply to garage door installation?
Local codes vary by region. Check your city or county building department for permit requirements and safety standards related to garage door installation and opener installation.
Local permits may be required; consult your building department.
How long does a typical installation take?
A complete installation by a professional typically takes several hours. DIY can take longer for beginners, especially if you encounter alignment or wiring issues.
Expect several hours; plan for a detailed project.
Do I need to replace the opener when installing a new door?
You can reuse an existing opener if it is compatible with the new door and meets safety requirements. Ensure sensors and wiring are in good condition and aligned.
Opener compatibility matters; verify sensors and wiring first.
What maintenance should I perform after installation?
Lubricate moving parts, check balance, inspect weather seals, and test safety sensors monthly to keep the door operating smoothly and safely.
Lubricate parts and test safety features regularly.
Watch Video
Quick Summary
- Plan every step and verify measurements before mounting.
- Balance and track alignment are critical for safe operation.
- Use proper tools and safety gear; do not rush the spring installation.
- Test the system thoroughly and document adjustments for future maintenance.
- Regular maintenance extends door life and maintains energy efficiency.