How to Install a Garage Door: A Step-by-Step Guide
Learn how to install a garage door safely with a homeowner-friendly, step-by-step guide. Tools, safety checks, and common pitfalls covered for a smooth, balanced door installation.

This guide shows you how to install a garage door safely and effectively, covering planning, measuring, frame prep, track mounting, panel handling, spring balancing (where applicable), opener installation, and final testing. You’ll need a solid toolset, a helper, and clear safety precautions. If you’re unsure about springs or electrical work, consult a pro. This is a practical, homeowner-friendly path to a correctly installed door.
Step-by-Step Overview
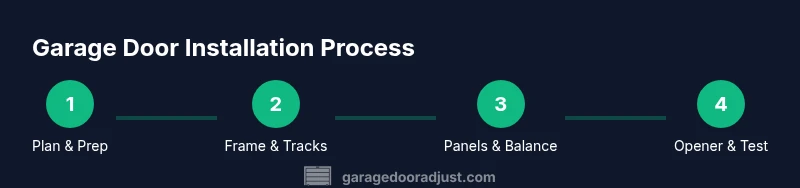
Putting a garage door in is a multi-stage project that blends carpentry, hardware mounting, and electrical work. This guide targets standard sectional doors with compatible torsion or extension spring systems and assumes you are working with a typical residential kit. Before you start, review the door’s weight, track layout, hardware compatibility, and whether you will use a manual crank or an electric opener. The general sequence—prep and framing, track assembly, panel mounting, spring balancing (if required), opener installation, and final adjustment—reduces rework and safety risks. It’s strongly advised to work with a helper; doors and springs are heavy and awkward. The overarching goal is a level, balanced door that opens smoothly and seals properly with the frame.
According to GarageDoorAdjust, a careful, methodical approach reduces risk when learning how to put garage door in.
blocktype_was_drafted_for SEO
word_count_estimate 0
Tools & Materials
- Carpenter’s drill(Cordless drill with assorted drill bits and a bit driver)
- Level(4- or 6-foot level for perfect alignment)
- Tape measure(1-inch or metric tape, at least 25 ft.)
- Clamps or locking pliers(Secure panels and tracks during mounting)
- Safety glasses and gloves(Protective gear for all helpers)
- Wrenches and socket set(For bolts and nuts in rails and brackets)
- Hammer and pry bar(Assist panel alignment and track seating)
- Ladder or scaffold(Stable height to reach top tracks)
- Door panels, tracks, rollers, hinges(Verify kit contents match opening size)
- Spring tool (if applicable)(Only if you’re comfortable; torsion springs require professional handling)
- Marker or pencil(Mark drilling points and alignment lines)
- Electrical tester (optional)(For confirming outlet and opener wiring)
Steps
Estimated time: 4-8 hours
- 1
Prepare workspace and safety gear
Clear the driveway and workspace of debris. Put on safety glasses and gloves, and secure the area. If you’re installing an opener, unplug the power source and verify nearby outlets are accessible. This step creates a safe foundation for the entire installation.
Tip: Have a helper nearby; large panels and springs are heavy and can slip suddenly. - 2
Remove old components or clear the opening
If there’s an existing door, carefully remove it, disconnect the opener, and clear tracks. Clean the opening to ensure true frame alignment. Label or photograph parts to reference later during reassembly.
Tip: Keep fasteners organized to avoid mismatched screws later. - 3
Measure and verify opening dimensions
Measure the width and height of the opening to confirm it matches your door kit. Check vertical clearance at multiple points to ensure tracks won’t rub walls or ceiling. Record measurements for reference during mounting.
Tip: If opening is out of spec, adjust framing or choose a compatible door kit. - 4
Install the upper and lower tracks
Attach the vertical and horizontal tracks to the door frame according to the kit instructions. Use level to ensure both tracks are plumb and parallel. Secure with appropriate bolts and brackets, then test track seating with light pressure.
Tip: Misaligned tracks cause binding and uneven door operation. - 5
Hang door panels on tracks
With a helper, lift panels onto the tracks and fasten them as directed by the kit. Ensure rollers are seated and hinges are tight. Check for smooth movement along the entire track.
Tip: Support heavy panels to prevent finger injuries or panel drop. - 6
Balance system and springs (if applicable)
Follow manufacturer guidelines to install or balance springs. For safety, never adjust springs with the door under tension. If you’re unfamiliar with torsion or extension springs, hire a pro for this step.
Tip: Always release tension before making adjustments and use locking pliers to hold components during setup. - 7
Install opener and connect safety features
Mount the opener per instructions and connect it to the door’s torsion or lifting mechanism. Install safety sensors at the bottom corners of the opening and run wiring to the opener. Program the opener’s limits and test cycle.
Tip: Test sensor alignment and ensure auto-reverse function works reliably. - 8
Fine-tune alignment and tighten hardware
Check door balance by lowering and letting it rest about halfway; it should stay put. Tighten any loose hardware, adjust track alignment if needed, and lubricate moving parts as recommended by the manufacturer.
Tip: Avoid over-lubrication; too much can attract dust and grime. - 9
Inspect safety, seals, and finalize
Inspect weatherstripping, gaps, and seals around the door. Check that the door seals tightly with the frame when closed and opens smoothly with no rubbing. Do a full function test, including manual opening in case of power loss.
Tip: Document any issues and address them before regular use.
Got Questions?
Is a permit required to install a new garage door?
Permit requirements vary by locality. Check with your city or county building department before starting, especially if you’re replacing structural components or modifying electrical connections.
Permit needs vary by location; check with your local building department.
Can I install a garage door by myself or should I hire a professional?
A homeowner with basic carpentry skills can perform non-sprung installations. Springs, panels, and openers introduce safety risks, so consider hiring a pro for the spring system or if you’re unsure.
DIY is possible for some steps, but springs and openers can be dangerous; consider a pro if unsure.
How long does installation take on average?
Typical installations take several hours, depending on the door size, kit compatibility, and whether you’re replacing hardware. Plan for a multi-hour session with a helper.
Most installations take several hours.
What safety features should I look for in a garage door opener?
Ensure the opener has an auto-reverse sensor, manual release, and properly aligned safety sensors at the door opening. Regular testing is essential.
Look for auto-reverse and sensor alignment, and test them regularly.
What’s the difference between torsion and extension springs?
Torsion springs balance the door over the top rail and provide smooth operation; extension springs run along the sides and can be easier to replace but may require extra safety precautions.
Torsion springs balance across the top; extension springs run along the sides.
Do I need to recalibrate the opener after installation?
Yes, test and adjust the opener’s limits after installation to ensure it opens and closes fully without stopping early or overextending.
You’ll likely need to recalibrate the opener after installing it.
Watch Video
Quick Summary
- Plan thoroughly before starting
- Balance and safety are non-negotiable
- Use a helper for heavy components
- Test operation multiple times before final use
- Keep a detailed per-step checklist for reliability