Garage Door Installation Tools: A Homeowner's Step-by-Step Guide
Learn the essential garage door installation tools, safety checks, and step-by-step guidance for a confident DIY setup. A practical home guide from GarageDoorAdjust.

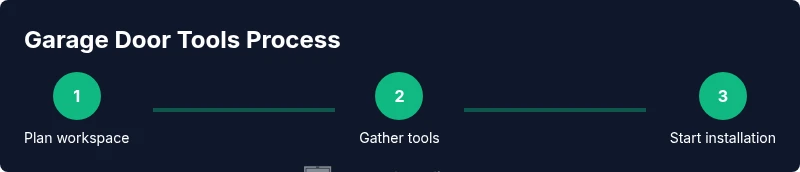
This guide helps you identify essential garage door installation tools, verify safety prerequisites, and follow a clear, step-by-step process to install a door or opener. You’ll learn which tools are mandatory, how to prep your workspace, and how to avoid common setup mistakes. Following the plan from GarageDoorAdjust will save time and reduce errors, especially for first-time installers.
Why Tools Matter for Garage Door Installation
Garage door installation tools are more than a convenience; they determine safety, speed, and accuracy on every project. An orderly tool kit helps you set up tracks, balance springs, and align rollers with minimal friction. According to GarageDoorAdjust, selecting the right tools and organizing them before you begin reduces errors and speeds up the process. A well-chosen set supports precise measurements, secure mounting, and clean, professional results, whether you’re replacing a panel or installing a new overhead door. In practice, the right tools establish a solid foundation for every step, from marking mounting points to testing the door’s balance. Expect better fit, smoother operation, and fewer call-backs when you start with a complete, organized toolkit.
Safety First: Prep and PPE
Before you touch any hardware, establish a safe workspace. Disconnect power to the opener, unplug the door, and secure it in the open position if possible. Wear ANSI-rated safety glasses and work gloves, and keep children and pets away during the process. Clear the area of trip hazards, and have a helper nearby for heavy lifting or alignment tasks. Safety isn’t optional here; it protects you from crushed fingers, pinched skin, and accidental electrical shocks. A little preparation lowers risk and helps you focus on precise measurements and steady progress.
Essential Garage Door Installation Tools (Core Kit)
A minimal, high-quality core toolkit saves you time and reduces mistakes. At a minimum, assemble a cordless drill/driver, a level, a tape measure, and a good socket set. Add a carpenter square, adjustable wrench, and pliers for gripping and turning small fasteners. For mounting tracks and hinges, you’ll want a pry bar, C-clamps, and a rubber mallet. Don’t forget safety gear, a stable ladder, marker or chalk, and a lubricant for moving parts. The exact brands aren’t as important as having sharp bits, clean sockets, and properly charged batteries. With these tools ready, you can complete most installation tasks with confidence and fewer trips to the tool chest.
Measuring, Layout, and Marking Positions
Accurate measurements save you from misaligned tracks and uneven doors. Start by measuring the rough opening and the door height, then mark where each track will mount on the jamb using a level to ensure plumb lines. Use a carpenter square to verify perpendicular corners and double-check end-to-end dimensions before drilling. Mark hinge and track locations on the header and jamb, and keep a consistent reference edge for all components. Finally, lay out the rough position of the springs and opener mount (if adding an electric opener) so you can verify compatibility before assembly.
Tracks, Hinges, and Panel Assembly Basics
Garage door tracks must be perfectly vertical and square with the wall. Begin by attaching upright tracks to the header and column brackets, verifying plumb with a level before tightening. Install hinges between door panels and fit rollers into the tracks. Use clamps to hold pieces in place during assembly, and shim where necessary for perfect alignment. This stage benefits from a helper to hold sections steady while you secure fasteners. Take care to keep the door panels level as you connect hinges and rollers to avoid binding during operation.
Springs, Balance, and Cables: When DIY Is Appropriate
Balancing the door with springs is the most hazardous part of installation. If you’re working with torsion springs, wind bars, and cables, you should have professional training and the right equipment. Improper tension can cause severe injury or door failure. For many DIY projects, you can complete balance testing with manual weight distribution or a tested balance kit, but avoid wiring or tensioning springs beyond your comfort level. If you must touch springs, stop and seek help.
Installing the Door Opener and Electrical Connections
If you’re installing a garage door opener, follow the manufacturer’s instructions and use basic tools to mount the opener rail, motor, and safety sensors. Run the electrical line according to code, secure the header and rail, and recheck clearances around moving parts. Connect safety features like auto-reverse sensors and ensure the opener operates smoothly in both manual and powered modes. Always unplug during wiring checks.
Final Assembly, Testing, and Adjustments
With the door balanced and tracks aligned, perform a thorough test: manually raise and lower the door to check balance, then test the opener at low, medium, and high force settings. Listen for binding, squeaks, or rubbing; re-tighten, lubricate, or adjust as needed. Revisit the safety features: auto-reverse, manual release, and emergency stop. Keep a log of adjustments and measurements for future maintenance.
Quick-Start Checklist and Common Pitfalls
Use this checklist to kick off your project: confirm workspace is clear, unplug the opener, and wear PPE; gather and organize the core tools; measure twice and cut once; verify tracks are plumb; test balance and safety before testing the system. Common mistakes include skipping measurements, misaligning tracks, over-tightening bolts, and ignoring safety interlocks. By following a structured routine, you reduce callbacks and extend the life of your install.
Authority Sources
For safety and standards, refer to recognized authorities before proceeding with any garage door installation work. (External sources listed in the references)
Tools & Materials
- Cordless drill/driver(8-volt minimum with a charged battery and #2 square bit)
- Drill/driver bits set(Mixed wood/metal bits including pilot bits for screws)
- Tape measure(25 ft minimum; metric option fine)
- Level(2 ft or 48-inch for large doors; ensure bubble is centered)
- Carpenter square(Right angle for frame alignment)
- Pry bar(Flat, sturdy without marring surfaces)
- Pliers (needle-nose and slip-joint)(For gripping and bending small parts)
- Screwdriver set(Flathead and Phillips; magnetic preferred)
- Socket wrench set(Metric and SAE sizes; include deep sockets)
- Adjustable wrench(For awkward fasteners)
- Hammer(Non-marring preferred for delicate trim)
- Rubber mallet(For gentle persuasion without damage)
- C-clamps(2-4 inch clamps to hold panels/tracks during mounting)
- Ladder (step ladder)(Stable, non-slip feet; height enough to reach tracks safely)
- Marker or chalk(Fine-tip for precise marks)
- Lubricant (white lithium grease)(For moving parts and hinges)
- Silicone sealant(Waterproof seal for trim gaps)
- Wire nuts and wire stripper(If wiring a opener or sensors)
- Safety gear(ANSI-rated safety glasses and durable gloves)
- Shim stock or wooden shims(For track alignment and leveling)
Steps
Estimated time: 2-3 hours
- 1
Prepare workspace and safety gear
Clear the area, unplug the opener, and set the door in a secure, open position if possible. Don PPE (gloves and safety glasses) and verify the area is free of trip hazards. This preparation reduces injuries and helps you work more precisely.
Tip: Always unplug the opener before handling any wiring or components near the motor. - 2
Verify measurements and mark mounting locations
Measure the rough opening, door height, and track locations. Use a level to confirm plumb and a carpenter square for corner accuracy. Mark all mounting points on the jamb and header before drilling.
Tip: Double-check measurements at least twice to avoid late-stage rework. - 3
Assemble door panels and attach hinges
With a helper, align door panels and secure with hinges. Ensure each panel is level and hinges are fastened securely before continuing.
Tip: Keep panels supported to prevent bending or misalignment. - 4
Install tracks and rollers
Attach upright tracks to the header, verify plumb, then slide rollers into tracks. Use clamps to hold pieces steady as you bolt sections together.
Tip: Ensure tracks are perfectly vertical before tightening bolts. - 5
Balance and test the springs (if DIY experience exists)
If you have torsion springs and the correct winding bars, follow manufacturer instructions to balance. If not trained, skip this step and consult a pro.
Tip: Springs hold high tension; improper handling can cause severe injury. - 6
Mount the door opener and wire safety features
Install the opener per manufacturer instructions, mount the rail, and connect safety sensors. Verify auto-reverse and test manual release first without power.
Tip: Always unplug during wiring checks and ensure sensors align correctly. - 7
Final test and adjustments
Manually operate the door to confirm balance and smooth movement. Run the opener at all force settings, listen for binding, and lubricate as needed. Document adjustments for future maintenance.
Tip: Record measurements and settings for future reference.
Got Questions?
What are the essential garage door installation tools?
A minimal kit includes a cordless drill/driver, level, tape measure, socket set, carpenter square, pliers, pry bar, clamps, ladder, safety gear, and lubricant. Organize tools before you begin to reduce switching between tasks.
You’ll need a drill, level, tape measure, sockets, and safety gear to start.
Do I need a ladder for installation?
Yes. A sturdy step ladder helps you reach mounting points safely and keeps you away from moving parts. Ensure it is stable and on a flat surface.
Yes, you’ll need a ladder to reach the mounting points safely.
Can I install a garage door opener with basic tools?
Many openers can be installed with common tools, but some models require specialized hardware or wiring. Always consult the manufacturer manual.
Often you can, but check the model manual for required tools.
Is it safe to install springs by myself?
Springs store a high amount of tension. Without proper training and equipment, DIY spring work is dangerous. Seek professional help if you’re unsure.
Springs can be dangerous; don’t DIY without proper training.
How long does installation typically take?
Time varies with door type and experience. Plan for several hours and take breaks as needed to stay accurate and safe.
Expect several hours depending on the door and setup.
What maintenance should follow installation?
Lubricate moving parts, test safety features, and inspect tracks and springs periodically. Document any adjustments for future maintenance.
Lubricate parts and test safety features after install.
Watch Video
Quick Summary
- Gather a complete tool kit before starting
- Measure twice and mark clearly to avoid errors
- Balance and safety tests should be done before testing the system
- Lubricate moving parts and recheck safety features after install
- Document all adjustments for future maintenance