DIY Garage Door Installation: A Step-by-Step Guide
A practical, safety-first guide to diy garage door installation for homeowners, covering planning, tools, measurements, panel setup, safety checks, and troubleshooting, with pro tips and common mistakes to avoid.

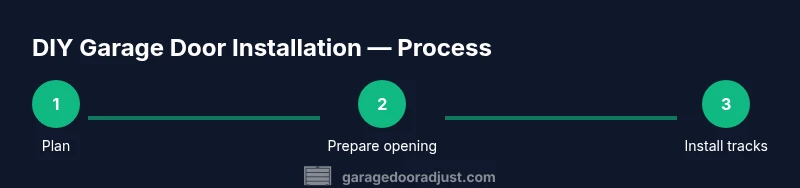
You will learn how to install a garage door safely and in line with manufacturer instructions, including opening preparation, panel assembly, track alignment, and final safety checks. This quick guide covers essential tools, measurement steps, and common pitfalls. If your project involves torsion springs, hire a professional for those elements.
Planning and safety for diy garage door installation
According to GarageDoorAdjust, meticulous planning reduces errors and injuries. Start by cataloging the rough opening, door size, and ceiling clearance, and check local codes for permits. If you're replacing an old door, review the existing frame and openings for wear. Enlist a helper; two people can manage heavy panels safely. Clear the workspace of obstacles, and protect floors with drop cloths. Before you lift any panel, verify the opening dimensions match the new door's width and height. This helps prevent fit issues and costly rework. Safety gear is non-negotiable: safety glasses, gloves, and sturdy footwear. If you live in an area with snow or icy conditions, keep the opening dry and free of ice to prevent slips when you handle panels.
Tools, materials, and pre-checks
Before you buy or assemble, perform a quick check of the opening and door kit to avoid misfits. GarageDoorAdjust analysis shows many mistakes happen when measurements are skipped, or doors are not matched to the opening height. Gather essential tools: measuring tape, level, drill with bits, socket wrench, screwdrivers, C-clamps, a sturdy ladder, a rubber mallet, and PPE (glasses, gloves). Keep the right hardware organized in labeled containers. Review the kit contents: panels, tracks, rollers, hinges, weather-stripping, and mounting brackets. Decide if you will install a basic manual door or a model with an electric opener; if you choose the latter, verify compatibility with the belt/chain drive and safety sensors. For any component that requires soldering or wiring, consult the manual or hire a pro.
Understanding door components and compatibility
Know the major components and how they fit: the header/frame, adjustable tracks, rollers, hinges, panels, and springs. The rough opening size must match the panel width with small allowances for weather stripping. Confirm you have the correct number of panels and that the door kit is designed for your opening width. If your opening is nonstandard, consider a custom fit or an alternative door style. Review compatibility for the opener and safety sensors; outdated wiring or old sensors may require upgrades. When counted, the components create a balanced, smooth operation.
Post-install safety checks and finishing touches
With the door assembled, perform a full safety check before operation. Start by manually lifting and lowering the door to assess balance; it should stay in place when you stop it mid-travel. Check track alignment with a level; adjust brackets to keep tracks plumb. Install weather seals and insulation as needed; ensure the bottom seal contacts the floor for cold weather. Program the opener settings if you installed an automatic unit: set travel limits, force limits, and learning features. Verify safety sensors near the floor are aligned and functional; test by placing an obstacle in the path. Finally, clean up tools, label maintenance intervals, and store hardware in a safe place. If you feel uncertain at any point, pause and consult the manual or a professional.
Common mistakes and when to call a pro
Common mistakes include skipping measurements, misplacing tracks, or failing to secure the header properly; these mistakes cause misalignment and binding. Avoid over-tightening fasteners, which can warp tracks or door panels. Do not attempt to adjust torsion springs or tensioning systems; these operate under high load and require professional training. If you encounter unusual noises, persistent binding, or door imbalance after your test, stop and seek professional help. In complex openings—arched doors, very high ceilings, or heavy doors—consider hiring a pro for safety and reliability.
Tools & Materials
- Ladder (sturdy, non-skid)(Prefer a tall step ladder for reach)
- Measuring tape(Minimum 25 ft preferred)
- Level (20-24 in minimum)(Ensure tracks are plumb)
- Socket wrench set(Metric/SAE as needed)
- Drill with bits(Phillips and flat-head bits)
- Pliers and vise grips(Helpful for positioning components)
- C-clamps(Hold tracks during alignment)
- Rubber mallet(Gentle tapping to avoid denting panels)
- Safety glasses(Protect eyes from debris)
- Leather work gloves(Grip and protect hands)
- Shop vacuum or broom(Keep workspace clean)
- Masking tape(Label parts as you remove them)
- Temporary supports or stands(Support panels during install)
- Weatherproof sealant/insulation(Seal gaps after install)
Steps
Estimated time: 3-6 hours
- 1
Prepare the opening and secure the workspace
Measure the rough opening to confirm compatibility and clear the area of obstacles. Bring in a helper to manage heavy components and set up temporary supports. Confirm weather conditions are suitable and wear PPE before lifting any panels.
Tip: Have a second person assist with lifting large panels; never lift alone. - 2
Remove the old door and hardware safely
Detach old tracks and panels methodically, labeling where each piece came from. Keep screws and brackets organized for reassembly. If the old door is corroded, take extra care to avoid bending studs.
Tip: Take photos during disassembly so you can re-create mounting points later. - 3
Install the header and vertical tracks loosely
Position and level the header across the opening, then mount the vertical tracks with clamps. Leave bolts slightly loose to allow for final alignment. Check plumb with a level before tightening fully.
Tip: Verify both tracks are parallel and evenly spaced before mounting panels. - 4
Hang the top panel and begin panel sequencing
Lift and align the top panel with the tracks, secure hinges to the panel, and gradually add the remaining panels. Ensure each panel lines up with adjacent tracks as you go. Do not force panels—misalignment can damage components.
Tip: Have a helper stabilize the panel while you secure hinges. - 5
Secure tracks and finish mounting hardware
Tighten all fasteners and ensure the track brackets are firmly anchored. Install rollers and connect panels as you progress, rechecking alignment frequently. If the door is prehung with springs, stop and consult the manual—spring work may require a pro.
Tip: Periodically check for wobble and correct it before the door is fully installed. - 6
Install opener (if applicable) and test
Mount the opener per the manufacturer instructions and attach it to the door. Program travel limits, force limits, and safety sensors. Test manually first, then with the opener to verify smooth travel and proper auto-reverse.
Tip: Test auto-reverse with a lightweight object to confirm sensor function.
Got Questions?
Is it safe to attempt a diy garage door installation?
DIY installation can be safe if you follow the manual, use proper tools, and work with a partner. Key hazards include heavy doors and spring components, which should not be handled without proper training. If unsure, consult a professional.
Yes, it can be safe if you follow the instructions and work with a partner, but avoid working with springs unless you’re trained.
Do I need permits for this project?
Permit requirements vary by location. Check with your local building department; you may need an inspection after installation. If your area has strict codes, hire a pro to ensure compliance.
Check with your local building department for permit and inspection requirements.
Should I replace the opener at the same time as the door?
A new door can be paired with an existing opener, but compatibility matters. If upgrading, choose a model with modern safety sensors and convenient features, and verify it supports your door’s weight and travel.
You can replace the opener separately, but make sure it’s compatible with the new door.
What parts should I hire a pro for?
Springs, torsion systems, and any high-tension adjustments require professional training. If you’re uncertain about wiring, safety sensors, or door balance, hire a pro for reliability and safety.
Springs and high-tension work should be done by a professional.
What post-install checks are essential?
Test the door manually for balance, verify track alignment, check weather seals, and program the opener correctly. Confirm safety sensors function properly and auto-reverse triggers when obstructed.
Test balance, tracks, sensors, and opener settings after installation.
Watch Video
Quick Summary
- Measure accurately before ordering or mounting parts
- Follow safety guidelines and wear PPE
- Do not handle or adjust springs yourself
- Verify track alignment and sensor functionality after install