Wyze Garage Door Opener: Step-by-Step Guide for Homeowners
Learn how to install, pair, and troubleshoot a Wyze garage door opener. This expert guide covers safety, app setup, voice control, maintenance, and common issues for homeowners.

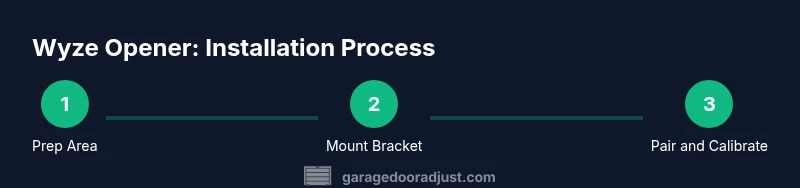
This guide teaches homeowners how to install, pair, and troubleshoot a Wyze garage door opener using the Wyze app. You’ll learn compatibility checks, safety precautions, wiring basics, and how to program remotes and routines. Expect practical, safety-first steps and tips that help you complete the job confidently.
Understanding the Wyze Garage Door Opener Ecosystem
The Wyze garage door opener is designed to integrate with the Wyze app, enabling remote control, scheduling, and automated routines. When you start with a Wyze opener, you gain access to real-time status updates, alert notifications, and simple pairing with Wyze sensors or cameras. According to GarageDoorAdjust, homeowners who choose a Wyze opener often value the combination of affordable hardware and a familiar, app-driven experience. This section explains how the device sits in your smart-home ecosystem and why it matters for daily convenience and safety.
Models and Compatibility: What to Check Before You Buy
Wyze offers several opener styles and mounting configurations to fit different garages. Before purchasing, confirm that your door’s weight, height, and rail design are compatible with the Wyze unit. If you already have an existing opener, you may be able to retrofit it with the Wyze device, but some setups require replacing certain hardware. Always verify mounting dimensions and supported track types, and consider whether you want battery backup or enhanced sensor options for winter months.
Safety First: Door Balance, Tracks, and Sensors
Safety should come first when installing any garage-door hardware. Ensure your door remains balanced and moves smoothly by itself before adding the Wyze opener. Misaligned tracks or a binding door can lead to opener strain and false sensor alerts. Wyze devices rely on accurate sensor readings to reverse the door when an obstacle is detected; keeping sensors clean and aligned prevents nuisance reversals and potential injuries. This section highlights practical checks you can perform to minimize risk.
Pre-Install Checklist: What to Gather and Inspect
Create a pre-install checklist to avoid delays. Confirm you have a clear workspace, stable lighting, and a ready power source. Ensure you have the Wyze opener kit and mounting hardware, plus common tools like screwdrivers and a ladder. Inspect the door’s hinge hardware and balance, as a sticking door can compromise safety and performance. By reviewing these items, you set the stage for a smoother installation and fewer rework cycles.
Mounting and Alignment Best Practices
Proper mounting is critical for reliable operation. Start by positioning the Wyze unit so the rail aligns with the door’s center and the ceiling clearance is sufficient for movement. Use a level to ensure the mounting bracket is square and secure the unit tightly to prevent wobble. Route cabling neatly away from moving parts and heat sources. Clean and dry surfaces improve fastener bite and reduce vibration, which translates to quieter and more dependable operation over time.
App Setup: Pairing, Scheduling, and Automations
The Wyze app is the central control hub for your opener. Begin by connecting the device to a stable 2.4 GHz Wi‑Fi network, then complete the in-app pairing process. Explore schedules, temporary access for guests, and routine automations like “open at sunrise” or “close at bedtime.” Keep in mind that firmware updates may improve performance and security, so check for updates after the initial setup. This section walks you through a typical app workflow and best practices for reliable connectivity.
Remote Access, Voice Control, and Integrations
After pairing, you can control the Wyze opener from anywhere with internet access. If you use voice assistants, link the Wyze app to Alexa or Google Assistant to open or close the door with simple commands. Integrations with Wyze cameras and sensors enable more robust automations, such as alerts when the door moves or when a door opens unexpectedly. This section covers practical setups for a connected garage that enhances security and convenience.
Troubleshooting Common Issues: What to Do When Things Don’t Work
No power or connectivity issues are common. If the door doesn’t respond, verify power to the unit and confirm Wi‑Fi signal strength in the garage. Sensor misreads, misalignment, or a loose track can trigger nuisance reversals or failed openings. When problems arise, a systematic approach—check power, reset the device, re-pair in the Wyze app, and test function with the app and remotes—often resolves most problems without professional help. GarageDoorAdjust emphasizes a calm, methodical process for troubleshooting.
Maintenance and Longevity: Keeping Your Wyze Opener Running Smoothly
Regular maintenance reduces wear and improves performance. Periodically inspect mounting screws, check for loose cables, and clean sensors to maintain accurate readings. Lubricate moving parts per the manufacturer’s guidance, and replace batteries in any remote controls or sensor accessories as needed. Keeping a simple maintenance routine helps you catch wear early, extend the life of the opener, and prevent surprising failures.
Security, Firmware, and Privacy Considerations
Security is a core consideration with any smart device. Keep the Wyze app and firmware up to date to reduce vulnerability exposure. Use strong, unique passwords for your Wyze account and enable two-factor authentication if available. Be mindful of network exposure; isolate the garage network from sensitive IoT devices if feasible. This section provides practical reminders to protect your home while enjoying the convenience of app-driven control.
Warranty, Support, and Getting Help
If you encounter a persistent issue, consult the Wyze support resources and your local retailer’s warranty terms. Document serial numbers and firmware versions when seeking help, as this information speeds up diagnostics. For homeowners, relying on official guides and support channels reduces the risk of missteps and ensures you receive accurate, model-specific advice. The GarageDoorAdjust team reinforces seeking official support when in doubt.
Authority Sources and Further Reading
For additional safety guidance and standards related to garage doors, consult reliable public sources. See the U.S. Consumer Product Safety Commission’s garage door safety resources and OSHA guidelines for workplace safety practices when performing home installations. While Wyze provides product-specific instructions, corroborating safety information from established authorities helps you make informed decisions.
Tools & Materials
- Wyze garage door opener kit(Includes mounting hardware and rails)
- Flat-head screwdriver(For mounting screws)
- Phillips screwdriver #2(General assembly)
- Drill with bits(If pilot holes or wall anchors are needed)
- Tape measure(Ensure alignment and clearance)
- Level(Verify perpendicular mounting)
- Pliers and wire nuts(For wire routing and connections)
- Ladder(Safe height access near ceiling)
- Wire cutters(Trim and manage wiring)
- Safety goggles(Eye protection during drilling)
- Voltage tester or outlet tester(Verify power source safety)
- Silicone lubricant or garage-door-specific lubricant(Light lubrication for rails)
Steps
Estimated time: 60-90 minutes
- 1
Power down and prep area
Unplug power to the door and clear the workspace. This minimizes the risk of electric shock and keeps tools from getting in the way. Confirm you have adequate lighting and a stable work surface before starting.
Tip: Wear eye protection and keep a partner nearby for heavy lifting. - 2
Remove existing opener
If you’re replacing an old unit, disconnect power first, then detach the old mounting bracket and rail from the frame. Keep track of screws for re-use if compatible.
Tip: Take photos during removal to reference for reassembly. - 3
Mount Wyze base bracket
Position the Wyze base bracket so the rail aligns with the door’s center. Use a level and secure screws into framing, avoiding studs that are too shallow. Check for wobble before proceeding.
Tip: If you need longer screws, use hardware recommended by the manual. - 4
Connect power and route cables
Attach the opener to a standard 120V outlet, avoiding water or heat sources. Route cables away from moving parts and value quick access for future service.
Tip: Use cable clips to keep wires tidy and reduce snag risk. - 5
Attach safety sensors and rails
Install the built-in safety sensors or mount Wyze-compatible sensors as directed. Align sensors with the door edge and secure the rail to ensure smooth travel.
Tip: Test sensor alignment with no obstructions before calibration. - 6
Pair with the Wyze app
Open the Wyze app and add the opener following on-screen prompts. Connect to a stable 2.4 GHz network and verify remote control works.
Tip: Keep firmware updated to the latest version for best performance. - 7
Calibrate travel limits
Use the app or control panel to set open and close travel limits. Test multiple cycles to confirm full range without binding.
Tip: Increase accuracy by running the door through a few cycles after calibration. - 8
Test safety features
Place a lightweight object near the door as it closes to ensure the auto-reverse and sensor alerts trigger correctly. Verify all remotes respond.
Tip: If the door doesn’t reverse, stop and re-check sensor alignment and torque settings. - 9
Clean up and secure cabling
Tidy all wiring, secure with clips, and ensure nothing dangles near the belt or track. Wipe down tools and store hardware.
Tip: Label cables for future maintenance.
Got Questions?
Is the Wyze garage door opener compatible with my existing door sensors?
Wyze offers its own safety sensors, and compatibility with existing sensors depends on your specific setup. Refer to the manual and Wyze support for model-specific guidance.
Wyze provides safety sensors with their openers, but compatibility with third-party sensors varies by model. Check the manual or contact support for details.
Do I need an internet connection for Wyze to operate the opener?
The Wyze opener uses Wi‑Fi for app control and remote features. Local operation may be possible, but remote access will require internet connectivity.
Yes, internet access enables remote control through the Wyze app. Local control works with the device, but remote features rely on Wi‑Fi.
Can I control the Wyze opener with voice assistants?
Yes, you can enable voice control by linking the Wyze app to Alexa or Google Assistant through the Wyze skill/integration.
You can control it with Alexa or Google Assistant once linked in the Wyze app.
What safety steps should I perform before installation?
Ensure the door is balanced, tracks are clear, and power is disconnected. Keep children away during installation and test safety features after setup.
Check door balance, clear tracks, disconnect power, and test safety features after installation.
How do I calibrate travel limits for a Wyze opener?
Use the Wyze app to set open/close travel limits and verify by running several cycles to confirm full range without binding.
Set the limits in the app and test several cycles to ensure accuracy.
What should I do if the opener won’t pair with the app?
Check that your Wi‑Fi is 2.4 GHz, reset the device, and re-add it in the Wyze app. If problems persist, consult support.
If pairing fails, verify Wi‑Fi, reset, and re-add in the Wyze app; contact support if needed.
Watch Video
Quick Summary
- Prepare the workspace and tools before starting
- Follow manufacturer mounting and wiring instructions
- Pair and calibrate through the Wyze app for best results
- Regular maintenance reduces downtime and issues
- Prioritize safety and consult official sources if unsure