Why Is My Garage Door Not Opening All the Way? A Safe Fix Guide
Urgent troubleshooting guide to diagnose why your garage door won’t open fully. Safe checks, diagnostic flow, step-by-step fixes, and professional help guidance from GarageDoorAdjust.

Most often the door stops short because the opener limit switches are misadjusted or the safety sensors are misaligned. Start with the basics: ensure power is on, remove obvious obstructions, and verify the photo-eye sensors face each other. If you still can't open fully, follow this diagnostic flow and step by step fix.
Understanding the symptom
According to GarageDoorAdjust, many homeowners notice the door stops a few inches short of full open when a control setting or safety feature is off. A clear symptom is: the door moves up but halts before the fully raised position, then sometimes sits at an odd gap or hesitates. This behavior often points to a limit switch misadjustment, sensor misalignment, or a minor obstruction in the track. It can also hint at a mismatch between what the opener is programmed to do and what the door’s physical state allows. Getting precise about the symptom helps you pick the right next steps and avoid unsafe guesses.
Quick checks you can perform safely
Before you jump into deeper fixes, perform a few safe, high-impact checks:
- Verify the opener is powered and that the indicator lights are normal. If the lights blink or don’t come on, reset power at the outlet or switch.
- Clear a clear path on the track and remove any visible debris or ice. Small objects and buildup can stop the door mid-travel.
- Check the photo-eye sensors (the small lenses on each side of the door frame). They should face each other directly with a small gap. Wipe away dust and align if needed.
- Test from both the wall console and the remote. If one control works but the other doesn’t, you may have a signaling issue to address.
Common causes when the door stops partway
The most frequent culprits fall into a few predictable buckets. First, the opener limits or travel settings may be off, so the door never completes its full travel. Second, photo-eye sensors can misread and prevent full travel if they’re misaligned or blocked. Third, an obstruction or damage in the tracks or rollers can physically stop movement. Less common but possible are weak balance due to spring wear, or a signaling fault in the remote or wall switch. Identifying which bucket your situation fits guides safe, effective fixes.
How safety sensors and limit switches influence travel
The safety sensors and travel limits act as the door’s brakes and governor. If the photo-eye sensors detect an obstacle, the opener will stop short to keep you safe. Misadjusted limits tell the opener to stop rising at the wrong height, so the door never reaches full open. Weather, dust, and minor misalignments can throw off alignment, causing a partial opening. Understanding this helps you diagnose without compromising safety.
Track, balance, and mechanical condition
Even when sensors and limits are correct, the door can fail to reach full open if the track is bent, misaligned, or if rollers are worn. A jam or binding in the track slows or stops ascent. Check for loose screws holding tracks in place, inspect for kinks or dents, and look for unusual gaps between door panels. Lubricate moving parts with a silicone-based lubricant, not oil, and rotate the rollers by hand to feel for rough spots. If anything looks damaged or you notice heavy resistance, stop and call a pro—the risk of injury is real.
When to seek professional help and prevention
If you identify a spring issue, a bent track, or any sign of frayed cables, stop immediately and contact a professional. Springs and cables carry high tension and require specialized tools and training. For preventive care, schedule a yearly safety check, keep hardware tight and tracks aligned, and clean sensors and tracks regularly. Emergency shutoff and safety practices should be part of every maintenance routine.
GarageDoorAdjust’s approach is to empower homeowners with safe, methodical steps first, then escalate when the risks become significant.
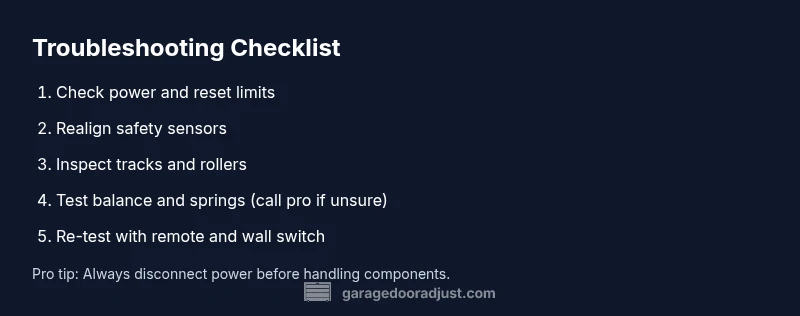
Steps
Estimated time: 60-90 minutes
- 1
Power and Safety First
Unplug the opener or switch off the circuit breaker. Confirm no one is using the door while you inspect. This minimizes risk and protects your garage ceiling wiring from accidental shocks.
Tip: Always keep hands and clothing away from the moving door. - 2
Check Limits and Reset Safely
Access the opener’s control panel or app, locate travel limits, and reset them to factory defaults or set to full open. Test by operating the door to see if it travels the full distance.
Tip: If you’re unsure of the exact setting, start with the full-open limit and test incrementally. - 3
Realign Safety Sensors
Inspect the photo-eye lenses. Wipe them clean, ensure neither is blocked, and adjust so they face each other with a small gap. Run the door again to confirm it completes travel.
Tip: Small misalignment is common; after adjustments, test multiple times from both controls. - 4
Inspect Tracks and Rollers
Check for bent or loose tracks, missing brackets, and debris. Tighten screws and gently straighten any bends. Spin the rollers manually to feel for smooth operation.
Tip: Avoid using lubricants on the tracks themselves; use silicone spray on rollers if needed. - 5
Test Balance and Signatures
Manually lift the door to mid-height and release. If it drops, springs or tension components may be failing and require pro service. If it stays in place, the balance is better but still test with the opener.
Tip: Never place your hands under a door prop or unsupported sections. - 6
Re-test and Re-pair Controls
Re-test with the wall switch and remote. If both fail, re-pair the remote and check batteries. If issues persist, prepare to call a technician for a spring/track assessment.
Tip: Document the symptoms and settings you adjusted to show a pro.
Diagnosis: Garage door stops moving before fully opening
Possible Causes
- highOpener limit switch misadjusted
- highPhoto-eye safety sensors misaligned or blocked
- mediumObstruction, debris, or damaged tracks/rollers in the door’s path
- lowWeak or unbalanced springs affecting lift
- lowRemote control signal issue or wall switch wiring fault
Fixes
- easyReset or adjust the opener limits per the manual or app and re-test travel
- easyRealign photo-eye sensors and clear the beam path; ensure they face each other
- easyInspect tracks for obstructions, loose screws, or bends; realign and lubricate moving parts
- hardIf springs show any wear or damage, call a professional; do not attempt spring work yourself
- easyTest and re-pair remote and wall switch signals if applicable
Got Questions?
Why does my garage door stop halfway after starting to open?
Most often the limit switch or safety sensors are out of alignment, or there is a track obstruction. Reset limits, align sensors, and clear debris before testing again.
Most doors stop halfway because the limits or safety sensors are off, or there's an obstruction. Reset limits, realign sensors, and remove debris.
Can a misaligned safety sensor prevent full opening?
Yes. If the safety eyes don’t read each other correctly, the opener halts to protect people and objects.
Yes. Misaligned safety sensors can stop the door from fully opening.
Is it safe to adjust the limit switches myself?
You can adjust limits using the manual, but follow the manufacturer’s instructions exactly. If you’re unsure, call a professional.
You can adjust limits yourself if you follow the manual, but if you’re unsure, hire a pro.
What if there’s an obvious obstruction on the tracks?
Remove the obstruction and inspect for track damage. If the tracks are bent or rollers are seized, stop and seek professional help.
Remove any obstruction and check tracks; if they’re bent or rollers stick, call a pro.
When should I replace springs?
Springs are dangerous to handle. If you notice wear, gaps, or the door is heavy, get a licensed technician to assess and replace if needed.
Springs are dangerous; have a pro inspect and replace if needed.
How can I prevent this issue in the future?
Regular maintenance: clean sensors, lubricate moving parts (not tracks), check balance, and test safety features yearly.
Do routine maintenance and safety tests to prevent future stalls.
Watch Video
Quick Summary
- Identify whether limits or sensors cause the issue.
- Clear obstructions and inspect tracks for misalignment.
- Test with both remote and wall switch; re-pair as needed.
- Call a pro for springs, cables, or persistent faults.