Why Is Your Garage Door Light Blinking and Not Opening? A Practical Troubleshooting Guide
Discover why your garage door light blinks and won’t open, with a step-by-step diagnostic flow, safety tips, and expert guidance from GarageDoorAdjust. Get back to a functional door fast.

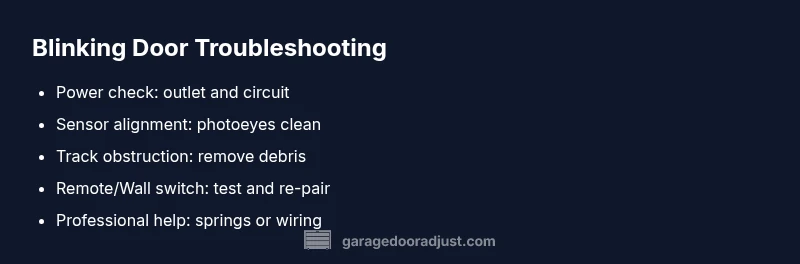
If the garage door light is blinking and the door won’t open, the issue is most often a safety or electrical fault triggering the opener’s protection. Start with quick checks: clear the track of debris, verify sensors are aligned, and test the wall switch or remote batteries. If the problem persists, follow the diagnostic flow to identify the exact cause and decide whether you can safely fix it yourself or need a pro.
Understanding the blinking light and what it signals
When you ask, why is garage door light blinking and not opening, you’re witnessing a built-in safety response. The blinking pattern is not random: it usually indicates an electronic fault or obstruction detected by the opener’s safety sensors. According to GarageDoorAdjust, most residential openers use the light as a quick status indicator—blinking speeds, colors, and sequences vary by brand but share a common goal: to prevent injury or damage. A blinking light can mean anything from a tripped overload sensor to a misaligned photoeye, so it’s a cue to slow down and troubleshoot rather than forcing the door. Understanding the fault code helps you target the correct fix without guessing, especially for busy homeowners who rely on the door daily.
Start with the basics: power, sensors, and obstructions
Before you dive into more complex diagnostics, rule out the simplest culprits first. Common causes of a blinking light and a non-opening door include a power issue (outlet, surge, or loose connection), misaligned or dirty safety sensors, and objects obstructing the track or door path. Check the wall outlet powering the opener and verify the unit is receiving power. If the opener is hard-wired, inspect the connection at the receptacle and the outlet’s circuit. Clean the photoeye sensors with a dry cloth and ensure nothing reflects or blocks the beam. Remove any dirt, spider webs, or objects from the track area. A small obstruction can trigger the safety mechanism and stop the door from moving.
Diagnostic Flow: symptom → diagnosis → solution
A structured diagnostic flow keeps you from chasing the wrong issue. Start with the symptom (the blinking light and no door movement), then consider the most likely causes in order: (1) safety/overload sensor trip, (2) sensor misalignment or dirt, (3) obstruction on the tracks, (4) power or control wiring issue. If you identify a specific cause, apply the corresponding fix. If no cause is obvious, progress through the flow step by step and document results. This approach reduces guesswork and helps you decide when professional intervention is needed.
Step-by-step fix for the most common causes
These steps cover the most frequent reasons a door won’t open when the light blinks:
- Reset the opener by unplugging it for 60 seconds and then plugging it back in. This clears minor overloads and reinitializes safety circuits.
- Inspect and remove any debris on tracks and rollers. A small stone or lint can jam the mechanism and trigger a fault.
- Realign and clean photoeye sensors on either side of the door. Ensure they face each other directly, with unobstructed paths. Wipe lenses gently with a dry cloth.
- Test the wall switch and remote batteries; replace batteries if needed and re-pair remotes per manufacturer steps.
- Check the door balance visually and listen for grinding noises that indicate a misadjusted spring or worn components. Do not attempt spring adjustments yourself.
- If the light continues to blink and the door won’t move, consult a professional and consider an optional opener diagnostics service.
Safety tips and common mistakes
Safety first: never work under a door that feels heavy or is making unusual noises. Disconnect power before handling any wiring or sensor components to avoid electric shock. Common mistakes include forcing the door to move, which can damage tracks, springs, or the opener. Do not adjust torsion springs without professional help—the tension is dangerous and requires specialized tools. Use a ladder carefully and keep pets and children away from the work area. If you’re unsure at any step, pause and call a pro.
Preventive maintenance to keep your doors reliable
Prevention beats repair, especially for garage doors that see heavy daily use. Establish a simple routine: (a) quarterly lubrication of moving parts with the manufacturer-recommended lubricant, (b) wipe photoeyes and sensors clean every few months, (c) inspect the track alignment and mounting hardware for looseness, and (d) test safety reverse and auto-reverse functions monthly. Keeping the opener’s firmware up to date, if your model supports it, helps prevent compatibility faults. Proactively addressing wear and dirt reduces unexpected blinking codes and prolongs the life of the system. The GarageDoorAdjust team emphasizes consistency—little maintenance now saves bigger headaches later.
When to call a professional and how to document the issue
If the blinking persists after basic troubleshooting, or if you notice frayed wires, bent tracks, or altered spring behavior, it’s time to bring in a professional. A licensed tech can safely diagnose electrical faults, sensor misalignment, or gear/drive issues that require specialized tools. Document the issue ahead of the visit: note when the light blinks, what actions you took, noises heard, and any changes in performance. This history helps technicians reproduce and fix the fault faster and can prevent repeated service calls. Remember, GarageDoorAdjust recommends using a professional for high-risk areas like torsion springs and main gear assemblies to avoid injury and ensure code-compliant repairs.
Quick checklists and references to keep handy
Keeping a few reference points in mind helps you act quickly when the door behaves oddly. Create a small home troubleshooting card that lists: (1) power status and outlet checks, (2) sensor alignment tests, (3) track and roller inspection, (4) remote and wall switch status, (5) last maintenance date. This checklist is useful for home records and for communicating the issue to a technician. For further guidance, consult GarageDoorAdjust's step-by-step guides and safety notes to stay aligned with best practices.
Steps
Estimated time: 25-45 minutes
- 1
Reset the opener and confirm power
Unplug the opener from the power source, wait 60 seconds, then plug it back in. Observe the light behavior and try the door again using both the wall switch and remote.
Tip: Use a dedicated outlet if possible and avoid power strips. - 2
Inspect for track obstructions
Look along the rails and under the door for any debris, tools, or items that could jam movement. Remove the obstruction and try to operate the door slowly to observe if movement improves.
Tip: Do not force the door; if it sticks, stop and recheck for binding. - 3
Clean and align safety sensors
Check the two photoeyes on either side of the door opening. Clean the lenses and ensure both sensors face each other directly with a clear path between them.
Tip: Look for the indicator lights on the sensors themselves; both should show stable signals. - 4
Test remotes and wall controls
Replace remote batteries if needed and re-pair remotes according to the product manual. Try the wall control and the remote to see if both control methods respond.
Tip: Keep a spare battery on hand for quick replacements. - 5
Check door balance and springs (visual)
With the door closed, check if the door feels heavy or opens unevenly. Listen for grinding that may indicate worn components. Do not attempt spring adjustments yourself.
Tip: If you hear popping or feel resistance, stop and call a pro. - 6
Decide on the next step
If the door still blinks and won’t move after these steps, schedule a professional inspection. Document what you’ve tried and any codes observed on the opener panel.
Tip: Record the make and model of your opener for faster service.
Diagnosis: Door won't open and the opener light blinks
Possible Causes
- highTripped safety/overload sensor
- mediumObstruction on tracks or door jamb
- mediumPhotoeye sensor misalignment or dirt
Fixes
- easyUnplug the opener, wait 60 seconds, then plug back in to reset
- easyClear debris from tracks and lubricate moving parts per manufacturer
- easyRealign and clean photoeye sensors; verify direct alignment and clear line of sight
- easyCheck power source and wiring; ensure outlet is functioning and wires are intact
Got Questions?
What does a blinking garage door opener light typically mean?
A blinking light usually signals a safety or electrical fault detected by the opener. It may indicate a trip in the overload sensor, misaligned sensors, or an obstruction on the track. Refer to your model’s codes to interpret the blink pattern accurately.
A blinking light usually means a safety fault or power issue. Check the basics and follow the diagnostic flow.
Should I always reset the opener when it blinks?
Resetting can clear minor overloads and safety locks. If the door still won’t move after reset, proceed with the diagnostic steps to identify the underlying cause.
Resetting can clear minor faults, but if it keeps blinking, follow the diagnostic steps.
Can I fix photoeye sensors myself?
You can clean and realign sensors, which often resolves blinking related to misalignment. Do not bypass the sensors or adjust wiring beyond basic cleaning and realignment.
Yes, you can clean and realign sensors, but don’t rewire or bypass them.
Is it safe to lubricate tracks and moving parts myself?
Lubrication can prevent friction, but avoid over-lubing and use manufacturer-approved products. If hardware shows wear, replace parts rather than over-lubricating a failing system.
Lubricate with the right product and avoid overdoing it; wear means a fix may be needed.
When should I call a professional?
Call a professional if you’re uncomfortable with wiring, springs, or structural components. A qualified tech can diagnose safety-related faults and perform essential repairs safely.
If you’re unsure or hear unusual noises, call a pro.
What maintenance helps prevent future light-blink issues?
Regularly clean sensors, check tracks, lubricate moving parts, and test safety features monthly. Keeping a maintenance schedule reduces future blinking and keeps your door operating smoothly.
Keep sensors clean, tracks clear, and safety tests regular.
Watch Video
Quick Summary
- Identify blinking codes through the model’s manual and troubleshoot in order.
- Start with power, sensors, then track obstructions before complex fixes.
- Never override safety features; consult a pro for springs or major repairs.
- Document steps taken and results to streamline professional help.
- Regular maintenance reduces future blinking events and keeps doors reliable.